Overview
"Alpine is a lightweight JavaScript framework that uses custom HTML attributes to add dynamic behavior. Alpine is notable for how easy it is to use and how small it is compared to other web frameworks.
Alpine was created by Caleb Porzio. He also created Livewire, a full stack framework for Laravel which uses PHP. Quoting Caleb, "Alpine.js offers you the reactive and declarative nature of big frameworks like Vue or React at a much lower cost. You get to keep your DOM, and sprinkle in behavior as you see fit."
The minified Alpine library for version 3.13.5, which is the latest as of January 2024, is only 14.9 KB.
To use this, add the following script tag.
The defer attribute is required.
<script
  defer
  src="https://cdn.jsdelivr.net/npm/alpinejs@3.x.x/dist/cdn.min.js"
></script>
Alternatively, install Alpine with
npm install alpine.js or bun add alpine.js.
Then import, register, and start Alpine with the following
once in each distinct web page:
import Alpine from 'alpinejs';
window.Alpine = Alpine; // optional for DevTools access
Alpine.start();
The design of Alpine is heavily based on Vue.
Vue uses v- for its directive prefixes.
During the initial implementation of Alpine, it did not yet have a name,
so x- was chosen for its prefixes.
That is why the prefix is not something like a- or alp-.
Many Alpine directives have the same name suffix as a Vue directives.
Using VS Code
The Alpine.js IntelliSense extension from Adrian Wilczyński provides intellisense and snippets for Alpine directives and magic properties.
The intellisense provides great documentation of Alpine directives as they are being entered.
Useful snippets include x-for, x-for-index, x-for-key, and x-if.
Unfortunately this extension has not been updated since November 2020 and some of it is specific to version 2 of Alpine.
A more recent option that supports version 3 of Alpine is Alpine.js IntelliSense from P. Christopher Bowers. It was last updated in June 2022.
Using TypeScript
To use TypeScript in an Alpine project, see Getting started with Alpine.js and TypeScript.
The following steps create a new project that uses Alpine, TypeScript, and Vite. Vite provides a local HTTP server with hot reload.
-
Enter
npm init vite@latest- Enter a project name.
- For the framework, select "Vanilla".
- For the variant, select "TypeScript".
-
cd to the newly created project directory
-
Enter
npm install alpinejs -
Enter
npm install -D @types/alpinejs -
Replace the contents of
src/main.tswith the following:import Alpine from 'alpinejs'; window.Alpine = Alpine; Alpine.start(); -
Create the file
src/global.d.tscontaining the following:import {Alpine as AlpineType} from 'alpinejs'; declare global { var Alpine: AlpineType; } -
Edit
index.htmlwhich already contains ascripttag for/src/main.ts. Add HTML that uses Alpine directives here. -
Enter
npm run dev -
Browse localhost:5173.
Using Tailwind
There are two approaches for using Tailwind for CSS styling in an Alpine app.
The easiest approach is to include it from a CDN with this link tag:
<script src="https://cdn.tailwindcss.com"></script>
This has the downside that it includes every Tailwind CSS class, not just the ones actually used in the app.
A more involved approach is to generate a CSS file that only contains the Tailwind CSS classes that are actually used. The steps to do this are as follows:
-
Install Tailwind by entering
bun install -d tailwindcss -
Enter
bunx tailwindcss initto create the filetailwind.config.js. -
Edit the value of
contentintailwind.config.jsto becontent: ['**/*.html'], -
Create the file
global.csscontaining the following:@tailwind base; @tailwind components; @tailwind utilities;This file can also define custom CSS classes.
-
Generate a CSS file containing only the Tailwind classes used in your app.
Enter
bunx tailwindcss -i ./global.css -o public/tailwind.css --watchto generatepublic/tailwind.cssnow and again every time any of thew "content" files are modified.Consider adding a
package.jsonscript for this such as:"tw": "bunx tailwindcss -i ./global.css -o public/tailwind.css --watch"To run this, enter
bun run tw. -
Include the following
linkelement in the base HTML of the app.<link href="/public/tailwind.css" rel="stylesheet" />The documentation for the
@elysiajs/staticplugin says it defaults to looking in thepublicdirectory, but it actual defaults to looking in the root directory and I haven't found a way to change that. See this issue. -
Serve the app from any HTTP server.
Basic Example
The following code renders a button that toggles whether a div is visible.
The x-data directive defines state that is
available on that element and its descendants.
The x-show directive determines whether that element should be shown
based on the value of the open state property.
When open is false, the attribute style="display: none;"
is added to the div.
That attribute is removed when open is true.
<html>
  <head>
    <script
      defer
      src="https://cdn.jsdelivr.net/npm/alpinejs@3.x.x/dist/cdn.min.js"
    ></script>
  </head>
  <body>
    <div x-data="{open: false}">
      <button @click="open = !open">Toggle</button>
      <div x-show="open">Hello, World!</div>
    </div>
  </body>
</html>
Directives
Alpine 3.13.3 supports 18 directives that are each described below. These are used as attributes on HTML elements.
Some directives accept a string of JavaScript code as their value. The JavaScript code can call built-in and custom JavaScript functions.
If embedding JavaScript code as the value of an Alpine directive
seems to make the HTML too cluttered, there is the option to
move the code to a JavaScript function inside a script tag
and change the directive value to be a call to that function.
When there is an error in the JavaScript code (such as a syntax error), a message is displayed in the DevTools console of the web browser. Developers must remember to check the console. No error is flagged for referring to an undefined variable.
Moving some of the JavaScript code into functions defined in a script tag
and calling those functions from Alpine directive values
enables seeing more errors in a code editor
before opening a page in a web browser.
On initial page load Alpine crawls the DOM looking for directive attributes and configures everything that is needed to update the DOM when data changes. It uses MutationObservers for this.
x-bind
The x-bind directive dynamically sets another attribute.
In some cases such as the class attribute it is possible to specify
a value both without and with x-bind and both values will be used.
A shorthand for x-bind: is just :.
This syntax was copied from Vue.
For example:
<html>
  <head>
    <script
      defer
      src="https://cdn.jsdelivr.net/npm/alpinejs@3.x.x/dist/cdn.min.js"
    ></script>
    <style>
      .primary {
        border: none;
        background-color: cornflowerblue;
        color: white;
        padding: 0.5rem;
      }
      .shout {
        font-weight: bold;
        text-transform: uppercase;
      }
      .whisper {
        color: lightgray;
        text-transform: lowercase;
      }
    </style>
  </head>
  <body>
    <div x-data="{important: false}">
      <button
        class="primary"
        :class="important ? 'shout' : 'whisper'"
        @click="important = !important"
      >
        Toggle
      </button>
    </div>
  </body>
</html>
The value of :class can be a JavaScript object
whose keys are class names and whose values are boolean expressions.
Each of the class names whose corresponding boolean expression
evaluates to true will be applied.
In the following example, if the value of score is greater than 15,
both the "shout" and "large" CSS classes will be applied.
<p :class="{shout: score > 10, large: score > 15}">Hello, World!</p>
Another common use of x-bind is conditionally disabling a button.
For example:
<button :disabled="username === '' || password === ''" @click="login">
  Login
</button>
x-cloak
The x-cloak directive hides an element until Alpine finishes processing it.
For example:
<style>
  [x-cloak] {
    display: none;
  }
</style>

<div x-cloak ...>...</div>
x-data
The x-data directive declares an HTML element to be an Alpine component
and optionally declares associated state that Alpine watches for changes.
The state is specified as a literal JavaScript object
which can include properties and functions.
These are scoped to this element and its descendant elements.
For example:
<div x-data="{ fruit: 'apple', count: 0 }">...</div>
Elements can access state properties on any of their ancestor elements. When the same property name is used at multiple nesting levels, the value of the nearest one is used.
From Data-less Alpine, "Sometimes you may want to use Alpine functionality,
but don't need any reactive data.
In these cases, you can opt out of passing an expression to x-data."
For example: <div x-data>.
Alpine uses a mutation observer to watch for changes in element trees
whose root element contains the x-data directive.
This avoids wasting time watching for changes to all elements,
some of which are not affected by Alpine directives.
It does however mean that if you forget to use the x-data directive,
but use other Alpine directives, they will be ignored.
Another way to declare state is with the Alpine.store function.
Alpine stores support sharing data across components that
are in separate branches of the DOM hierarchy.
This differs from using x-data where the data is
only available in Alpine directives on descendant elements.
The following code prompts for an image query and displays an image from unsplash.
<html>
  <head>
    <script
      defer
      src="https://cdn.jsdelivr.net/npm/alpinejs@3.x.x/dist/cdn.min.js"
    ></script>
  </head>
  <body>
    <div
      x-data="{
        imgUrl: '',
        query: '',
        getImage() {
            this.imgUrl = `https://source.unsplash.com/featured/?${this.query}`;
            this.query = '';
        }
    }"
    >
      <form @submit.prevent="getImage">
        <input type="text" x-model="query" />
        <button>Search</button>
      </form>
      <div x-show="imgUrl">
        <img :src="imgUrl" style="width: 300px" />
      </div>
    </div>
  </body>
</html>
The magic property $data can be passed to a JavaScript function.
This can be used to reactively modify any x-data properties.
The following code demonstrates this.
<html>
  <head>
    ...
    <script>
      function incrementBoth(data) {
        data.inner++;
        data.outer++;
      }
    </script>
  </head>
  <body>
    <div x-data="{outer: 1}">
      <div>outer = <span x-text="outer"></span></div>
      <div x-data="{inner: 1}">
        <div>inner = <span x-text="inner"></span></div>
        <button @click="incrementBoth($data)">Increment Both</button>
      </div>
    </div>
  </body>
</html>
x-effect
The x-effect directive executes specified JavaScript code
every time a variable it uses changes.
For example:
<body x-data x-effect="updateStatus($store.data.todos)">
  <div x-effect="console.error('Problem:', problem)">...</div>
</body>
x-for
The x-for directive repeats the contents of a template element
once for each item in an array.
Its value is a string that contains a variable name followed by " of "
and a data property whose value is an array.
This directive can only be applied to template elements.
For example:
<div x-data="{colors: ['red', 'green', 'blue']}">
  <template x-for="color in colors">
    <div x-text="color"></div>
  </template>

  <!-- This iterates over the colors AND their indexes. -->
  <template x-for="color, index in colors">
    <div x-text="`${index + 1}) ${color}`"></div>
  </template>
</div>
If array items will be added, deleted, or reordered,
the template element should include the key attribute
with a unique value for each array item.
This enables Alpine to better managing updating the DOM.
For example:
<div
  x-data="{
    addDog() {
      this.dogs.push({
        id: this.dogs.length + 1,
        name: 'Goofy',
        breed: 'Bloodhound',
      })
    },
    dogs: [
      {id: 1, name: 'Maisey', breed: 'Treeing Walker Coonhound'},
      {id: 2, name: 'Ramsay', breed: 'Native American Indian Dog'},
      {id: 3, name: 'Oscar', breed: 'German Shorthaired Pointer'},
      {id: 4, name: 'Comet', breed: 'Whippet'},
    ],
    getSortedDogs() {
      return this.dogs.sort((a, b) => a.name.localeCompare(b.name))
    }
  }"
>
  <template x-for="dog in getSortedDogs()" :key="dog.id">
    <div x-text="`${dog.name} is a ${dog.breed}.`"></div>
  </template>
  <button @click="addDog">Add Dog</button>
</div>
x-html
The x-html directive sets the inner HTML of this element
to the result of a given JavaScript expression which is typically HTML text.
For example:
<div x-html="await (await fetch('https://foo.com/bar')).json()">...</div>
The official documentation provides this warning:
"Only use on trusted content and never on user-provided content. Dynamically rendering HTML from third parties can easily lead to XSS vulnerabilities."
x-id
The x-id directive is used in conjunction with the $id function.
See the section below describing $id.
x-if
The x-if directive conditionally includes the contents of a template element.
Its value is a JavaScript expression that is interpreted as a Boolean condition.
When the condition is false, the element will not be included in the DOM.
This directive can only be applied to template elements.
For example:
<template x-if="score >= 21">
  <div>Winner!</div>
</template>
The x-show directive is similar.
x-ignore
The x-ignore directive prevents this element and its descendants
from being initialized by Alpine.
For example:
<div x-ignore>...</div>
x-init
The x-init directive executes given JavaScript code
when this element is initialized.
For example:
<div x-data="{ dogs: [] }" x-init="dogs = await (await fetch('/dogs')).json()">
  <template x-for="dog of dogs"> ... </template>
</div>
x-model
The x-model directive creates a two-way binding between
an input value to an x-data property.
Supported inputs include the HTML elements input, textarea, and select.
For example:
<div x-data="{ name: '' }">
  <input type="text" x-model="name" />
  <div>Hello, <span x-text="search"></span>!</div>
</div>
The x-model directive can be applied to a set of related checkboxes
to populate an array with the values of the selected checkboxes.
For example:
<div x-data="{colors: ['red', 'green', 'blue'], selectedColors: []}">
  <template x-for="color in colors">
    <div style="display: flex; align-items: center;">
      <input type="checkbox" :value="color" x-model="selectedColors" />
      <span x-text="color"></span>
    </div>
  </template>
  <div x-show="selectedColors.length">
    You selected <span x-text="selectedColors"></span>.
  </div>
</div>
The x-model directive can be applied to a set of related radio buttons
to populate a variable with the value of the selected radio button.
For example:
<div x-data="{colors: ['red', 'green', 'blue'], selectedColor: ''}">
  <template x-for="color in colors">
    <div style="display: flex; align-items: center">
      <input type="radio" :value="color" x-model="selectedColor" />
      <span x-text="color"></span>
    </div>
  </template>
  <div x-show="selectedColor">
    You selected <span x-text="selectedColor"></span>.
  </div>
</div>
The x-model directive can be applied to a select element
that allows either one or multiple selections.
For example:
<div x-data="{colors: ['red', 'green', 'blue']}">
  <div x-data="{selectedColor: ''}">
    <select x-model="selectedColor">
      <option value="">Select a color</option>
      <template x-for="color in colors">
        <!-- <option :value="color" x-text="color"></option> -->
        <!-- The value of each option defaults to its text. -->
        <option x-text="color"></option>
      </template>
    </select>
    <span x-show="selectedColor">
      You selected <span x-text="selectedColor"></span>.
    </span>
  </div>
  <br />
  <div x-data="{selectedColors: []}">
    <!-- After selecting the first color, hold down
        cmd or shift before clicking another. -->
    <select multiple x-model="selectedColors">
      <template x-for="color in colors">
        <option x-text="color"></option>
      </template>
    </select>
    <span x-show="selectedColors.length">
      You selected <span x-text="selectedColors"></span>.
    </span>
  </div>
</div>
The following modifiers can be applied to the x-model directive:
-
.booleanThis converts the string value of the input to a boolean when setting the model variable.
-
.debounceThis delays updating the model variable until typing stops for some period of time (defaults to 250ms). To change the time period, add a period and a number of milliseconds, optionally followed by "ms". For example,
.debounce.500. -
.fillThis uses
valueattribute to set initial value of model variable. -
.lazyThis waits to update the model variable until focus leaves the input.
-
.number:This converts the string value of the input to a number when setting the model variable.
-
.throttleThis updates the model variable on the first value change and then repeatedly after some period of time (defaults to 250ms) if the value has changed. To change the time period, add a period and a number of milliseconds, optionally followed by "ms". For example,
.throttle.500.
x-modelable
The x-modelable directive exposes state "to the outside".
It is useful when using certain templating frameworks such as Laravel Blade.
x-on
The x-on directive executes given JavaScript code when a specified event occurs.
For example:
<button x-on:click="like = !like">Toggle</button>
The JavaScript code in the x-on value can access
the event object using the magic property $event and
the target element using the magic property $el.
If the value of event handler is a function name instead of a call to a function or other JavaScript code, the function will be called with no arguments. So these are equivalent:
<button x-on:click="someFunction()">Do Something</button>
<button x-on:click="someFunction">Do Something</button>
A shorthand for x-on: is just @.
This syntax was copied from Vue.
The event name must be composed of lowercase letters and dashes.
To handle events with names that contain uppercase letters or periods,
see the modifiers camel and dot described below.
When using HTML form submission, all the inputs inside the form
can be reset to their default values with the following:
<form x-data @submit="$nextTick(() => $el.reset())">...</form>
The event name can be followed by the following modifiers:
-
.camelHTML attributes do not support camelCasing. This modifier enables listening for events whose name is camelCased. For example,
@some-name.camel="..."listens forsomeNameevents. -
.captureThis executes event handling during the capture phase instead of the bubbling phase.
-
.debounceThis delays processing the event until activity stops for some period of time (defaults to 250ms). To change the time period, add a period and a number of milliseconds, optionally followed by "ms". For example,
.debounce.500. -
.documentThis causes the event listener to be registered on the
documentobject instead of on the current element. -
.dotThis modifier enables listening for events that have dots in their name. For example,
@some-name.camel="..."listens forsome.nameevents. -
.onceThis causes only the first matching event that is dispatched to be handled.
-
.outsideThis is used on
clickevents to listen for clicks outside the current element. An example where this is useful is closing a modal dialog when a user clicks outside it or presses the escape key.For example:
<html lang="en"> <head> <script defer src="https://cdn.jsdelivr.net/npm/alpinejs@3.x.x/dist/cdn.min.js" ></script> <style> .modal { border: 1px solid red; padding: 1rem; position: absolute; left: 50%; top: 50%; transform: translate(-50%, -50%); </style> </head> <body> <div x-data="{show: false}"> <button @click="show = true">Show</button> <p class="modal" x-show="show" @click.outside="show = false" @keyup.escape.window="show = false" > Click outside to hide. </p> </div> </body> </html> -
.passiveThis can improve scrolling performance when touch events are supported.
-
.preventThis calls
$event.preventDefault()when an event is handled. -
.selfThis restricts the event handling to only events that were dispatched from the current element, not from descendant elements.
-
.stopThis calls
$event.stopPropagation()when an event is handled. -
.throttleThis processes the event immediately and then again after some period of time (defaults to 250ms) even if activity has not stopped. To change the time period, add a period and a number of milliseconds, optionally followed by "ms". For example,
.throttle.500. -
.windowThis causes the event listener to be registered on the
windowobject instead of on the current element.
When listening for key events, modifiers can specify a key
that must be pressed or held down in order to trigger event handling.
These include .alt, .caps-lock, .cmd, .ctrl, .down (arrow key),
.enter (return key), .equal, .escape, .left (arrow key),
.meta (command key in macOS, Windows key in Windows),
.period, .right (arrow key), .shift, .slash, .space,
.tab, and .up (arrow key).
x-ref
The x-ref directive adds a reference name to an element
so other elements can access its value with $refs.{name}.
For example:
<input type="text" x-ref="name" />
<div>Hello, <span x-text="$refs.name.value"></span>!</div>
The following example demonstrates using x-ref and $refs
to manage a modal dialog created with the HTML dialog element.
It can be closed by clicking the "OK" button,
clicking outside the dialog, or pressing the escape key.
The dialog element provides checking for the escape key.
<div
  x-data
  // This handles all dialogs.
  @click="if ($event.target.nodeName === 'DIALOG') $event.target.close()"
  // This only handles a specific dialog.
  // @click="if ($event.target === $refs.myDialog) $event.target.close()"
>
  <button @click="$refs.myDialog.showModal()">Open Dialog</button>
  <!-- We are adjusting margins and padding so the
        form entirely fills the dialog, making all clicks
        inside the dialog be seen as clicks on the form. -->
  <dialog style="padding: 0" x-ref="myDialog">
    <!-- When a form with method="dialog" is inside a
          dialog element, submitting the form closes the dialog. -->
    <form method="dialog" style="margin: 0; padding: 1rem">
      <p style="margin-top: 0">This is the dialog content.</p>
      <button>OK</button>
    </form>
  </dialog>
</div>
The following example demonstrates using x-ref and $refs
to allow users to copy the value of an input element to the system clipboard.
This is done by clicking a button to the right of the input.
After the button is clicked, a green checkmark is displayed for one second.
Note how $data is passed to the copy function
so it can modify the value of the copied property
which is used to determine whether the green checkmark should be displayed.
<html>
  <head>
    <script
      defer
      src="https://cdn.jsdelivr.net/npm/alpinejs@3.x.x/dist/cdn.min.js"
    ></script>
    <style>
      button.plain {
        background-color: transparent;
        border: none;
        cursor: pointer;
        padding: none;
      }
      .copied {
        color: green;
      }
      .row {
        display: flex;
        align-items: center;
        gap: 0.5rem;
      }
    </style>
    <script>
      function copy(input, data) {
        navigator.clipboard.writeText(input.value);
        data.copied = true;
        setTimeout(() => (data.copied = false), 1000);
      }
    </script>
  </head>
  <body>
    <div class="row" x-data="{copied: false}">
      <input size="20" type="text" x-ref="input" />
      <button class="plain" @click="copy($refs.input, $data)">📋</button>
      <div class="copied" x-show="copied">✓</div>
    </div>
  </body>
</html>
x-show
The x-show directive determines whether
the element to which it is applied should be visible.
Its value is a JavaScript expression that is interpreted as a Boolean condition.
When the condition is false, the attribute style="display: none;" is added.
That attribute is removed when the condition is true.
The element will be present in the DOM regardless.
For example:
<h2 x-show="score == 21">Blackjack!</h2>
The x-if directive is similar.
If constructing the element is expensive
(for example, sending an API request to fetch data),
it is preferred to use x-if in order to avoid
taking the time to construct an element that will not be visible.
x-teleport
The x-teleport directive transports a template element
to another part of the DOM.
One use is to attach a modal dialog to the body element.
x-text
The x-text directive specifies the text content of
the element to which it is applied by evaluating a JavaScript expression.
For example:
<div x-text="temperature >= 80 ? 'hot' : 'cold'"></div>
It's a shame that a more terse syntax like {{expression}}
instead of <span x-text="var"></span> isn't supported.
See the x-interpolate directive described at alpine-plugins.
x-transition
The x-transition directive causes the element to which it is applied to
transition in and out when it is shown and hidden using the x-show directive.
By default it changes the opacity between 0 and 1
and changes the scale between 0% and 100%.
For example:
<h2 x-show="score == 21" x-transition>Blackjack!</h2>
To change the transition duration, add the duration modifier.
The duration must be specified in milliseconds, not seconds.
For example:
<h2 x-show="score == 21" x-transition.duration.1000ms>Blackjack!</h2>
To only apply only the opacity transition, add the opacity modifier.
Note that multiple modifiers can be applied.
For example:
<h2 x-show="score == 21" x-transition.opacity.duration.1000ms>Blackjack!</h2>
To only apply only the scale transition, add the scale modifier.
For example:
<h2 x-show="score == 21" x-transition.scale.duration.1000ms>Blackjack!</h2>
For more detail, see x-transition.
Custom Directives
In addition to the provided directives, custom directives can be implemented
by calling the Alpine.directive function.
This is passed the name of the directive and a callback function.
Alpine.directive(
  'some-name',
  (el, { value, modifiers, expression }, { Alpine, effect, cleanup }) => {
    ...
  }
);
The directive name must not include the x- prefix,
but that prefix is required to use the directive.
The callback function takes three parameters.
The first parameter is a reference to the element
on which the directive is applied and is typically named el.
The second parameter is an object with the properties
value, modifiers, and expression.
The value property holds the optional part of the directive
that follows the name and a colon.
The modifiers property is an optional array of modifier names
that follow the name and are each preceded by a period.
The expression property is the optional value specified with ="{value}".
Consider the following directive application:
<div x-alpha:beta.gamma.delta="epsilon">...</div>
The name is alpha, value is beta, modifiers is ['gamma', 'delta'],
and expression is 'epsilon'.
The third parameter is and object with the properties
Alpine, effect, and cleanup.
The Alpine property is the global Alpine object that
provides the functions bind, data, and store.
The effect property is a function that is used to create reactive directives
that respond to changes in stores and x-data values.
The cleanup property is a function that can be passed a function that
should be called when the directive is removed from the DOM.
The following code demonstrates defining
a custom directive named x-weather-feel.
<html>
  <head>
    <script
      defer
      src="https://cdn.jsdelivr.net/npm/alpinejs@3.x.x/dist/cdn.min.js"
    ></script>
    <script>
      document.addEventListener('alpine:init', () => {
        Alpine.directive(
          'weather-feel', // Alpine prepends "x-" to the name.
          (el, {expression}, {effect, evaluate}) => {
            // "el" is a reference to the DOM element
            // where the directive is applied.
            // "expression" is JavaScript expression assigned to the directive.
            // "effect" is passed a function to run every time
            // the value of the expression changes.
            // "evaluate" is a function that evaluates a JavaScript expression
            // and returns the result.
            effect(() => {
              const value = evaluate(expression);
              el.textContent =
                value > 80 ? 'hot' : value < 50 ? 'cold' : 'warm';
            });
          }
        );
      });
    </script>
  </head>
  <body x-data="{ temperature: 50 }">
    <input type="range" min="0" max="100" x-model="temperature" />
    <div>
      The temperature is <span x-text="temperature"></span> and I feel
      <span x-weather-feel="temperature"></span>.
    </div>
  </body>
</html>
For more detail, see Custom Directives.
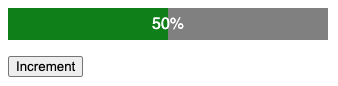
Progress Bar Example
The following example combines some of the features we have seen so far.
<html>
  <head>
    <script
      defer
      src="https://cdn.jsdelivr.net/npm/alpinejs@3.x.x/dist/cdn.min.js"
    ></script>
    <style>
      .progress-bg {
        background-color: gray;
        height: 2rem;
        position: relative;
        width: 20rem;
      }
      .progress-bar {
        height: 100%;
        background-color: green;
      }
      .progress-value {
        color: white;
        font-family: sans-serif;
        /* centers text in .progress-bg */
        position: absolute;
        top: 50%;
        left: 50%;
        transform: translate(-50%, -50%);
      }
    </style>
  </head>
  <body>
    <div
      x-data="{
        percent: 0,
        increment() {
          this.percent = Math.min(100, this.percent + 5);
        }
    }"
    >
      <div class="progress-bg">
        <div class="progress-bar" :style="`width: ${percent}%`"></div>
        <div class="progress-value" x-text="`${percent}%`"></div>
      </div>
      <button @click="increment" style="margin-top: 1rem">Increment</button>
    </div>
  </body>
</html>
To Do App
The following example implements a To Do app using only Alpine.
It persists the data using localStorage.

<html>
  <head>
    <link rel="stylesheet" href="todo-list.css" />
    <!-- This Alpline plugin adds support for the
         x-interpolate directive which enables interpolation
         of JavaScript expressions inside text content.
         It provides an alternative to using the x-text directive. -->
    <script
      defer
      src="https://cdn.jsdelivr.net/gh/mvolkmann/alpine-plugins@v0.0.4/interpolate.js"
    ></script>
    <script src="https://cdn.jsdelivr.net/npm/@alpinejs/persist@3.x.x/dist/cdn.min.js"></script>
    <script
      defer
      src="https://cdn.jsdelivr.net/npm/alpinejs@3.x.x/dist/cdn.min.js"
    ></script>
    <script>
      let lastId = 0;

      document.addEventListener('alpine:init', () => {
        Alpine.store('data', {
          status: '',
          todos: Alpine.$persist([]).as('todos')
        });
      });

      function addTodo(text) {
        const data = Alpine.store('data');
        data.todos.push({id: ++lastId, text: text.trim(), done: false});
      }

      // This keeps only the todos that are not done.
      function archiveCompleted() {
        const data = Alpine.store('data');
        data.todos = data.todos.filter(t => !t.done);
      }

      function deleteTodo(todoId) {
        const data = Alpine.store('data');
        data.todos = data.todos.filter(t => t.id !== todoId);
      }

      function filterTodos(todos, filter) {
        switch (filter) {
          case 'completed':
            return todos.filter(t => t.done);
          case 'uncompleted':
            return todos.filter(t => !t.done);
          default:
            return todos;
        }
      }

      function updateStatus(todos) {
        const data = Alpine.store('data');
        const uncompletedCount = todos.filter(t => !t.done).length;
        data.status = `${uncompletedCount} of ${todos.length} remaining`;
      }
    </script>
  </head>
  <body
    x-data="{filter: 'all'}"
    x-effect="updateStatus($store.data.todos)"
    x-interpolate
  >
    <h1>To Do List</h1>
    <div>
      {$store.data.status}
      <button @click="archiveCompleted()">Archive Completed</button>
    </div>
    <form x-data="{text: ''}" @submit.prevent="addTodo(text); text = ''">
      <input
        autofocus
        placeholder="enter new todo here"
        size="30"
        type="text"
        x-model="text"
      />
      <button :disabled="text.trim().length === 0">Add</button>
    </form>
    <div>
      <label>
        <input type="radio" name="filter" value="all" x-model="filter" />
        All
      </label>
      <label>
        <input type="radio" name="filter" value="completed" x-model="filter" />
        Completed
      </label>
      <label>
        <input
          type="radio"
          name="filter"
          value="uncompleted"
          x-model="filter"
        />
        Uncompleted
      </label>
    </div>
    <ul>
      <template x-for="todo in filterTodos($store.data.todos, filter)">
        <li class="todo-row">
          <input type="checkbox" x-model="todo.done" />
          <span :class="{done: todo.done}">{todo.text}</span>
          <button @click="deleteTodo(todo.id)">Delete</button>
        </li>
      </template>
    </ul>
  </body>
</html>
Magic Properties and Functions
Alpine provides many properties and functions whose names begin with $.
These are referred to as "magics".
Each of them are described below.
$data
This magic property provides access to the x-data object
on the nearest ancestor element that uses that directive.
It can be used to pass the entire object to a JavaScript function
instead of passing individual properties.
$dispatch
This magic property is a function that can be called
to dispatch a standard or custom DOM event.
It must be passed an event name.
It can optionally be passed any kind of data
that can be accessed with $event.detail.
If elements that listen for the event are not
ancestors of the elements that dispatch the event,
add the .window modifier when listening.
For example, x-on="my-event.window="{code}".
The following code demonstrates dispatching and listening for a custom event.
<div x-data="{eventData: {}}" x-on:my-event="eventData = $event.detail">
  <button x-on:click="$dispatch('my-event', {foo: 'bar'})">Send Event</button>

  <!-- After the button is clicked, this will render {"foo":"bar"}. -->
  <div x-text="JSON.stringify(eventData)"></div>

  <!-- This element is not an ancestor of the button that dispatches the event,
       so the "window" modifier is needed. -->
  <div x-on:my-event.window="console.log($event)"></div>
</div>
$el
This magic property provides access to the current DOM element. For example:
<button @click="$el.innerHTML = 'Clicked'">Press</button>
$event
This magic property holds data associated with an event
that was dispatched using the $dispatch function.
It is used to access the event inside an event handling function.
See the example under $dispatch.
$id
This magic property is a function that generates an element id that will not conflict with other generated ids. It is useful for defining reusable components.
The $id function takes a string argument
that is used as the prefix for the generated ids.
Each id generated with the same prefix uses a suffix of
a dash followed by an incrementing integer starting from 1.
For example, the following buttons will be given the ids "abc-btn-1" and "abc-btn-2":
<button :id="$id('abc-btn')">First</button>
<button :id="$id('abc-btn')">Second</button>
For more detail, including use of the x-id directive for grouping ids,
see $id.
$nextTick
This magic property is a function that takes a function to be executed after Alpine finishes updating the DOM. It is useful for inspecting the DOM or making additional changes to it.
This function returns a Promise, so the await keyword
can be used to wait for it to settle.
$refs
This magic property provides access to DOM elements
to which the x-ref directive is applied.
Its value is an object.
The keys are the string values specified by all the x-ref directives.
The values are the corresponding DOM element objects.
For example:
<p x-ref="status">Pending</span>
<button @click="$refs.status.innerHTML = 'Processing'">Process</button>
$root
This magic property holds a reference to
the root DOM element of the current component which is
the nearest ancestor element on which the x-data directive is applied.
$store
Alpine stores support sharing data across components that
are in separate branches of the DOM hierarchy.
This differs from using x-data where the data is
only available in Alpine directives on descendant elements.
To create a named, global store, use JavaScript code like the following:
document.addEventListener('alpine:init', () => {
  Alpine.store('profile', {
    username: '',
    role: '',
    someFunction(args) { ... }
  });
});
The value passed as the second argument to the Alpine.store function
can be a boolean, number, string, array, or object.
To access a store in the value of an Alpine directive,
use the $store magic property.
For example, $store.profile.role.
To access a store in a JavaScript function,
use code like Alpine.store('profile').
$watch
This magic property is a function that can be called to watch any component property. It is passed a property name and a function that is called when the property value changes. The function is passed the current value.
The following example demonstrates using $watch
to watch primitive, object, and array properties.
The "Change Dog" and "Change Scores" buttons
only trigger displaying an alert dialog once because
after the first click they do not change a value.
<html>
  <head>
    <script
      defer
      src="https://cdn.jsdelivr.net/npm/alpinejs@3.x.x/dist/cdn.min.js"
    ></script>
    <script>
      const data = {
        dog: {name: 'Comet', breed: 'Whippet'},
        password: '',
        scores: [7, 10]
      };

      function configureWatches(watch) {
        watch('dog', value => {
          alert('dog is now ' + JSON.stringify(value));
        });

        watch('password', value => {
          if (value.startsWith('pass')) {
            alert('Bad password!');
          }
        });

        watch('scores', value => {
          alert('scores are now ' + JSON.stringify(value));
        });
      }
    </script>
  </head>
  <body>
    <div x-data="data" x-init="configureWatches($watch)">
      <label>
        Password
        <input autofocus size="20" type="password" x-model="password" />
      </label>
      <button @click="dog.breed = 'Greyhound'">Change Dog</button>
      <button @click="scores[0] = 19">Change Score</button>
    </div>
  </body>
</html>
The following is another example of using $watch.
It is based on the YouTube video Learn Alpine.js: Project - Hackernews search
by Codecourse.
This allows users to enter a query which is used to search for matching
articles on HackerNews.
<html>
  <head>
    <script
      defer
      src="https://cdn.jsdelivr.net/gh/mvolkmann/alpine-plugins@v0.0.5/interpolate.js"
    ></script>
    <script
      defer
      src="https://cdn.jsdelivr.net/npm/alpinejs@3.x.x/dist/cdn.min.js"
    ></script>
    <script>
      async function search(query, data) {
        if (query === '') {
          data.results = [];
          return;
        }

        try {
          // This endpoint limits the number of hits returned to 20.
          const url = 'https://hn.algolia.com/api/v1/search?query=' + query;
          const response = await fetch(url);
          const json = await response.json();
          data.results = json.hits;
        } catch (e) {
          data.error = e.message;
        }
      }
    </script>
  </head>
  <body>
    <div
      x-data="{error: undefined, query: '', results: []}"
      x-init="$watch('query', query => search(query, $data))"
      x-interpolate
    >
      <label>
        Query
        <input autofocus size="20" type="text" x-model.debounce.300="query" />
      </label>
      <div style="color: red" x-show="error">Error: {error}</div>
      <div x-show="results.length">
        The search for "{query}" returned {results.length} results.
      </div>
      <template x-for="result of results" :key="result.objectID">
        <div>
          <h4 style="margin-bottom: 0">{result.title}</h4>
          <a :href="result.url" target="_blank">{result.url}</a>
        </div>
      </template>
    </div>
  </body>
</html>
In addition to the provided magic properties, custom magic properties can be implemented. See Custom Magics.
Global Functions
Alpine.bind
The Alpine.bind function provides a way to define a named set of
attributes and directives that can be applied to multiple elements
to avoid repetition and allow changes to be made in one place.
This is likely rarely needed.
For a contrived example, see Alpine.bind.
Alpine.data
The Alpine.data function provides an alternate way
to specify the value of an x-data property.
It is useful for long lists of properties
and properties that are function definitions.
While these can be defined using the x-data property,
long definitions can feel out of place in HTML.
Defining them in a script tag is sometimes preferable.
The Alpine.data function is only used to define data,
not to query or modify data.
For example:

<html>
  <head>
    <script
      defer
      src="https://cdn.jsdelivr.net/npm/alpinejs@3.x.x/dist/cdn.min.js"
    ></script>
    <script defer>
      document.addEventListener('alpine:init', () => {
        Alpine.data('counter', () => ({
          count: 5,
          decrement() {
            if (this.count > 0) this.count--;
          },
          increment() {
            if (this.count < 10) this.count++;
          }
        }));
      });
    </script>
  </head>
  <body>
    <div style="display: flex; gap: 1rem" x-data="counter">
      <button @click="decrement" :disabled="count === 0">-</button>
      <div x-text="count"></div>
      <button @click="increment" :disabled="count === 10">+</button>
    </div>
  </body>
</html>
The following code demonstrates sharing Alpine data with JavaScript code.
<html>
  <head>
    <script
      defer
      src="https://cdn.jsdelivr.net/npm/alpinejs@3.x.x/dist/cdn.min.js"
    ></script>
    <script defer>
      const shared = {
        v1: 8,
        v2: 14,
        reset() {
          this.v1 = 0;
          this.v2 = 0;
        },
      };
      document.addEventListener("alpine:init", () => {
        Alpine.data("shared", () => shared);
      });
      function alertSum() {
        alert(shared.v1 + shared.v2);
      }
    </script>
  </head>
  <body>
    <!-- x-data here uses a named set of variables defined with Alpine.data.
         This allows JavaScript code to share access to them. -->
    <div x-data="shared">
      <div>v1 = <span x-text="v1"></span></div>
      <div>v2 = <span x-text="v2"></span></div>
      <div>sum = <span x-text="v1 + v2"></span></div>
      <button @click="v1++">Increment v1</button>
      <button @click="v2++">Increment v2</button>
      <button @click="reset()">Reset</button>
      <button @click="alertSum()">Alert Sum</button>
    </div>
  </body>
</html>
For more detail, see Alpine.data.
Alpine.store
The Alpine.store function defines a named, global store.
It takes a name string and an object with properties and optional methods.
This function can be called any number of times
to define multiple global stores.
Stores can be accessed outside of the Alpine context.
This differs from data defined by Alpine.data
which can only be accessed in the context of Alpine.
The following code demonstrates defining a store.
import Alpine from 'alpinejs';
Alpine.store('profile', {
  id: 0,
  username: '',
  role: ''
});
Alpine.store('todos', []);
Stores are accessed with the magic property $store.
For example:
$store.profile.role = 'admin';
Plugins
Alpine plugins add functionality. Each plugin used requires a new script tag.
Anchor
The Anchor plugin anchors the position of an element to another using CSS absolute positioning.
In most cases this functionality can be achieved with HTML nesting and CSS.
Collapse
The Collapse plugin enables expanding and collapsing elements with smooth animations.
For example:
<html>
  <head>
    <!-- The plugin must be loaded before Alpine.js. -->
    <script
      defer
      src="https://cdn.jsdelivr.net/npm/@alpinejs/collapse@3.x.x/dist/cdn.min.js"
    ></script>
    <script
      defer
      src="https://cdn.jsdelivr.net/npm/alpinejs@3.x.x/dist/cdn.min.js"
    ></script>
  </head>
  <body x-data="{show: true}">
    <button @click="show = !show">Toggle</button>
    <p x-show="show" x-collapse>
      Out of memory.<br />
      We wish to hold the whole sky,<br />
      But we never will.
    </p>
  </body>
</html>
Focus
The Focus plugin manages focus within a page containing form elements.
Intersect
The Intersect plugin enables reacting to an element entering the browser viewport.
Mask
The Mask plugin
formats text inputs in specific ways using a mask whose characters
indicate the set of characters that can be entered.
The supported mask characters are * for any character,
a for alphabetic characters (a-z and A-Z),
and 9 for numeric characters (0-9).
For example:
<html>
  <head>
    <!-- The plugin must be loaded before Alpine.js. -->
    <script
      defer
      src="https://cdn.jsdelivr.net/npm/@alpinejs/mask@3.x.x/dist/cdn.min.js"
    ></script>
    <script
      defer
      src="https://cdn.jsdelivr.net/npm/alpinejs@3.x.x/dist/cdn.min.js"
    ></script>
  </head>
  <script>
    // This returns a string like "April 16, 1961".
    const formatDate = date =>
      new Date(date).toLocaleDateString('default', {
        month: 'long',
        day: 'numeric',
        year: 'numeric'
      });
  </script>
  <body x-data="{date: '', placeholder: 'MM/DD/YYYY'}">
    <input
      :placeholder="placeholder"
      size="12"
      x-mask="99/99/9999"
      x-model="date"
    />
    <div x-show="date.length == placeholder.length">
      You entered <span x-text="formatDate(date)"></span>.
    </div>
  </body>
</html>
The x-mask:dynamic directive takes a JavaScript function name
that is called to determine the mask based what has been entered so far.
For entering currency amounts, use the value $money($input).
Morph
The Morph plugin enables moving an element into a provided HTML template. It is useful for updating the DOM from HTML received from an API request without losing page state.
Persist
The Persist
plugin saves state across page loads, including browser refreshes.
By default the data is saved in localStorage.
To use this plugin, add the following script tag before the one for Alpine:
<script
  defer
  src="https://cdn.jsdelivr.net/npm/@alpinejs/persist@3.x.x/dist/cdn.min.js"
></script>
Alternatively, install the plugin from NPM and initialize it in code.
To cause any x-data property to be persisted,
wrap the value in a call to the $persist function.
The following code demonstrates persisting the name data property.
<html>
  <head>
    <script
      defer
      src="https://cdn.jsdelivr.net/npm/@alpinejs/persist@3.x.x/dist/cdn.min.js"
    ></script>
    <script
      defer
      src="https://cdn.jsdelivr.net/npm/alpinejs@3.x.x/dist/cdn.min.js"
    ></script>
  </head>
  <body x-data="{ name: $persist('World') }">
    <input autofocus size="20" type="text" x-model="name" />
    <div>Hello, <span x-text="name"></span>!</div>
  </body>
</html>
If the type of a persisted property is changed,
clear localStorage before running the code again.
Inside localStorage, persisted property names are prepended with _x_.
If there are multiple pages at the same domain that persist
properties with the same name, they will share the localStorage value.
If this is not desired, specify a different name with the as modifier.
For example, x-data="{ $persist(name).as('company-name') }"
When this modifier is used, the name will not be prepended with _x_.
Data saved in localStorage remains across sessions of the app.
To avoid this, the data can instead be saved in sessionStorage
by applying the using modifier.
For example, x-data="{ $persist(name).using(sessionStorage) }"
It is also possible to define a custom storage location. For details, see Using a custom storage.
To persist data in a store, use the Alpine.$persist function.
This seems to require removing defer from the plugin script tag.
For example:
Alpine.store('data', {
  status: '',
  todos: Alpine.$persist([]).as('todos')
});
Components
One issue with Alpine is that it doesn't describe a standard way
to define components in the sense that SPA frameworks like React do.
For example, we can't define a "ProgressBar" component and then
render it with HTML like <ProgressBar value={value} max={100} />.
The Alpine team provides a commercial set of predefined components at
Components.
Each component is implemented as a custom directive
that can be applied to an HTML element such as a div.
A script tag is required to load the code for each component.
Data can be provided to the components in several ways including
the directive properties value, modifiers, and expression.
The components can also access data defined with x-data or stores.
Using a custom directive to define a component doesn't make it easy specify the HTML of the component. Directives are defined in JavaScript code and modifying the DOM using JavaScript is tedious compared to writing HTML.
Another approach is to search the DOM for elements that
have an attribute like x-include that
specifies an HTML file to load that defines a component.
Data can be made available to an instance of a component
using the x-data directive.
This approach is implemented by an Alpine plugin at alpine-plugins.
See the description of the x-include directive.
The following HTML provides an example of using the x-include directive.
This file must be served by an HTTP server rather than opening it as a file
in order to avoid CORS issues.
<html lang="en">
  <head>
    <title>Include Demo</title>
    <script
      defer
      src="https://cdn.jsdelivr.net/gh/mvolkmann/alpine-plugins@v0.0.5/include.js"
    ></script>
    <script
      defer
      src="https://cdn.jsdelivr.net/npm/alpinejs@3.x.x/dist/cdn.min.js"
    ></script>
  </head>
  <body x-data="{show: true}">
    <h1>Include Demo</h1>
    <div style="display: flex; gap: 1rem">
      <button @click="show = !show">Toggle</button>
      <span x-show="show">
        <!-- The file greeting.html defines a component.
             We can pass scoped data to it using x-data. -->
        <span x-include="greeting" x-data="{name: 'World'}"></span>
      </span>
    </div>

    <!-- The file colors.html defines a component.
         The file will only be loaded once even though
         we "include" it multiple times. -->
    <div x-include="colors"></div>
    <div x-include="colors" x-data="{upper: true}"></div>
  </body>
</html>
Here is the contents of "greeting.html":
<p style="margin: 0">Hello, <span x-text="name"></span>!</p>
Here is the contents of "colors.html":
<div x-data="{colors: ['red', 'green', 'blue']}">
  <ol>
    <template x-for="color in colors">
      <!-- Using $data.upper instead of just upper
           works when upper is not defined. -->
      <li x-text="$data.upper ? color.toUpperCase() : color"></li>
    </template>
  </ol>
</div>
Miscellaneous Details
To specify Alpine directives that are not tied to a rendered element,
add them to a template element.
These are somewhat like fragments in React.
For example:
<div x-data="{colors: ['red', 'green', 'blue']}">
  <template x-for="color in colors">
    <div x-text="color"></div>
  </template>
</div>
Advanced Topics
AJAX
Alpine AJAX is an Alpine plugin that "enables your HTML elements to request remote content from your server." It provides functionality that is similar to htmx, but is simpler and provides fewer features.
Alpine AJAX was not created by the team that created Alpine.
Async
The await keyword can be used in directives that take a function
to wait for the result of an async function.
For example, <span x-text="await getHighScore()"></span>.
CSP
For applications that must adhere to the Content Security Policy (CSP), see CSP.
Reactivity
Alpine monitors state defined in x-data directives and stores and
automatically updates parts of the UI that use the data when the values change.
Reactivity is implemented by the functions Alpine.reactive and Alpine.effect.
Alpine does not use a virtual DOM like React.
For more detail, see Reactivity.
Common Mistakes
Did you forget to add the x-data directive on an ancestor element
of elements that use other Alpine directives?
The directives will not be processed without this.
Did you apply the x-if or x-for directives
to an element other than template?
Those directives can only be applied to template elements.
Resources
- Alpine home page
- Say No To Complexity With AlpineJS YouTube video by Caleb Porzio
- Mark Volkmann
- Alpine Toolbox