Overview
Meteor (meteor.com) is an open-source, full-stack, JavaScript platform for building web and mobile (Android and iOS) applications. It is referred to as a platform instead of a framework because it works with other frameworks. It is used to host both client-side and server-side code.
Meteor is built on Node.js. It has great integration with the MongoDB NoSQL database. It also supports a publish and subscribe mechanism to synchronize user interfaces (UIs) with backend data, providing real-time updates.
Meteor uses its own build systems and JavaScript bundler. It does not use an external bundler such as Webpack, Rollup, or Parcel. This is partially because Meteor was created before those tools were created or became mature.
Meteor has its own frontend framework called Blaze. But it also supports other popular options that can be used in its place such as Angular, React, Svelte, Vue, and Cordova (for Android and iOS apps). (Cordova is an open source fork of PhoneGap which was created by Adobe. On August 10, 2020 Adobe announced they will no longer support development of PhoneGap. Development of Cordova continues under Apache.)
Meteor was initially released in 2012. It gained immediate attention for its novel use of WebSockets as an alternative to HTTP to achieve real-time updates. But the attention faded quickly as other frameworks garnered more notice. It is seeing some resurgence in 2020.
Tiny (tinycapital.com), a Canadian technology holding company, acquired Meteor from the Meteor Development Group in October, 2019. This occurred after most of the Meteor Development Group team transitioned to working on Apollo GraphQL. The new Meteor company supports both Meteor and Galaxy. Galaxy is a commercial cloud hosting platform for Meteor applications.
Companies that use Meteor include Qualcomm, Mazda, IKEA, and Honeywell.
Enterprise support is available in order to have guaranteed support response times and service-level agreements (SLAs).
Meteor provides many command-line tools summarized
here.
After installing Meteor, enter meteor help for help on using these.
Key Benefits
The key benefits of using Meteor are:
- One install provides client, server (Node.js), and database (MongoDB) setup.
- Simple integration with MongoDB is provided out of the box.
- Client and server code can be developed in a single language, JavaScript or TypeScript.
- There is no need to implement REST services or GraphQL queries if using Meteor Methods with WebSockets is acceptable. Meteor Methods are much easier to implement and are described in detail later.
- The UI can be implemented using any popular web framework.
- Real-time UI updates across clients are easy to implement. Changes to data in MongoDB collections can be published to all connected clients using WebSockets so UIs can stay in sync. Clients subscribe to publications of interest.
- User account management and authentication is provided, including OAuth logins.
- Reactivity is provided through the use of the JavaScript classes
Tracker,ReactiveVar,ReactiveDict, andSession.
All of this enables implementing significant functionality in a small amount of code.
Installing
For platform-specific instructions on installing Meteor,
see here.
On Linux or macOS, enter curl https://install.meteor.com | sh.
On Windows, install Chocolatey and enter choco install meteor.
Install Meteor also installs several tools used by it including MongoDB and TypeScript. Node.js must be installed separately and that includes the npm tool.
Repeating the install command will update the existing installation.
Creating a Project
To create the initial directory structure for a new Meteor project and run it, enter the following commands:
meteor create {app-name}cd {app-name}meteor
This is covered in more detail later in the "Todo App" section.
It is recommended to use the command meteor npm instead of npm
when installing npm packages in a Meteor app.
When packages have binary dependencies,
this ensures that they are built using the same C libraries.
Meteor provides "hot code pushes" so the browser doesn't need to be manually refreshed and the server doesn't need to be manually restarted. After making changes to client code, the message "Client modified -- refreshing" will appear in the terminal window where the server is running. After making changes to server code, the message "Meteor server restarted" will appear in the same place.
Directory Structure
The recommended directory structure for Meteor applications and the initial set of files inside them is:
-
client
This holds files that are only used in the browser.main.htmlmain.cssmain.js
-
server
This holds files that are only used in the server.main.js
-
imports
This holds files that are used in both the browser and server.*.js
-
public
This holds static assets such as images and fonts. When referencing these files, do so as if they were at the top level, not includingpublic/. -
private
This holds files that are only accessible from server code using the Assets API. -
.meteor
This holds files that Meteor uses for bookkeeping. These files should not be manually modified.
Additional files can be added to all the directories listed above
except .meteor.
In the past Meteor eagerly loaded files outside the imports directory
and lazily loaded files inside the imports directory.
As of Meteor 1.7 it no longer makes this distinction
and all code is lazily loaded.
So there is no longer a requirement to have an imports directory.
However, it is still a useful location for
files that are shared between client and server code.
Meteor Packages
Meteor projects can use packages from npm and from its own package repository called "Atmosphere". Atmosphere contains packages that are specific to Meteor. These are referred to as "Isopacks" because they are typically isomorphic, meaning that the code can run on the client or server.
To see the available packages in Atmosphere, browse atmosphere.com. Packages without an author prefix followed by a colon are official Meteor packages. This page lists packages that are trending, recently added/updated, and most frequently used.
To install a package from Atmosphere in your current Meteor project,
enter meteor add {package-name}.
This writes information about the installed package
to .meteor/packages in order to track dependencies,
similar to how npm uses the package-lock.json file.
It also installs packages on which this one depends.
If the app is running, Meteor performs a
"hot code push" of the CSS and JS files in the package
so the effect is seen immediately,
unlike installing npm packages.
After adding packages to a project, to update to
the latest version of each, enter meteor update.
This also updates to the latest version of Meteor.
To only update packages and not Meteor, enter meteor update --packages-only.
The version of each package being used
can be found in the file .meteor/versions.
To import functions, classes, and other values from a Meteor package, use an import with the following syntax:
import {name1, name2} from 'meteor/{package-prefix}:{package-name}';
There are five types of packages:
meteor-base
This is a specific package that contains core components.- first-party (core) packages
These are bundled with Meteor. Some are included by default, but can be removed. Others are not, but can be added. Their names do not have an author prefix. - local-packages
These are specific to your app and reside in thepackagesdirectory. - Atmosphere (community) packages
Many of these follow theauthor:packagenaming convention and all that are in use are listed in the file.meteor/packages. - npm packages
These are listed as dependencies in the filepackage.json.
New Meteor apps typically include three core packages by default which are meteor-platform, autopublish, and insecure. The meteor-platform package has many dependencies that are also installed including blaze, check, ddp, jquery, mongo, session, tracker, and underscore.
Popular Atmosphere packages include:
- accounts-password - "login service that enables secure password-based login"
- accounts-ui - "turn-key user interface for Meteor Accounts" using Blaze
- meteor-base - "default set of packages that almost every app will have"
- mongo - "adaptor for using MongoDB and Minimongo over DDP"
- rdb:svelte-meteor-data - "reactively track Meteor data inside Svelte components"
- react-meteor-data - "React hook for reactively tracking Meteor data"
- static-html - "define static page content in
.htmlfiles"; alternative to Blaze - svelte:compiler - compiles
.sveltefiles to JavaScript - svelte:blaze-integration - "render Blaze templates inside your Svelte components and vice versa"; useful when using the account-ui package in a Svelte app
- tracker - "dependency tracker to allow reactive callbacks"
- typescript - "compiler plugin that compiles TypeScript and ECMAScript
in
.tsand.tsxfiles"
MongoDB
MongoDB is a popular NoSQL database. There are many commands and options to master, but the following presents some of the basics for using the MongoDB console in conjunction with Meteor.
To start the MongoDB console, enter meteor mongo.
To see a list of all the databases, enter show dbs.
Meteor uses the database named "meteor".
To interact with this database, enter use meteor.
To see a list of collections in the current database, enter show collections.
To see the first 20 documents in a given collection,
enter db.{coll-name}.find().
To delete all the documents in a collection, enter db.{coll-name}.drop().
To reset the "meteor" MongoDB database,
deleting all documents in all collections,
stop the Meteor server and enter meteor reset.
This can be useful to start an app in a pristine state.
Multiple Meteor apps can use the same MongoDB database to share data. Search for "Multiple apps use the same database" in the Meteor Up docs.
Collections
The client-side of Meteor applications can obtain data in many ways including REST calls and GraphQL queries that connect to any kind of database. The data can be stored in clients in many ways including JavaScript variables, session storage, and local storage.
The most common way for a Meteor application to store data is in "collections". These are typically associated with a MongoDB collection. They can be accessed from both client and server code. When data is added to a collection, updated, or deleted, client code that uses it typically updates automatically. This provides a significant benefit over using REST services that require the use of polling to get data updates.
The following code demonstrates
creating a MongoDB collection named "tasks",
inserting a document into the collection, and finding it.
By convention, variable names that refer to collections
have CamelCase names that start uppercase.
MongoDB stores the unique id of each document in property named _id.
If no value is provided, MongoDB will generate a unique value.
const Tasks = new Mongo.Collection('tasks');
const id = Tasks.insert({text: 'buy milk'}); // returns assigned id
const task = Tasks.findOne({_id: id});
The same code can be used in client or server code when the Meteor "insecure" package is installed. The starter app includes this. Later we will look at securing Meteor applications by removing this package.
If the code above is run in the server, it creates a MongoDB collection (if it doesn't already exist) and populates it. If the code above is run in the client, it creates a client-side cache using the "Minimonogo" library which provides an in-memory JavaScript implementation of the MongoDB API.
Minimongo in the client is automatically kept in sync with MongoDB in the server when the "autopublish" package is installed. The starter app includes this. Later we will look at removing this.
When "autopublish" is not installed, the server must publish documents from collections and the client must subscribe documents of interest. This keeps the client-side cache (implemented by Minimongo) in sync with a subset of the data in MongoDB on the server. The underlying mechanism that supports this is the Meteor Distributed Data Protocol (DDP) which sends WebSocket messages in both directions.
Local Collections
It is also possible to create a "local collection"
that only exists on the client or on the server.
These are Minimongo collections that are
not synchronized with a MongoDB collection.
They are useful for data that only resides in memory
in cases where using the MongoDB API to access it is convenient.
An alternative is to use a ReactiveVar, ReactiveDict,
or the Session object, all of which are described later.
To create a local collection:
const myCollection = new Mongo.Collection(null);
or
const myCollection = new Mongo.Collection('some-name', {connection: null});
To support associations between documents in different collections, see the Meteor package cultofcoders:grapher.
Collection Schemas
A schema can be associated with a collection
in order to provide validation when documents are added or updated.
Schemas can be described using the npm package
simpl-schema,
which is installed by entering npm install simpl-schema.
The type of each property can be specified with
either a shorthand or longhand definition.
Shorthand definitions only specify a type.
Longhand definitions can also specify that
a property is optional, a default value, a max length,
a regular expression (regEx) to be matched, and more.
Both kinds of definitions can be used in the same schema, one per property.
For example, a tasks collection can be associated with a schema as follows:
import SimpleSchema from 'simpl-schema';

const Tasks = new Mongo.Collection('tasks');
Tasks.schema = new SimpleSchema({
  createdAt: {type: Date, defaultValue: new Date(), optional: true},
  done: {type: Boolean, defaultValue: false, optional: true},
  owner: String,
  text: String,
  username: String
});
Note that specifying a defaultValue for a property
does not imply that it is optional.
That must also be specified.
Here is another example where a property (topics) is an array of objects:
import SimpleSchema from 'simpl-schema';

export const Meetings = new Mongo.Collection('meetings');
const topicSchema = new SimpleSchema({
  description: {type: String, defaultValue: ''},
  presenter: {type: String, defaultValue: ''},
  minutes: {type: Number, defaultValue: 0}
});
Meetings.schema = new SimpleSchema({
  name: {type: String, defaultValue: ''},
  date: String,
  time: String,
  duration: SimpleSchema.Integer,
  topics: [topicSchema]
});
Schema validation is not performed automatically.
It is done by explicitly passing an object to the validate method.
For example, if Tasks.schema.validate(newTask) is called
and the object referred to by newTask does not match the schema,
a ValidationError which describes the difference is thrown.
Extra properties in the object that are
not specified in the schema are not allowed.
The aldeed:collection2 Meteor package can be used to automatically validate
every insert, update, and upsert performed on a given collection.
In addition it coerces values to the expected types when possible,
removes properties not in the schema, and
assigns default values specified with the defaultValue property.
To install this package, enter meteor add aldeed:collection2.
To use this on our Tasks and Meetings collections:
Tasks.attachSchema(Tasks.schema);
Meetings.attachSchema(Meetings.schema);
For more detail on schema definitions, see simpl-schema.
Creating collections whose documents can be deeply nested or can contain large arrays is not recommended. This is because DDP, which is used to send messages to clients that describe new and updated documents, is only able to describe top-level properties and their values. For example, if a document contains a property whose value is a large array and a single element is modified, DDP will send the entire array to clients. This works fine, but is inefficient.
Meteor Methods
Meteor Methods are functions that can reside only on the server or on both the client and server. They are meant to be called from client code. The server instance is invoked using a Remote Procedure Call (RPC) that utilizes WebSockets. By convention, "Method" is written with a capital "M" to distinguish it from normal JavaScript methods.
Meteor Methods are an alternative to REST calls implemented using HTTP. An issue with using Meteor Methods instead of REST is that they can only be called from the same Meteor app. In many cases the Methods are specific to the app and this is a non-issue.
Common uses for Methods include inserting a document into a collection, deleting a document from a collection, and updating a document in a collection. There is typically no need to return anything to the client because changes in the MongoDB database are communicated back to the client through WebSocket messages that keep Minimongo in the client synchronized. Retrieving documents from collections is typically done by subscribing to them rather than through methods calls, but Methods can also be used for this purpose.
Methods can also be used to perform CRUD operations on SQL databases. In this case it makes sense for the methods to only reside on the server and for them to return data needed by the client.
To implement Methods,
import Meteor from the meteor/meteor package
and pass an object literal to Meteor.methods.
The properties of the object are Method definitions.
This registers the Methods with Meteor's DDP system.
The Meteor.methods function can be called any number of times
to register additional Methods.
Methods can accept any number of parameters with any JavaScript types.
The check function in the meteor/check package
can be used to check the types of parameters at runtime.
Note that TypeScript types are only checked at compile-time.
The check function throws a Match.Error error
if unexpected types are passed.
For details on the check function,
see here.
To report other kinds of parameter validation errors
that are based on values rather than types,
use throw new ValidationError(message).
To report most other errors, use
throw new Meteor.Error(errorId, message[, details]).
The error id is typically the Method name
followed by a period and an error name.
If a generic JavaScript error is thrown instead using
throw new Error(message), the details will only appear on the server
and clients will only be notified that an internal server error occurred.
To call a Method from client code,
import Meteor from the meteor/meteor package and call Meteor.call,
passing it the name of a Method, any number of arguments,
and a callback function.
This triggers the Method call lifecycle which has six parts.
- If the Method is defined in the client, it is executed there. This typically updates Minimongo and corresponding UI updates are made in response to these changes.
- A JSON-based DDP message is constructed and sent to the server
using a WebSocket connection.
This includes a message name (
msgproperty set to "method"), Method name (in themethodproperty), arguments (in theparamsproperty), and a generated Method id (in theidproperty). - The Method executes on the server, possibly updating MongoDB.
- A return value is sent to the client in a message that includes
a message name (
msgproperty set to "result"), the previously generated Method id (in theidproperty), and the result (in theresultproperty). - DDP messages that describe changes made in MongoDB in the server are received in the client and used to make corresponding changes in Minimongo, but the UI is not yet updated.
- The callback function passed to
Meteor.callis invoked, passing it an error description (if there was an error) and the result value. Now the UI is updated using data from Minimongo.
If the call succeeds, the error description is undefined
and the result is set to whatever value the Method returns.
If the call fails, the error description is set to an object
that contains the properties
error (an HTTP status code even though HTTP isn't used),
reason (concise message), message (long message), and more.
It does not throw a JavaScript Error, so try/catch cannot be used.
If a Method inserts new documents in a collection,
Meteor uses the same random generator seed on the client and server
in order to guarantee that documents created by client calls
are assigned the same _id values as documents created by server calls.
When multiple Methods are called without
waiting for the result of each before calling the next,
Meteor guarantees that they will execute
in the order in which they are called and
that the results will be processed in the same order.
In some cases you may wish to allow multiple methods to execute concurrently.
Call this.unblock() in a Method implementation
to allow another Method to begin executing before that one finishes.
While it is not commonly needed, Meteor supports Method implementations that call other Methods.
Let's implement a simple Method that just adds two numbers.
It is not a typical Method because it does not update a collection.
We will see several examples of Methods that update a collection later.
To verify that the Method is called on both the client and server side,
a console.log call is added.
It will be output in the DevTools console AND
in the terminal window where the server is running.
Create the directory imports and
the file imports/methods.js containing the following:
import {check} from 'meteor/check';
import {Meteor} from 'meteor/meteor';

Meteor.methods({
  sum(n1, n2) {
    console.log('sum called; on server?', Meteor.isServer);
    check(n1, Number); // parameter type validation
    check(n2, Number); // parameter type validation
    return n1 + n2;
  }
});
Add the following near the top of client/main.js and server/main.js
to invoke the code above in the client and server:
import '../imports/methods.js';
Add the following in client/main.js to call the sum Method:
const number1 = 2;
const number2 = 3;
Meteor.call('sum', number1, number2, (err, result) => {
  if (err) {
    alert(err);
  } else {
    console.log('sum =', result); // 5
  }
});
In this case there is no benefit to invoking the method on both the client and server because it doesn't rely on any server resources. Later in the "Optimistic UI" section we will learn why this can be useful.
If you prefer to use promises instead of callback functions,
implement a utility function that wraps calls in a Promise as follows:
export function call(name, ...args) {
  return new Promise((resolve, reject) => {
    Meteor.call(name, ...args, (err, result) => {
      if (err) {
        reject(err);
      } else {
        resolve(result);
      }
    });
  });
}
An advantage of calling Methods in this way is that the result of one call can be used to form the arguments of another call without resorting to nested callback functions.
Using this new call function, our sum Method
can be called from an async function as follows:
try {
  const sum = await call('sum', 2, 3);
  console.log('App.svelte addTask: sum =', sum);
} catch (e) {
  alert(e);
}
If a Method returns a Promise,
Meteor will wait for the Promise to resolve or reject
before returning a result or an error to the client.
Two alternate ways to define Methods are Advanced Method boilerplate and mdg:validated-method. These provide additional features, but may be overkill for most Methods.
Typically client code only invokes methods that are registered in the server of the same Meteor application. However, it is also possible to invoke methods defined in the server of a different Meteor application. To do this:
import {DDP} from 'meteor/ddp-client';

const connection = DDP.connect(serverUrl);
connection.call(methodName, arguments, callback);
For more details, see https://docs.meteor.com/api/connections.html#DDP-connect.
Method Retries
If a client calls a Method and their internet connection is lost before a result is returned, Meteor will remember this and will make the call again when connectivity is restored. This presents an issue when Methods are not idempotent. In this context, being idempotent means that when a call is repeated no additional changes are made in the database.
Consider typical CRUD operations.
-
Creating a new document in a collection using the same data multiple times is typically problematic and it's up to you to guard against this. For example, in a Todo app we could reject attempts to add multiple tasks with the same text.
-
Retrieving a document from a collection multiple times is not a problem.
-
Updating a document multiple times is not a problem as long as the document hasn't been modified using different data in the interim. This can be addressed by adding the last update timestamp to each document and verifying that it matches what is in the data for an update. When the timestamp does not match, we can assume the document has been updated since we last retrieved it and reject the update.
-
Deleting a document multiple times is not a problem as long as an attempt to delete a non-existent document is not treated as an error.
Optimistic UI
Optimistic UI is a feature of Meteor Methods, and also of Apollo GraphQL, that enables a UI to respond to user interactions without waiting for server responses. This is satisfied by the following properties.
-
The UI is rendered on the client rather than waiting for the server to return HTML or data. This requires predicting the result of Method calls based on data that has been cached on the client.
-
The client-side cache (stored in Minimongo) is a global cache rather than being associated with specific components, so it is not possible for components to disagree on the state. All affected components can re-render using the same data. When a MongoDB query is executed using a Meteor Method, it is first run against Minimongo on the client and then against MongoDB on the server.
-
The client subscribes to data using DDP to keep Minimongo on the client in sync with MongoDB on the server. Updates are made in real time, not using polling.
-
When the server returns the actual results of a Method call, Meteor verifies that it matches what the client predicted. If they differ, Meteor rolls back all the changes made in Minimongo from that point forward and applies the correct changes from the server. The UI can then update using the new data in Minimongo.
All of this functionality is provided by default. The only requirement is for the client to use Meteor Methods to request data changes.
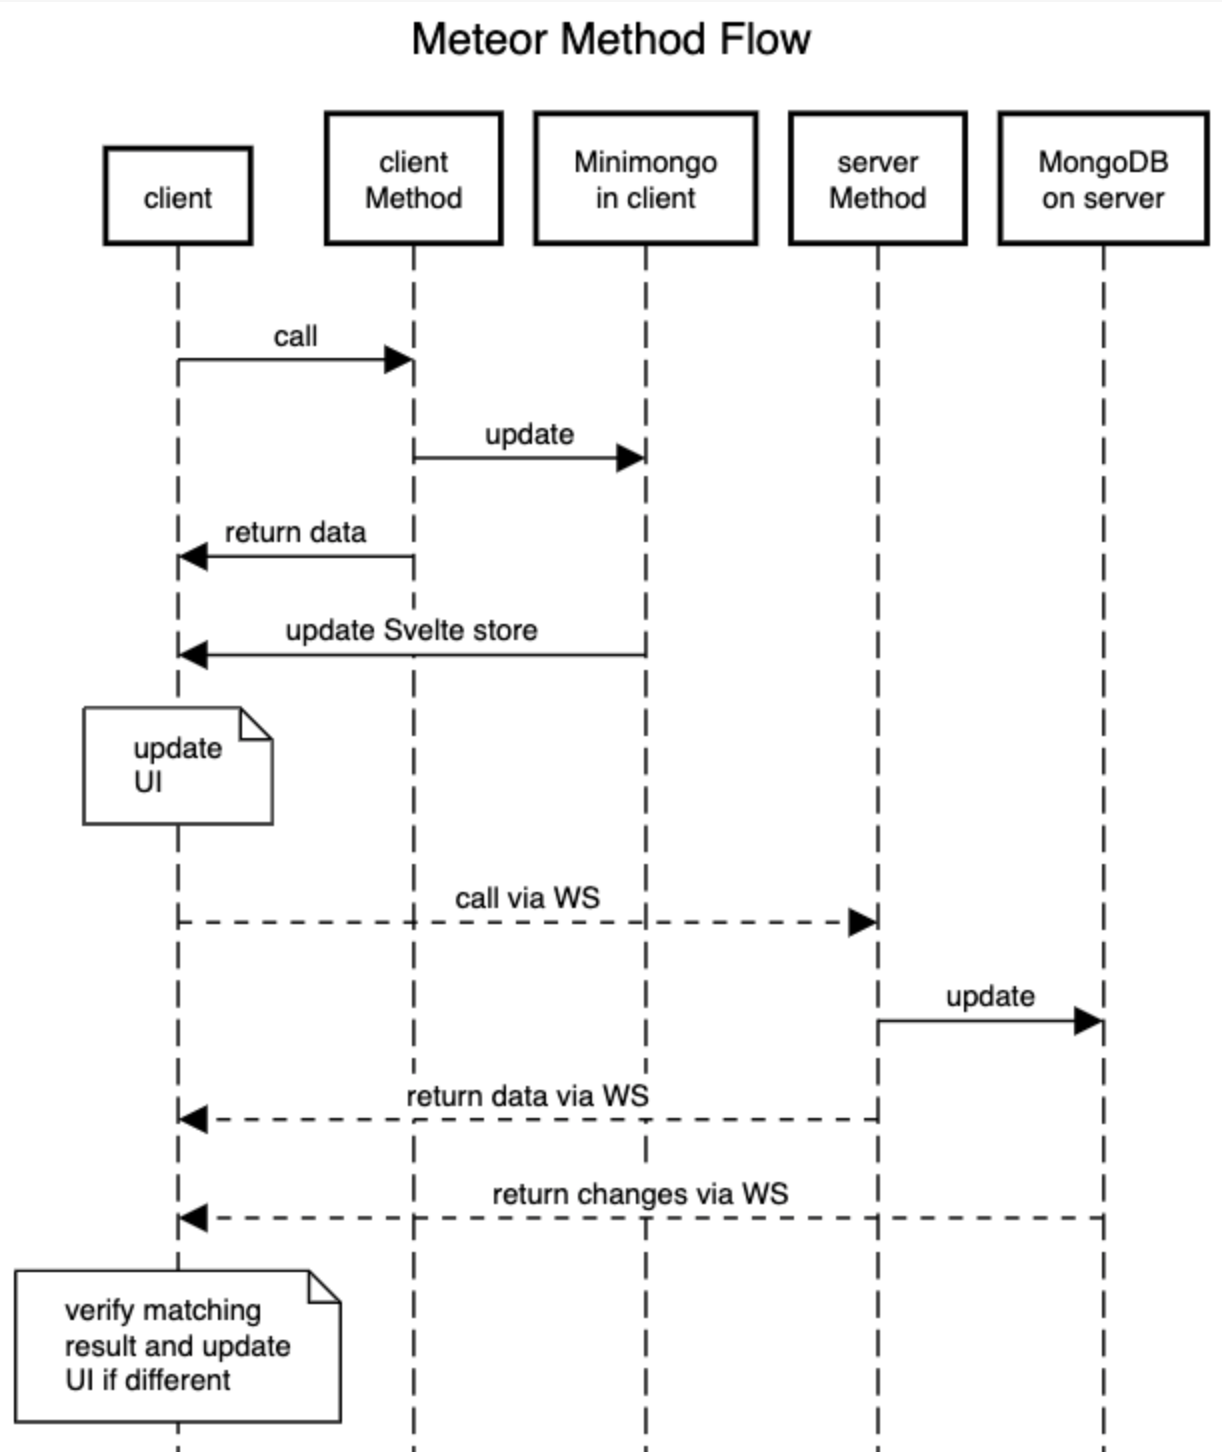
The following sequence diagram illustrates the order of these operations. It assumes that Svelte is being used to implement the UI and that data retrieved from Minimongo is placed in a Svelte store.
If the Method throws an error when run on the client, it is not called on the server.
To see rollback in action, we can modify a Meteor Method to return a different result when run on the client versus the server. This is not typical, but it is useful to demonstrate optimistic UI.
Here is a simplified example from the upcoming Todo app. It inserts a document in the "tasks" collection. When run on the client it updates Minimongo using the text passed as an argument. When run on the server it uses a timeout to wait three seconds and then uses the uppercase version of the text. The Method first runs on the client and the UI renders a new task with the entered text. The Method then runs on the server. After the timeout it sends a message to the client that tells it to update Minimongo using the uppercase version of the text. The UI then updates to show the uppercase text.
Meteor.methods({
  addTask(text) {
    check(text, String);
    return new Promise(resolve => {
      if (Meteor.isServer) {
        // Meteor requires using this version of setTimeout.
        // See https://docs.meteor.com/api/timers.html.
        Meteor.setTimeout(() => {
          // Tasks is a collection.
          const id = Tasks.insert({text: text.toUpperCase()});
          resolve(id);
        }, 3000);
      } else {
        // in client
        const id = Tasks.insert({text});
        resolve(id);
      }
    });
  }
});
It is possible to define a Method only on the server-side, thereby opting out of optimistic UI. The UI will not update until the Method finishes executing on the server and sends back a result message. This is because Minimongo will not be updated until the result message is received.
Here is an example of defining a Method on the server taken from the upcoming Todo app. It deletes a task with a given id.
if (Meteor.isServer) {
  Meteor.methods({
    deleteTask(taskId) {
      check(taskId, String);
      Tasks.remove(taskId);
    }
  });
}
Viewing WebSocket Messages
Chrome DevTools can be used to view the WebSocket messages that are sent by Meteor. Like HTTP messages, they appear on the Network tab. But unlike HTTP messages where there is a separate entry for each request/response pair, there is only a single WebSocket entry per connection. Selecting a connection displays all the messages sent over that connection.
To view WebSocket messages:
- Open the Chrome DevTools.
- Select the "Network" tab.
- Click "WS" to filter on WebSockets.
- Refresh the browser to get a new WebSocket connection.
- Click the WebSocket connection that is displayed.
- Click the "Messages" tab to see all the WebSocket messages. This list is updated as new messages are received.
- Click a message to see its details.
Each message is preceded by an arrow. Outgoing messages have a green arrow pointing up and are sent from the client to the server. Incoming messages have a red arrow pointing down and are sent from the server to the client.
Meteor WebSocket Messages
Each Meteor WebSocket message contains an array of JSON objects that have
a msg property and other properties such as
collection, fields, id, method, methods, msg, and params.
Typically each message array contains a single object.
When a client initially connects to the server, a series of messages are sent from the server to the client. While I can't describe the purpose of each of these messages, I can describe the pattern observed. These messages include:
-
one matching
{ "msg": "connect", "version": "{some-version}", "support": [?] } -
several matching
{ "msg": "sub", "id": "{some-id}", "name": "{some-name}", "params": [?] } -
one matching
{"server_id": "{some-id}"} -
one matching
{"msg": "connected", "session": "{session-id}"} -
several matching
{"msg": "ready", "subs": [?]} -
several matching
{
  "msg": "added",
  "collection": "meteor_autoupdate_clientversions",
  "id": "version",
  "fields": {"version": "outdated}
}
Periodically, about every 45 seconds, each side sends a "ping" message to verify that the other side is still reachable. The other side replies with a "pong" message.
If the Meteor accounts packages are used to support account creation and sign in, a sign in request triggers a message from the client to the server containing the following JSON:
{
  "msg": "method",
  "method": "login",
  "params": [
    {
      "user": "{username}",
      "password": "{hashed-password}",
      "algorithm": "sha-256"
    }
  ]
}
A successful sign in triggers a message from the server to the client containing the following JSON:
{
  "msg": "result",
  "id": "{message-id}",
  "result": {
    "id": "{result-id}",
    "token": "{token}",
    "token-expires": {"$date": "{timestamp}"},
    "type": "password"
  }
}
Updates to the MongoDB database trigger additional JSON messages
from the server to the client that describe the changes.
This allows Minimongo in the client to stay in sync.
Each message has a msg property that specifies the type of update,
a collection property set to the name of the collection,
and an id property set to the _id value of the affected document.
When a document is added to a collection, msg is set to "added"
and fields is set to a JSON object containing
all the properties of the document.
When a document is updated, msg is set to "changed"
and fields is set to a JSON object containing
only the properties of the document that were modified.
When a document is deleted from a collection, msg is set to "remove".
When a client subscribes to a collection, "added" messages described above are sent from the server to initially populate Minimongo.
Tracker
Tracker is a dependency tracking system used by Meteor to
update UIs when reactive variables and data sources change.
From the Meteor
Tracker docs,
"When you call a function that supports reactive updates
(such as a database query),
it automatically saves the current Computation object, if any
(representing, for example, the current template being rendered).
Later, when the data changes, the function can "invalidate" the Computation,
causing it to rerun (re-rendering the template)."
There is a low-level API for using Tracker, but there are easier ways to use it in React and Svelte.
For React there is hook called useTracker for responding to tracker changes.
This is provided by the Meteor package
react-meteor-data.
For Svelte, there is a useTracker function.
This is provided by the Meteor package
rdb/svelte-meteor-data.
For example, to always get the current user in a Svelte component when the accounts-password package is used:
$: user = useTracker(() => Meteor.user());
The rdb/svelte-meteor-data package also turns MongoDB cursor objects into Svelte stores that automatically update whenever the database is updated in a way that affects the query results.
For example, to always get the latest tasks from a task collection:
// A query can limit the documents returned,
// instead of getting all documents in the collection.
// It is not typically desirable to
// copy a large amount of data into Minimongo.
const query = {};
// A projection can limit the document properties returned
// and/or specify a sort order.
const projection = {sort: {createdAt: -1}}; // newest first
$: tasks = Tasks.find(query, projection);
Note that both user and tasks are Svelte stores,
so references to them should have a $ prefix.
For more information on the relationship between
useTracker and Svelte stores, see this
issue.
ReactiveVar
A ReactiveVar is a client-side object holds a single value.
They can be created and exported from .js files
so they can be imported by multiple components.
They can also be passed as a prop to components.
To use this feature, add the reactive-var package
by entering meteor add reactive-var.
To create a new ReactiveVar object:
import {ReactiveVar} from 'meteor/reactive-var';

const myVar = new ReactiveVar(initialValue);
To change the value, call myVar.set(newValue).
To get the value, call myVar.get().
Here is a Svelte component that demonstrates using a ReactiveVar:
<script>
  import {ReactiveVar} from 'meteor/reactive-var';

  const myRV = new ReactiveVar(0);
  let counter;
  Tracker.autorun(() => {
    counter = myRV.get();
  });
</script>

<div>
  counter = {counter}
  <button on:click={() => myRV.set(counter + 1)}>Increment</button>
</div>
Since Svelte components already support reactive variables within components
and stores to achieve reactivity across components,
there is little reason to use ReactiveVar in Svelte components.
ReactiveDict
A ReactiveDict is a client-side reactive data store
that holds key/value pairs.
They are used in the same ways a ReactiveVar objects,
but they can hold multiple values instead of just one.
The values can be any kind of JavaScript value that can be converted to JSON.
Other values can be made compatible by calling EJSON.addType(name, factory).
Multiple instances can be created to maintain separate groups of related key/value pairs.
To use this feature, add the reactive-dict package
by entering meteor add reactive-dict.
To create a new ReactiveDict object:
import {ReactiveDict} from 'meteor/reactive-dict';

const myDict = new ReactiveDict(name, initialKeyValuePairs);
Both constructor arguments are optional. Providing a name allows the key/value pairs to survive hot code pushes, but not browser refreshes. Providing an initial value is an alternative to starting with no key/value pairs.
To set the default value of a ReactiveDict key,
call ReactiveDict.setDefault(key, value).
Only the first call is processed. Subsequent calls are ignored.
To set a new value of a ReactiveDict key, call ReactiveDict.set(key, value).
To get the value of a ReactiveDict key, call ReactiveDict.get(key).
To get all the current key/value pairs, call myDict.all().
To remove all the key/value pairs, call myDict.clear().
For the same reasons explained in the previous section on ReactiveVar,
there is little reason to use ReactiveDict in Svelte components.
Session
The Session is a client-side, global ReactiveDict object.
It is typically used to share data between components.
The Session object cannot be shared between users or between browser tabs.
To use this feature, add the session package
by entering meteor add session.
To use Session in a component, import it with
import {Session} from 'meteor/session;
The API for the Session object is identical to
that of ReactiveDict objects since it is one.
To make the Session reactive so code is executed whenever
the value for a given key changes, use Tracker.autorun as follows:
let someValue;
Tracker.autorun(() => {
  someValue = Session.get(key);
});
Here is a Svelte component that demonstrates using a Session:
<script>
  import {Session} from 'meteor/session';
  import {Tracker} from 'meteor/tracker';

  let counter;
  Tracker.autorun(() => {
    counter = Session.get('counter');
  });
  Session.setDefault('counter', 0);

  function increment() {
    Session.set('counter', counter + 1);
  }
</script>

<div class="container">
  {counter}
  <button on:click="{increment}">Increment</button>
</div>
The ESLint plugin eslint-plugin-meteor will complain about
the use of Session based on the meteor/no-session rule.
Disable this ESLint rule if you decide to use Session.
For the same reasons explained in the previous section on ReactiveVar,
there is little reason to use Session in Svelte components.
TODO: Document the Meteor API for sending email.
ESLint
The steps to install and configure the ESLint linting tool for use in a Meteor project are listed below. They assume using Svelte as the web framework. When this is not the case, the Svelte-specific parts can be omitted.
-
Enter
npm install eslint eslint-plugin-import eslint-plugin-meteor eslint-plugin-svelte3 -
Add the following script in
package.json:"lint": "eslint --fix --quiet '{client,imports,server}/**/*.{js,svelte}'", -
Create the file
.eslintrc.jsoncontaining the following:{ "env": { "browser": true, "es6": true, "jest": true, "node": true }, "extends": [ "eslint:recommended", "plugin:import/recommended", "plugin:meteor/recommended" ], "overrides": [ { "files": ["**/*.svelte"], "processor": "svelte3/svelte3" } ], "parserOptions": { "ecmaVersion": 2019, "sourceType": "module" }, "plugins": ["import", "meteor", "svelte3"] }
To run ESLint, enter npm run lint.
ESLint will give "Unable to resolve path to module" errors
on all imports that begin with "meteor/".
However, the Meteor build system is able to resolve these.
To suppress these errors, add the following top level property
in the .eslintrc.json file:
"rules": {
  "import/no-unresolved": ["error", {"ignore": ["^meteor/"]}]
}
Prettier
The steps to install and configure the Prettier code formatting tool for use in a Meteor project are listed below. They assume using Svelte as the web framework. When this is not the case, the Svelte-specific parts can be omitted.
-
Enter
npm install prettier prettier-plugin-svelte -
Add the following script in
package.json:"format": "prettier --write '{client,imports,server}/**/*.{css,html,js,svelte}'", -
Create the file
.prettierrccontaining personal preferences like the following:{ "arrowParens": "avoid", "bracketSpacing": false, "singleQuote": true, "svelteSortOrder": "scripts-markup-styles", "trailingComma": "none" }
To run Prettier, enter npm run format.
DevTools
The Chrome extension "Meteor DevTools Evolved" displays DDP messages, Minimongo contents, and subscriptions.
To install it, browse here.
Tutorials
The Meteor web site contains several tutorials here that provide introductions to using Meteor.
Todo App
Let's walk through the steps to build a Todo app using Meteor. This is a modified version of the Todo app presented at the Meteor site that demonstrates additional features. Code for the final version of this app can be found in GitHub.
-
Create the app starting point by entering
meteor create todos.We are using the default app template here. To use a non-default app template, add one of the following options after
create:--bare,--minimal,--full,--react, or--typescript. None of these options corresponds to the default which produces applications that are insecure. Such applications allow all MongoDB updates to be initiated from clients and all documents are synced from MongoDB on the server to Minimongo in the client. We will learn how to fix this later. For details on the Meteor packages included by default and with each of the options see here. -
Modify the
startscript inpackage.jsonas follows if you are not targeting older browsers or mobile devices in order to avoid generating unnecessary code:"start": "meteor run --exclude-archs 'web.browser.legacy, web.cordova'", -
Start the server by entering
cd todos,meteor npm install, andnpm start. -
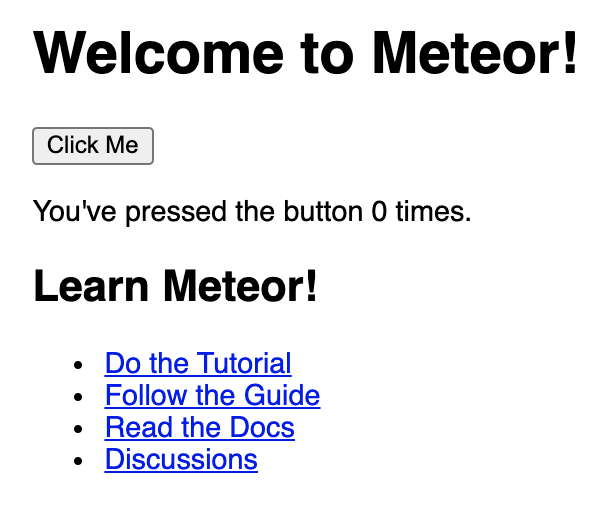
Browse localhost:3000 to see the following page:
-
Press the "Click Me" button multiple times.
The text "You've pressed the button n times." will update to display the number of times it was clicked.
-
Exercise "hot code push".
The UI is defined by the following files in the
clientdirectory:main.html,main.css, andmain.js. Try editing the fileclient/main.html. The browser will updated automatically when the changes are saved. -
Configure the app to use the Svelte web framework, instead of the default Blaze framework.
Svelte is a good choice due to its use of reactive statements. For more information about Svelte, see my article.
-
Install Svelte by entering
meteor npm install svelte. -
Add some Meteor packages by entering
meteor add svelte:compiler rdb:svelte-meteor-data -
Remove a package that will no longer be used by entering
meteor remove blaze-html-templates -
Add a replacement Meteor package by entering
meteor add static-html
-
-
Replace the content of
client/main.htmlwith the following:<head> <title>Todo App</title> </head> <body> <!-- Svelte will insert content in this div. --> <div id="app"></div> </body> -
Replace the content of
client/main.jswith the following:import {Meteor} from 'meteor/meteor'; import App from './App.svelte'; Meteor.startup(() => { new App({target: document.getElementById('app')}); }); -
Create the file
client/Task.sveltecontaining the following:<script> export let task; // Parent components pass this value as a prop. const formatDate = date => date.toLocaleDateString('en-us', { month: 'short', day: 'numeric', year: 'numeric' }); // These are Svelte "reactive declarations" which are // re-executed any time a variable they depend on changes. $: ({createdAt, text} = task); $: item = text + (createdAt ? ` - added ${formatDate(createdAt)}` : ''); </script> <li>{item}</li> <style> /* This styling is scoped to this component. */ li { padding-left: 0; } </style> -
Create the file
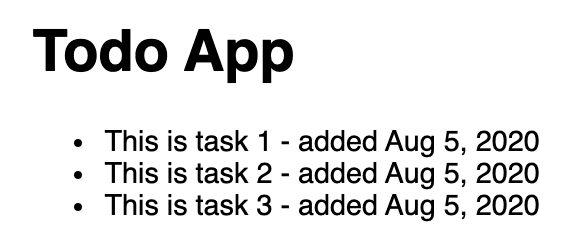
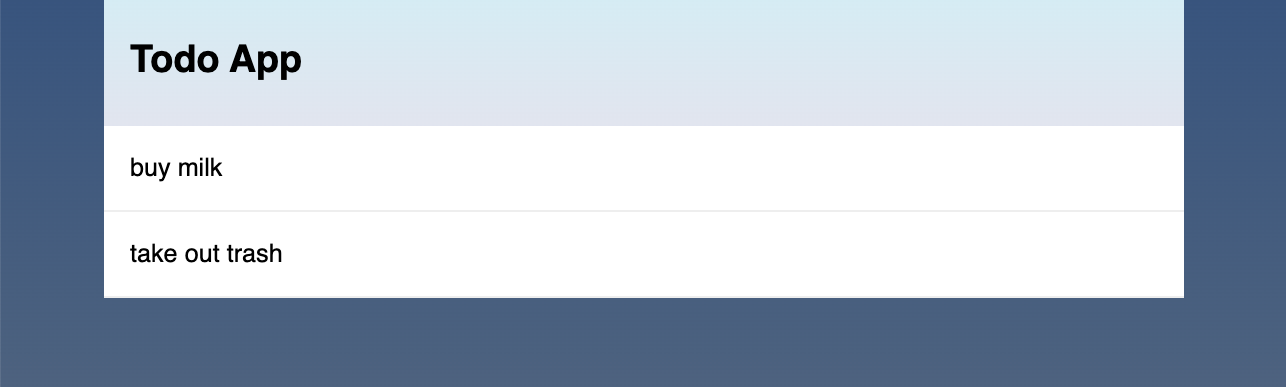
client/App.sveltecontaining the following:<script> import Task from './Task.svelte'; // Later we will replace this with a way to get the tasks from MongoDB. function getTasks() { const createdAt = new Date(); return [ {_id: 1, text: 'This is task 1', createdAt}, {_id: 2, text: 'This is task 2', createdAt}, {_id: 3, text: 'This is task 3', createdAt} ]; } </script> <div class="container"> <header> <h1>Todo App</h1> </header> <section> <ul> {#each getTasks() as task} <Task {task} /> {/each} </ul> </section> </div>At this point the app should display the following basic task list:
-
Replace the contents of
client/main.csswith what is found at here. Now the task list is styled nicely.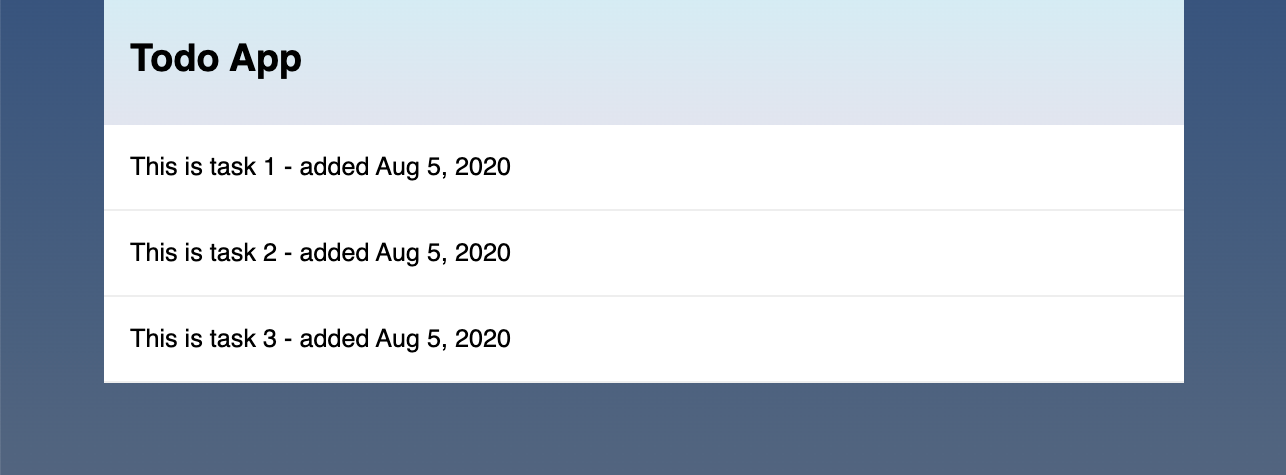
-
Create a top-level project directory named
imports. -
Create the file
imports/tasks.jscontaining the following which will create a MongoDB collection named "tasks":import {Mongo} from 'meteor/mongo'; export const Tasks = new Mongo.Collection('tasks'); -
Add the following import near the top of
server/main.js.import '../imports/tasks.js'; -
Add the following import near the top of
client/App.svelte:import {Tasks} from '../imports/tasks.js'; -
Replace the
getTasksfunction inclient/App.sveltewith the following in order to get tasks from MongoDB:const query = {}; const projection = {sort: {createdAt: -1}}; // newest first // This is a MongoDB cursor which is also a Svelte store. $: tasks = Tasks.find(query, projection); -
Replace the call to
getTasks()inclient/App.sveltewith$tasks.This is a reference to a Svelte store that is kept in sync with the MongoDB "tasks" collection. The UI will no longer display any tasks because this collection does not yet contain any tasks.
-
Insert some tasks using the MongoDB console by entering the following:
meteor mongo
db.tasks.insert({ text: "buy milk" })
db.tasks.insert({ text: "take out trash" })
Note that the UI updates automatically to show these new tasks.
-
Enable adding tasks in the UI.
-
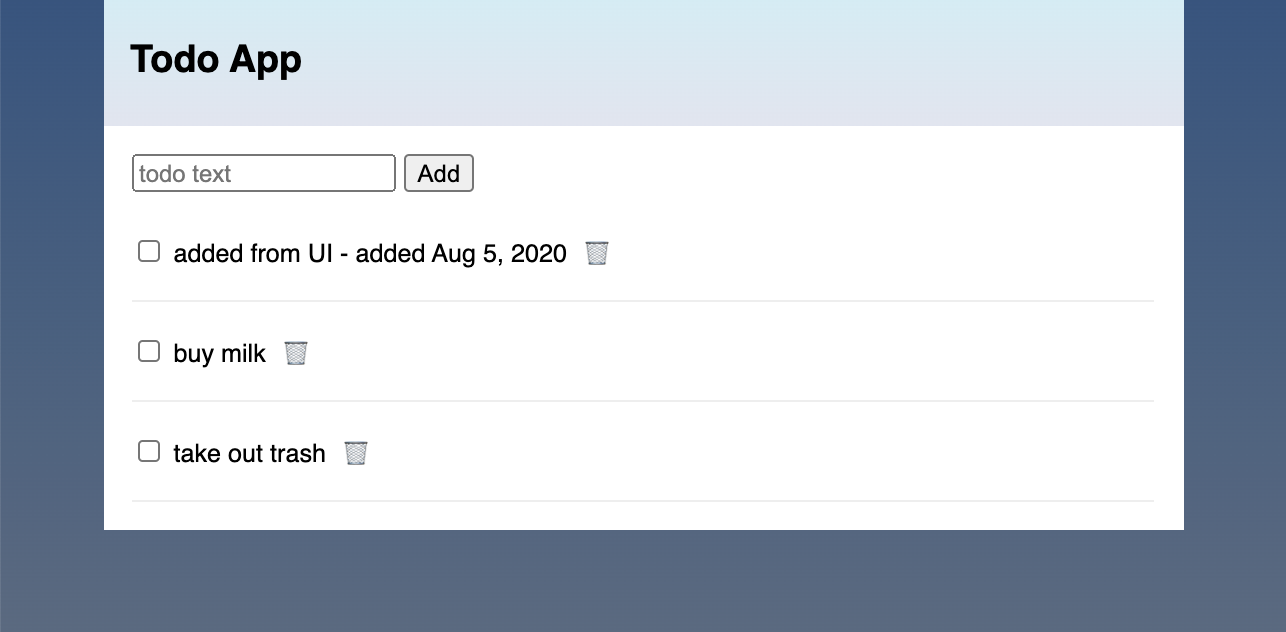
Add the following inside the
scriptelement inclient/App.svelte:let text = ''; function addTask() { Tasks.insert({text, createdAt: new Date()}); text = ''; } -
Add the following in
client/App.svelteas the first child of thesectionelement to prepare for adding tasks in the UI:<form on:submit|preventDefault="{addTask}"> <input placeholder="todo text" bind:value="{text}" /> <button>Add</button> </form> -
Add the following after the HTML in
client/App.svelte:<style> form { margin-top: 0; padding-bottom: 1rem; } section { padding: 1rem; } </style>
Now new tasks can be added by entering text in the input and either pressing the "Add" button or pressing the return key.

-
-
Note how Meteor keeps all clients in sync.
To see this, open a second web browser or another window in the same web browser and browse localhost:3000. Add a task in either browser window and notice that it appears in both.
-
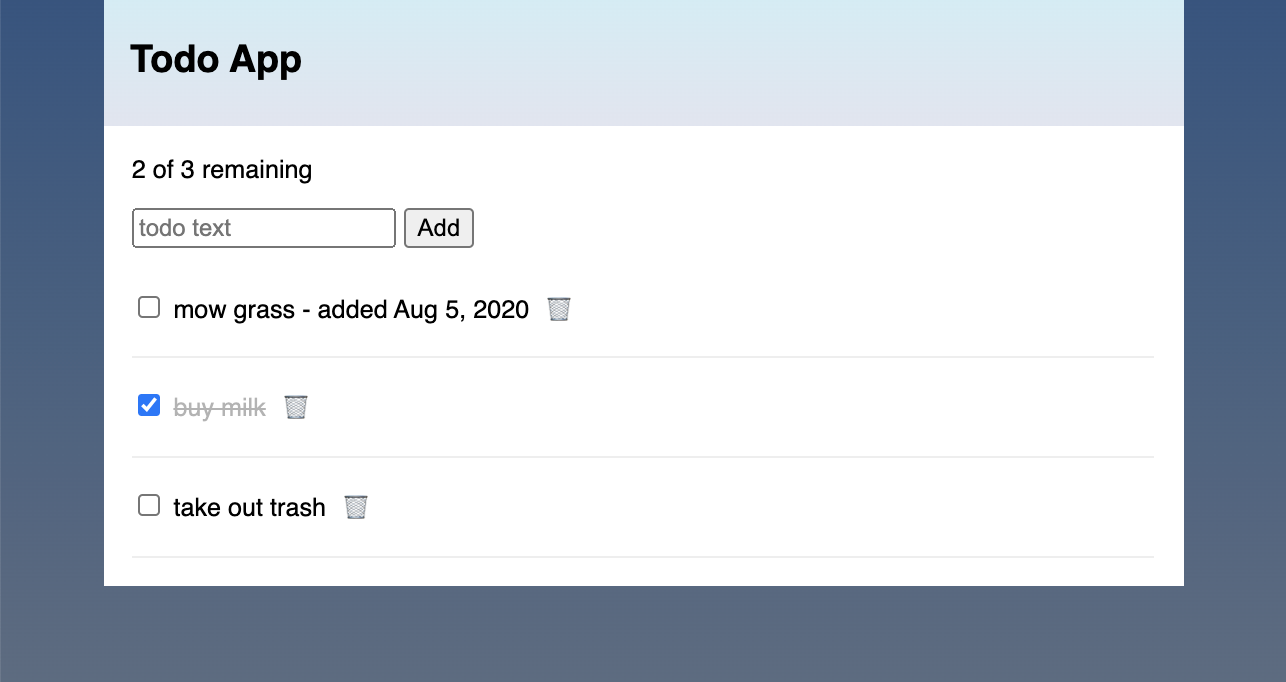
Add the ability to mark tasks as done and delete them by changing
client/Task.svelteto match the following:<script> import {Tasks} from '../imports/tasks.js'; export let task; function deleteTask() { Tasks.remove(task._id); } const formatDate = date => date.toLocaleDateString('en-us', { month: 'short', day: 'numeric', year: 'numeric' }); function toggleDone() { Tasks.update(task._id, {$set: {done: !task.done}}); } $: ({createdAt, text} = task); $: item = text + (createdAt ? ` - added ${formatDate(createdAt)}` : ''); </script> <li> <input type="checkbox" checked="{task.done}" on:click="{toggleDone}" /> <span class:done="{task.done}">{item}</span> <!-- using Unicode trash can --> <button on:click="{deleteTask}">🗑</button> </li> <style> button { background-color: transparent; border: none; } .done { opacity: 0.3; text-decoration: line-through; } li { padding-left: 0; } </style>Now tasks can be marked as done by clicking the checkbox in front of them and they can be deleted by clicking the trash can icon after them.
-
Show the number of remaining tasks and total tasks in the heading by making the following changes in
client/App.svelte:-
Add the following in the
scriptelement:$: remaining = $tasks.filter(t => !t.done).length; -
Add the following as the new first child of the
sectionelement:<p class="stats">{remaining} of {$tasks.length} remaining</p> -
Add the following inside the
styleelement:.stats { margin-top: 0; }
Now when tasks are added, toggled between done and not done, and deleted, the number of remaining tasks and total tasks is updated.
-
-
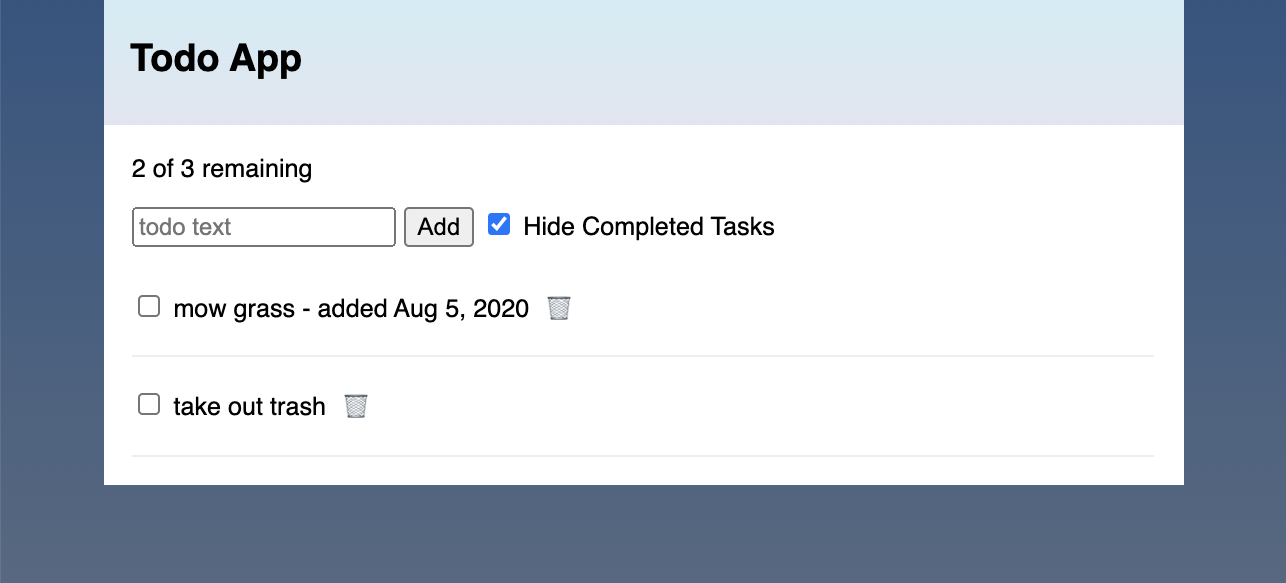
Add the ability to only display tasks that are not done by making the following changes in
client/App.svelte:-
Add the following variable declaration in the
scriptelement:let hideCompleted = false; -
Add the following inside the
formelement after the "Add" button:<label className="hide-completed"> <input type="checkbox" bind:checked="{hideCompleted}" /> Hide Completed Tasks </label> -
Change the content of the
{#each}block to the following:{#if !hideCompleted || !task.done} <Task {task} /> {/if}
Now when the "Hide Completed Tasks" checkbox is checked, only tasks that are not done are displayed.
-
-
Add support for user accounts by doing the following:
-
Add some Meteor packages by entering
meteor add accounts-ui accounts-password svelte:blaze-integration -
Create the file
client/accounts-config.jswith the following content:import {Accounts} from 'meteor/accounts-base'; // Email is needed for the next step. Accounts.ui.config({ passwordSignupFields: 'USERNAME_AND_EMAIL' }); -
Add the following near the top of
client/main.js:import './accounts-config.js';Alternatively, this can be imported from a
.sveltefile, perhaps the one that renders<BlazeTemplate template="loginButtons" />, which is described next. -
Modify the
client/App.sveltefile to match the following:<script> import {Meteor} from 'meteor/meteor'; import {useTracker} from 'meteor/rdb:svelte-meteor-data'; import {BlazeTemplate} from 'meteor/svelte:blaze-integration'; import {Tasks} from '../imports/tasks.js'; import Task from './Task.svelte'; let hideCompleted = false; let text = ''; let user; // user is a store $: user = useTracker(() => Meteor.user()); const query = {}; const projection = {sort: {createdAt: -1}}; // newest first // This is a MongoDB cursor which is also a Svelte store. $: tasks = Tasks.find(query, projection); $: remaining = $tasks.filter(t => !t.done).length; function addTask() { Tasks.insert({ text, createdAt: new Date(), owner: Meteor.userId(), username: $user.username }); text = ''; } </script> <div class="container"> <!-- This provides the UI for user account management. --> <BlazeTemplate template="loginButtons" /> <header> <h1>Todo App</h1> </header> <section> {#if $user} <p class="stats">{remaining} of {$tasks.length} remaining</p> <form on:submit|preventDefault="{addTask}"> <input placeholder="todo text" bind:value="{text}" /> <button>Add</button> <label className="hide-completed"> <input type="checkbox" bind:checked="{hideCompleted}" /> Hide Completed Tasks </label> </form> <ul> {#each $tasks as task} {#if !hideCompleted || !task.done} <Task {task} /> {/if} {/each} </ul> {:else} <p>Please sign in.</p> {/if} </section> </div> <style> form { margin-top: 0; padding-bottom: 1rem; } section { padding: 1rem; } .stats { margin-top: 0; } /* This is a way to define global styles from a Svelte component. */ :global(#login-buttons) { padding: 0.5rem; text-align: right; } :global(#login-buttons a) { text-decoration: none; } :global(#login-dropdown-list) { position: fixed; top: 50%; left: 50%; transform: translate(-50%, -50%); } </style>
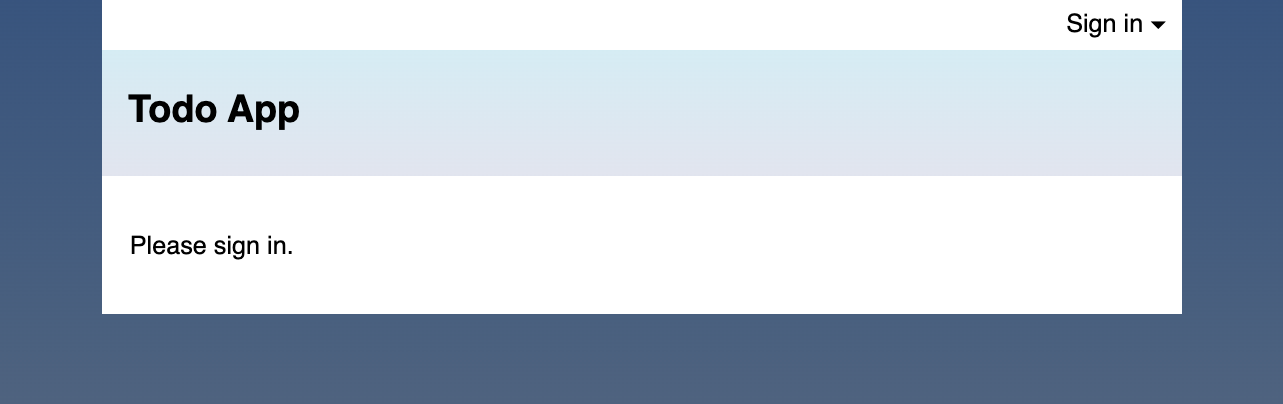
Now users must create an account and sign in before they can view, add, and modify tasks. Information about user accounts is stored in the MongoDB database "meteor" inside the collection "users".
Before a user signs in, they see a "Sign in" link in the upper-right.
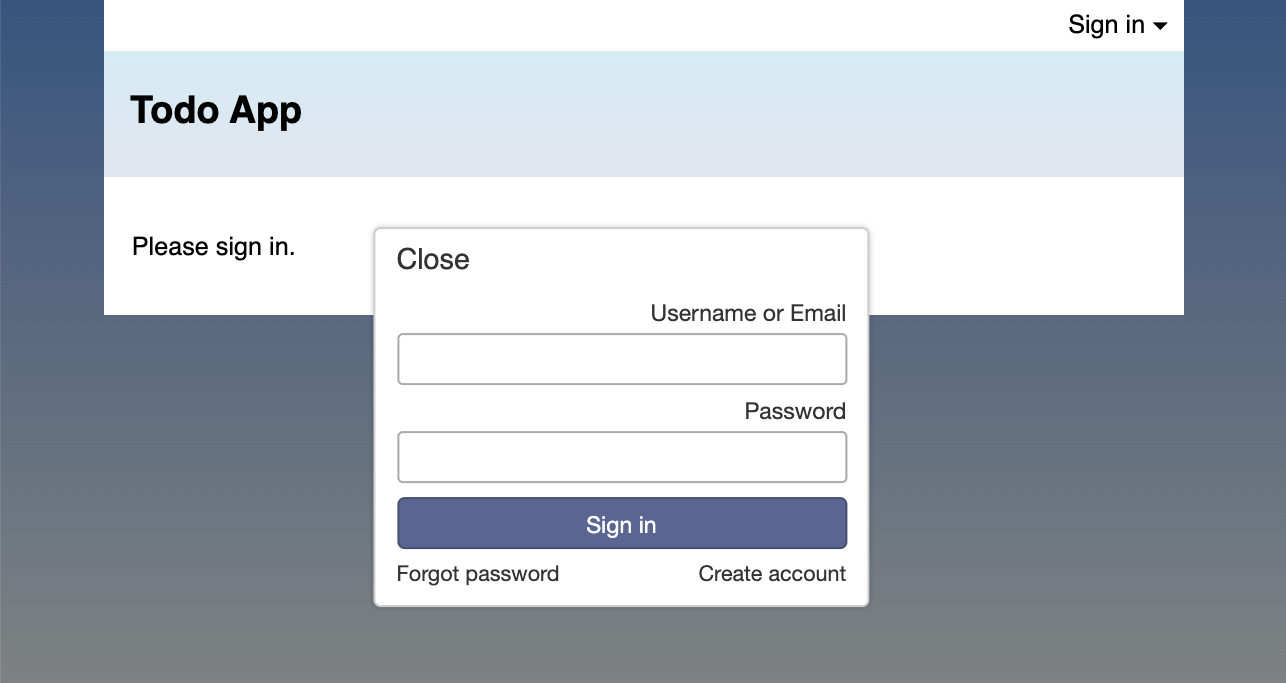
Clicking "Sign in" displays a dialog that contains a link to create an account.
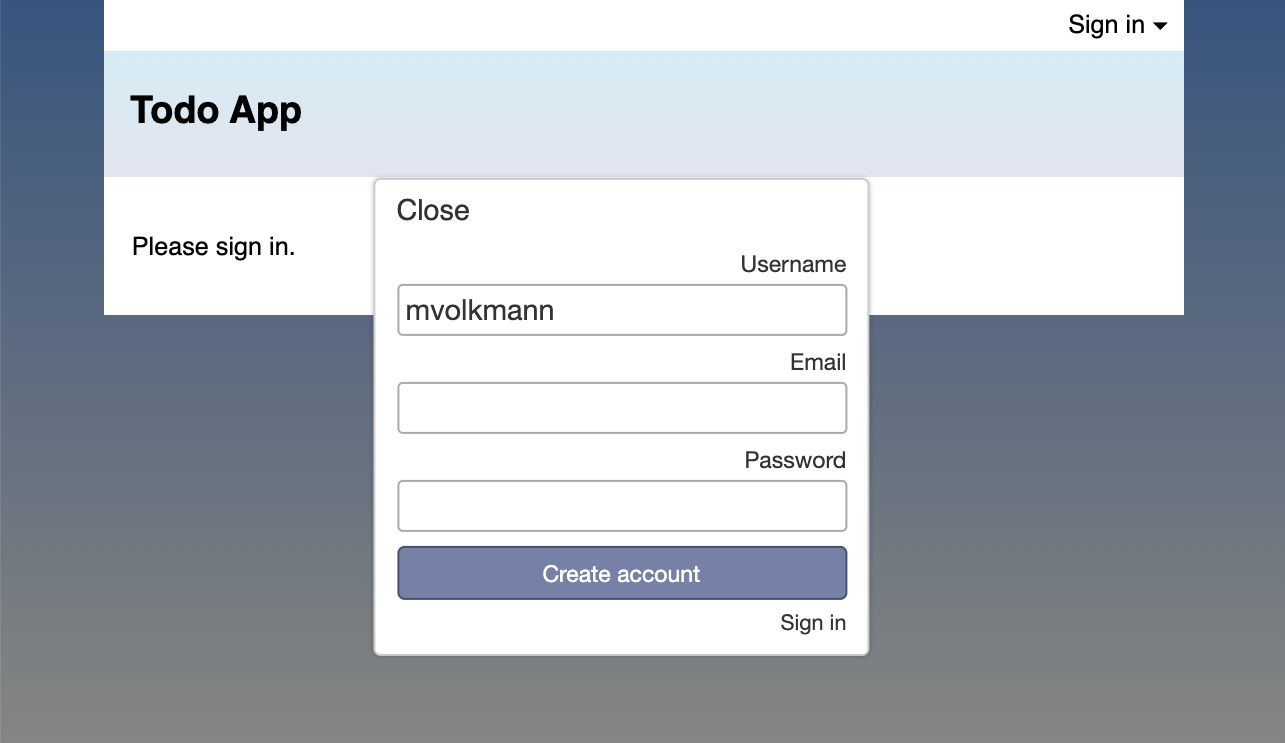
Clicking "Create account" changes the dialog to prompt for account information. By default, passwords must contain at least six characters, but there are no restrictions on the characters.
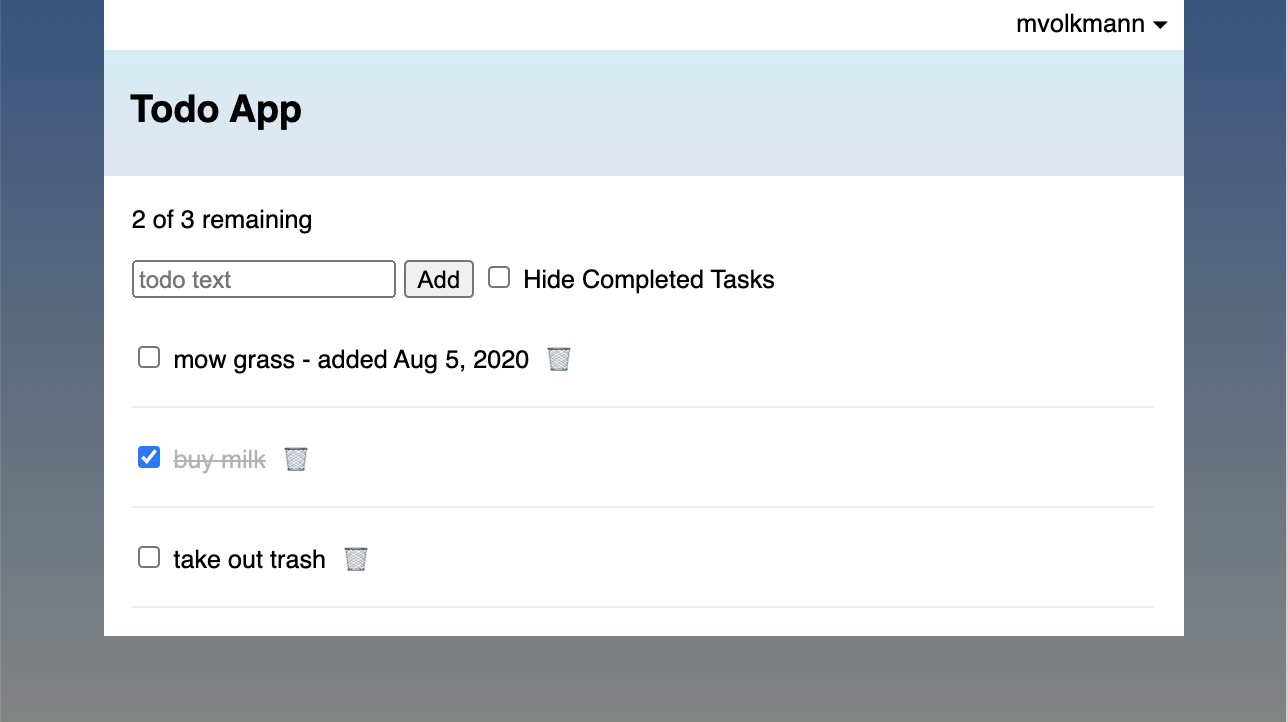
After creating an account, or entering a username and password for an existing account, the user is signed in and the "Sign in" link in the upper-right is replaced by their username.
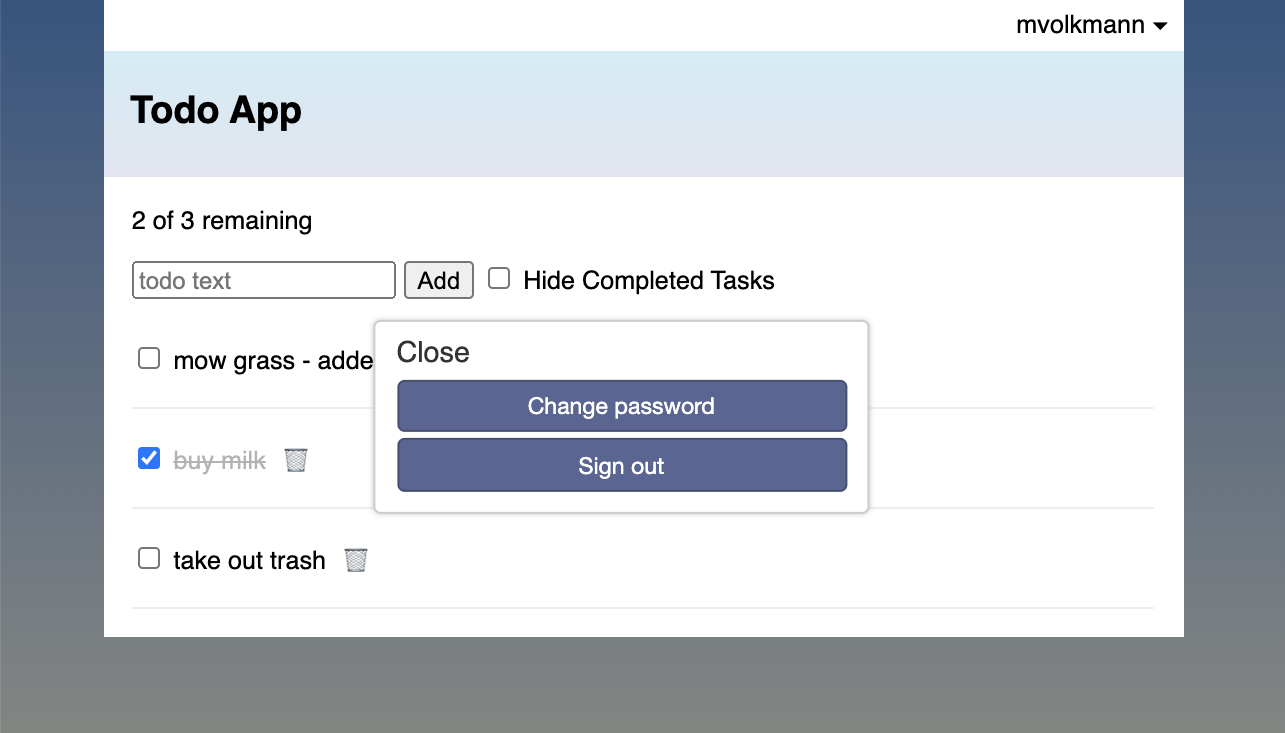
Clicking the username link in the upper-right presents a dialog for signing out or changing the password.
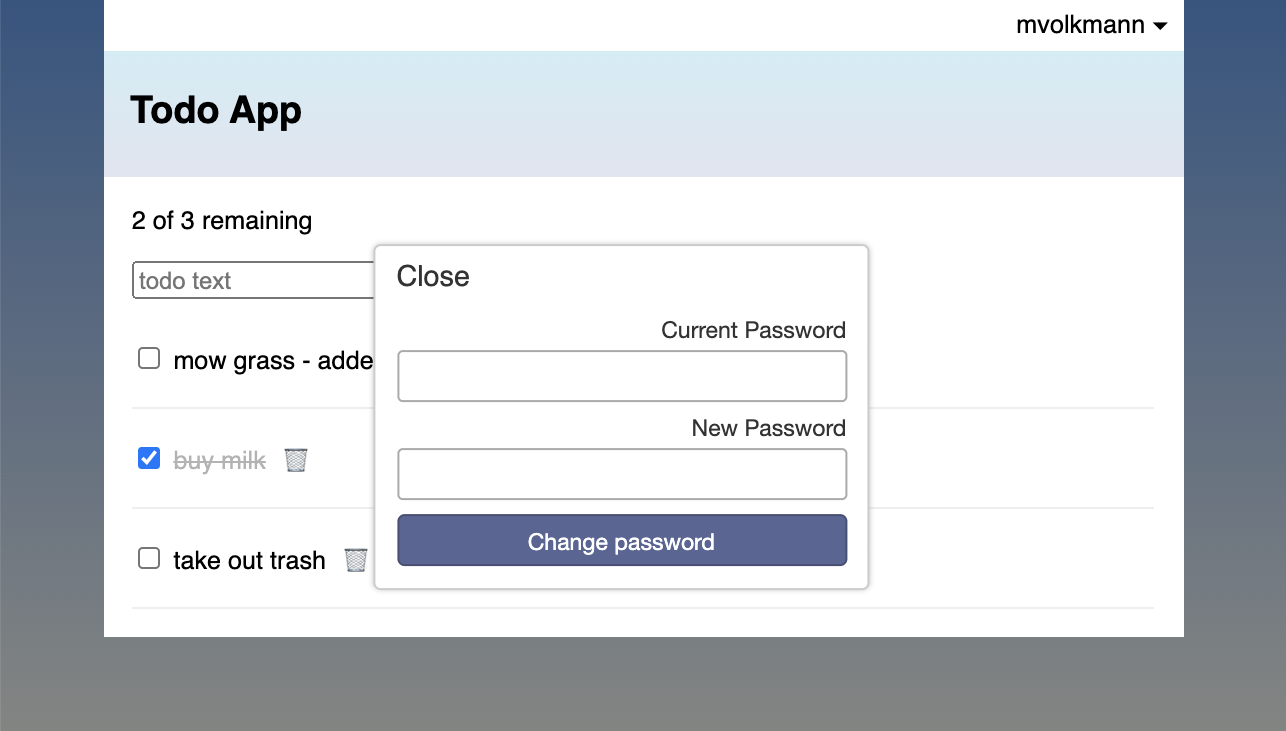
Clicking "Change password" changes the dialog to prompt for the current and new passwords.
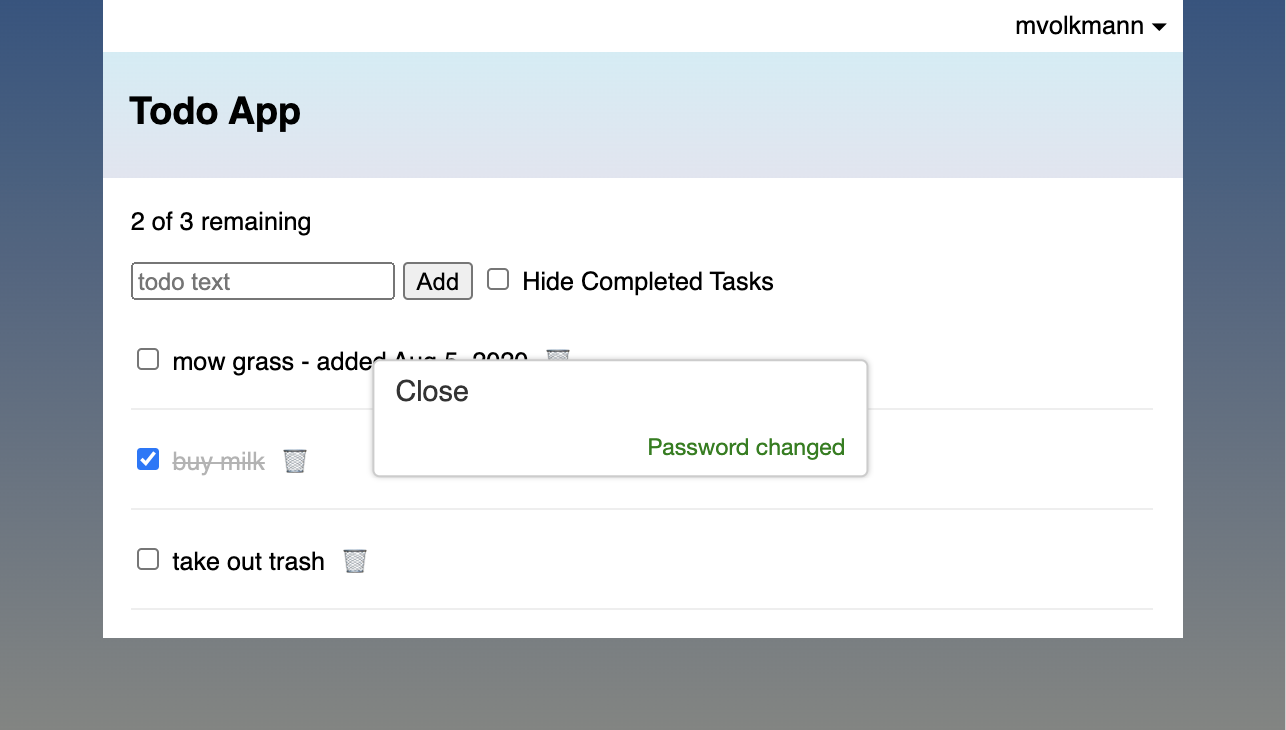
After successfully changing the password, the dialog changes to notify the user.
For more information on users and accounts features and ways to customize them, see here. This includes adding support for OAuth logins and changing password validation rules. To give users role-based permissions and per-document permissions, see here.
-
-
Add support for "forgot password" emails.
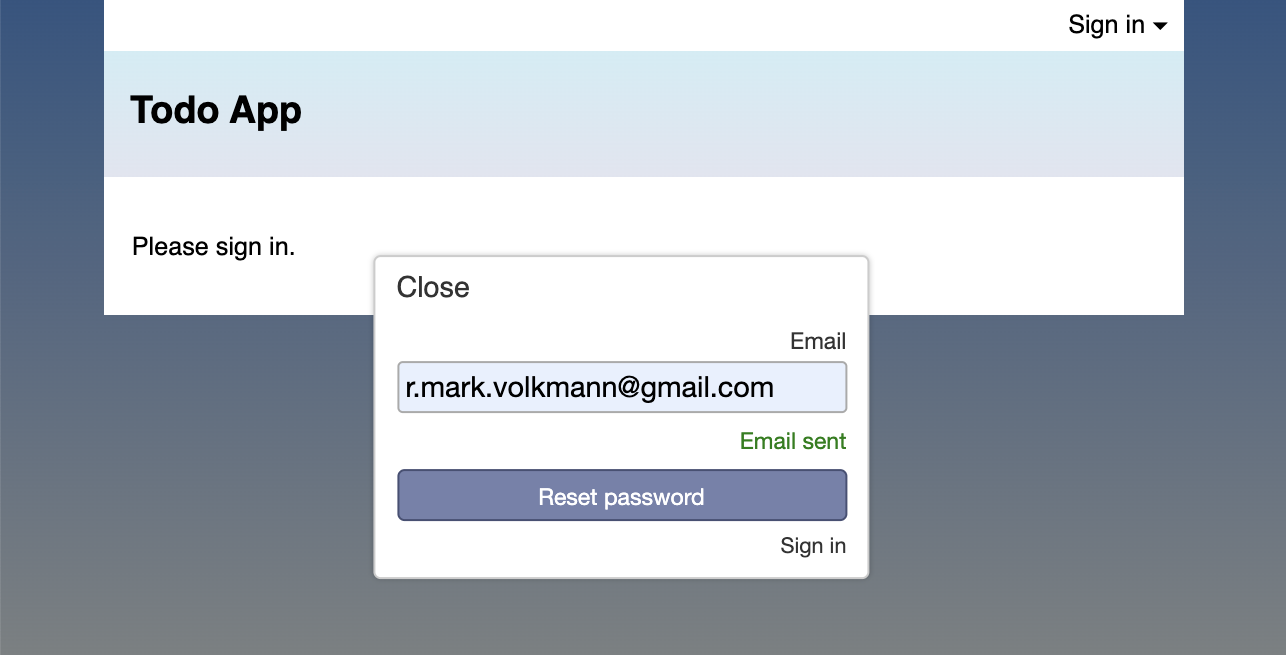
This will allow users to click the "Forgot password" link in the "Sign in" dialog which changes the dialog content to prompt for an email address. If a user account exists for the email address, an email is sent containing a link that the user can click to reset their password. After doing so they are immediately signed in.
-
Add another Meteor packages by entering
meteor add email -
Create the file
secrets.jsonin the project root directory with content like the following:{ "MAIL_NAME": "Your Name", "MAIL_USER": "some-user", "MAIL_PASSWORD": "some-password", "MAIL_USER_DOMAIN": "some-company.com", "MAIL_SERVER_DOMAIN": "smtp.gmail.com", "MAIL_SERVER_PORT": 587 }Note that the last two values above are specific to using a Google G Suite account for sending email. The values will differ if you are using a different email service. Another service to consider is MailChimp.
-
If you are saving the project in a Git repository, add
secrets.jsonto the.gitignorefile so it is not added to the repository for others to see. -
Create the file
server/accounts-setup.jswith the following content:import {Accounts} from 'meteor/accounts-base'; import secrets from '../secrets.json'; const siteName = 'Todos by Mark'; Accounts.emailTemplates.siteName = siteName; const from = `${secrets.MAIL_NAME}<${secrets.MAIL_USER}@${secrets.MAIL_USER_DOMAIN}>`; Accounts.emailTemplates.from = from; -
Modify the file
server/main.jsto match the following:import {Meteor} from 'meteor/meteor'; import '../imports/tasks.js'; import './accounts-setup.js'; import secrets from '../secrets.json'; Meteor.startup(() => { // code to run on server at startup process.env.MAIL_URL = 'smtp://' + secrets.MAIL_USER + '%40' + secrets.MAIL_USER_DOMAIN + ':' + secrets.MAIL_PASSWORD + '@' + secrets.MAIL_SERVER_DOMAIN + ':' + secrets.MAIL_SERVER_PORT; });
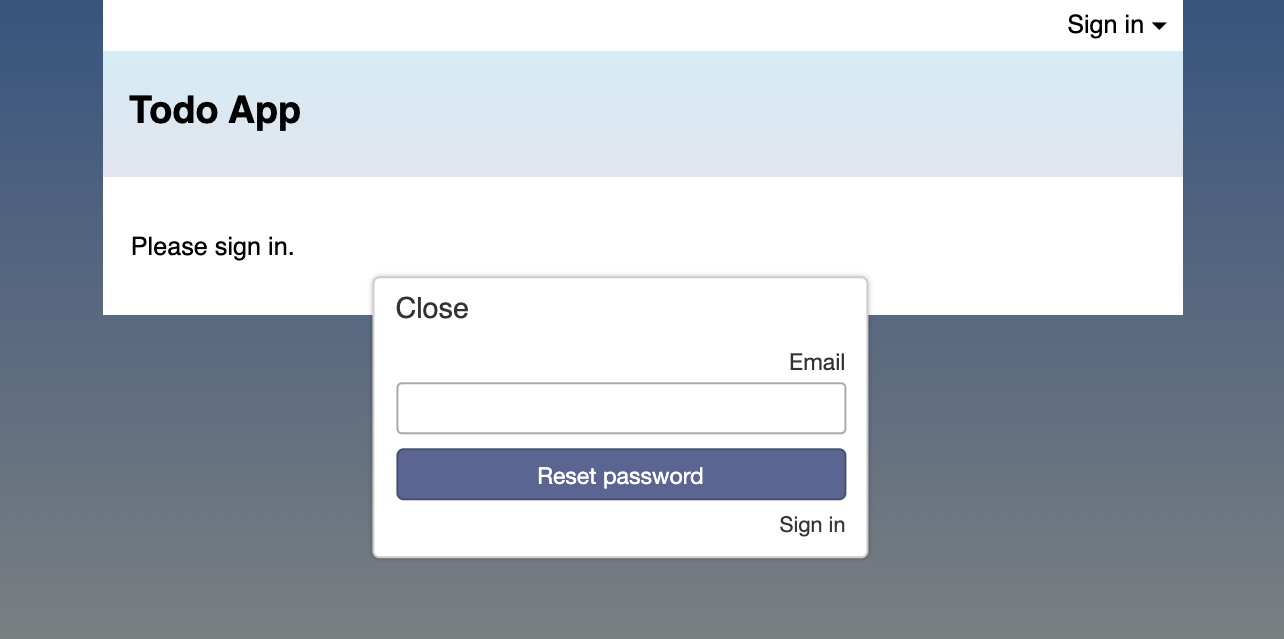
Now when a user clicks the "Forgot password" link in the sign in dialog, they can enter their email address and press the "Reset password" button.
When the email is sent, the dialog changes to include the text "Email sent".
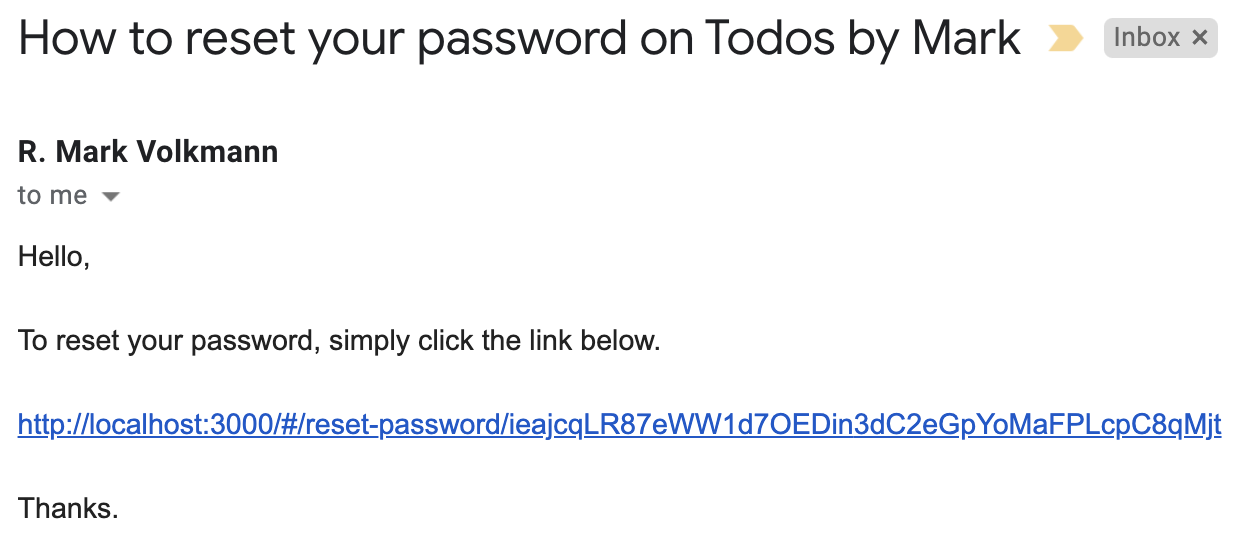
The user will receive an email like the following:
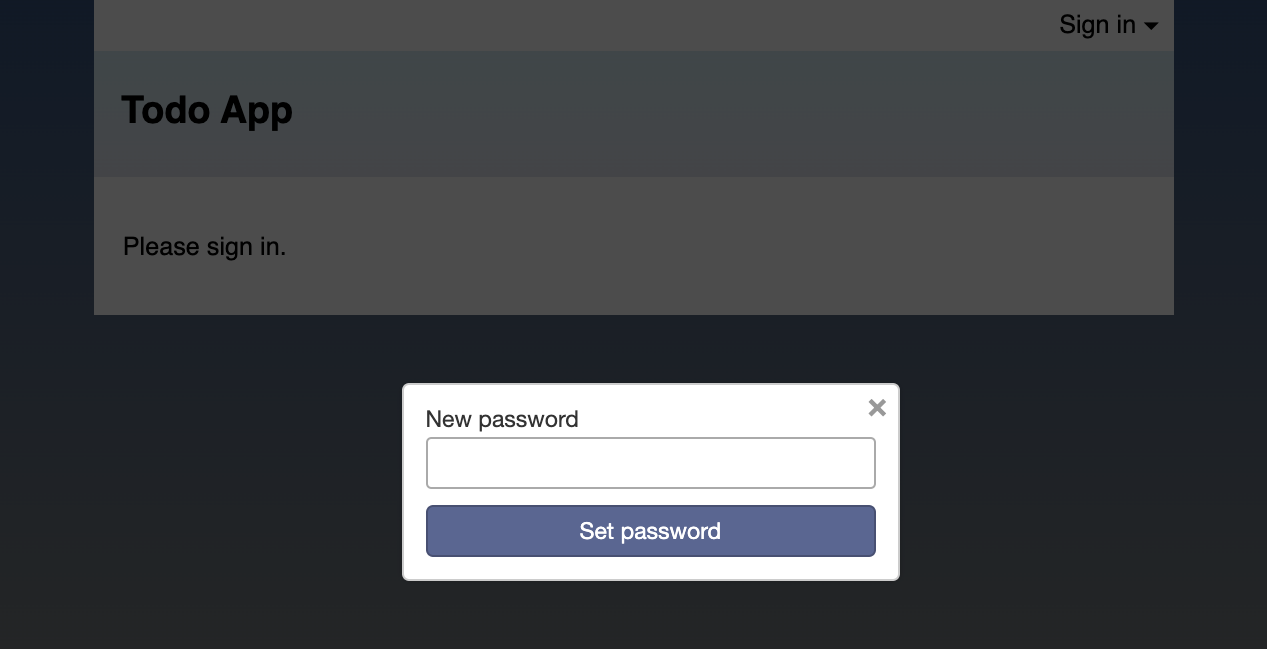
Clicking the link opens the app in a new browser tab and displays a dialog for resetting the password.
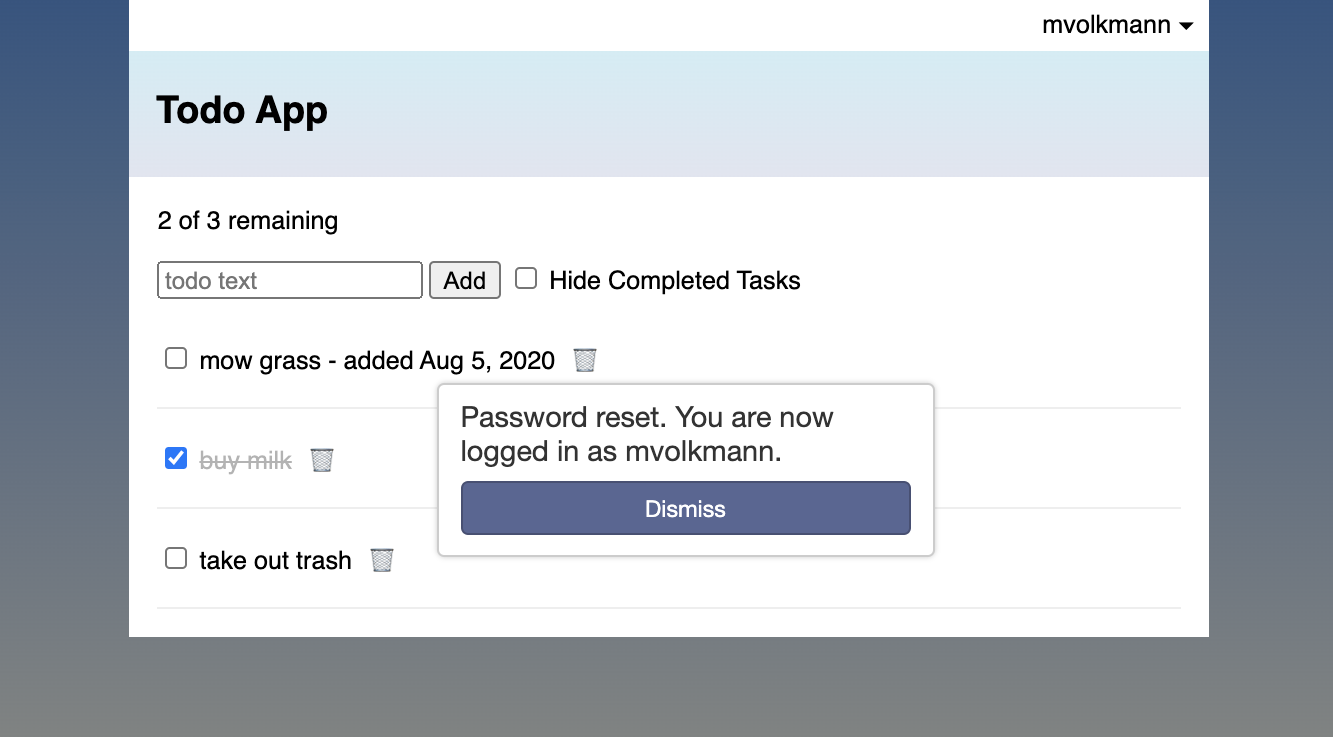
After entering a new password, the user is notified that it has been reset and that they are now logged in.
-
-
Make the app more secure by moving database interactions to the server.
This is accomplished by implementing Meteor Methods that are invoked by client-side code with calls to
Meteor.call(name, data, callback).-
Remove the Meteor package that allows client code to interact with MongoDB by entering
meteor remove insecure. -
Define Methods by modifying
imports/tasks.jsto match the following:import {check} from 'meteor/check'; import {Meteor} from 'meteor/meteor'; import {Mongo} from 'meteor/mongo'; export const Tasks = new Mongo.Collection('tasks'); Meteor.methods({ addTask(text) { check(text, String); // parameter type validation // Make sure the user is logged in before inserting a task. if (!this.userId) throw new Meteor.Error('addTask', 'not-authorized'); const {username} = Meteor.users.findOne(this.userId); const id = Tasks.insert({ text, createdAt: new Date(), owner: this.userId, username }); return id; }, deleteTask(taskId) { check(taskId, String); // parameter type validation Tasks.remove(taskId); }, setDone(taskId, done) { check(taskId, String); // parameter type validation check(done, Boolean); // parameter type validation Tasks.update(taskId, {$set: {done}}); } }); -
Create the file
client/util.jscontaining the following error handling function:export function handleError(err) { // Replace this will better error handling later. if (err) alert(err.message); } -
Add the following
importinclient/App.svelteandclient/Task.svelte:import {handleError} from './util.js'; -
Replace the call to
Tasks.insertin theaddTaskfunction ofclient/App.sveltewith the following:Meteor.call('addTask', text, handleError); -
Remove the import of
Tasksfromclient/Task.sveltesince it is no longer used and add the following import:import {Meteor} from 'meteor/meteor'; -
Replace the call to
Tasks.removein thedeleteTaskfunction ofclient/Task.sveltewith the following:Meteor.call('deleteTask', task._id, handleError); -
Replace the call to
Tasks.updatein thetoggleDonefunction ofclient/Task.sveltewith the following:Meteor.call('setDone', task._id, !task.done, handleError);
Nothing will change in the UI. But client-side code can no longer directly modify the MongoDB database.
-
-
Explicitly specify what data the server sends to the client so we can separate tasks by user.
Tasks for all users will still be stored in the same MongoDB collection, but each user will only see and operate on the tasks they add.
-
Remove the ability for the server to send any MongoDB content requested by clients. Currently the app includes the
autopublishpackage. It shares every collection and every document in them with every connected client. This is convenient for prototyping, but not desired for production.Enter
meteor remove autopublish. -
Publish only tasks that belong to the logged in user by adding the following in
imports/tasks.jsafter the line that starts withexport const Tasks.if (Meteor.isServer) { // This is only run on the server. // An arrow function cannot be used here // because we need to use the "this" keyword. // If no query is provided, the entire collection is published. // A second argument can be passed to the find method which is // an object where the keys are names of properties. // The values are booleans that either specify which properties // to include (true) or which to exclude (false), but not both. Meteor.publish('tasks', function () { return Tasks.find({owner: this.userId}); }); } -
Add the following
importinclient/App.svelte:import {onMount} from 'svelte'; -
Add the following in the
scriptelement ofclient/App.svelteto subscribe to all tasks that are published:// The name passed to subscribe must match a name passed to publish. onMount(() => Meteor.subscribe('tasks'));Additional arguments can be passed to
Meteor.subscribe. These are passed to the function that is passed toMeteor.publishin the server and it can uses them to decide which documents to publish. This is useful to limit the amount of data that is copied into Minimongo on the client.The
Meteor.subscribemethod returns an object that can be captured in a variable. It has three properties.stopis a method that can be called to cancel the subscription. Typically the subscription is retained for the duration of the session.readyis a method returns the booleantruewhen the server has completed the initial publication of data.subscriptionIdis a unique id for the subscription that is not typically needed.
Now users only see and operate on their own tasks.
-
-
Require account email validation before users can view and operate on their tasks.
-
Add the following at the bottom of
server/accounts-setup.js:Accounts.onLogin(({user}) => { const [email] = user.emails; if (!email.verified) { Accounts.sendVerificationEmail(user._id, email.address); } }); Accounts.emailTemplates.verifyEmail = { subject() { return `Activate your ${siteName} account.`; }, text(user, url) { return ( `Hey ${user.username}, click the following link ` + `to verify your email address: ${url}.` ); } }; -
Determine if the logged in user has a verified email address by adding the following in
client/App.svelteafter the$: user =line:$: emailVerified = $user && $user.emails[0].verified; -
Change
{#if $user}to{#if $user && emailVerified} -
Add the following before the
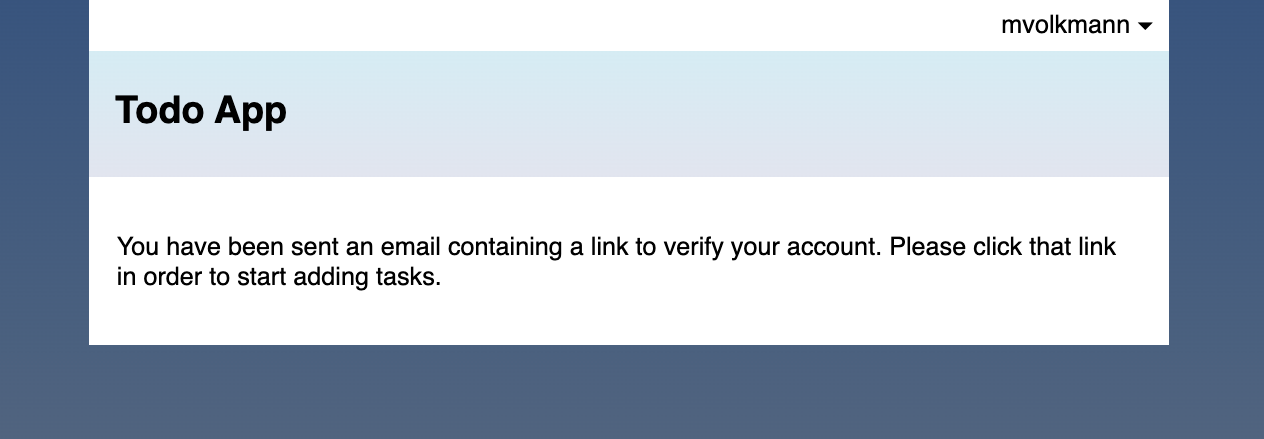
{:else}line:{:else if $user && !emailVerified} <p> You have been sent an email containing a link to verify your account. Please click that link in order to start adding tasks. </p>
Now after a user creates a new account, they will see the following:
The user must must verify their email address by clicking a link in an email they receive like the following before they can start adding tasks.

Clicking the link in the email opens a browser tab containing the following:
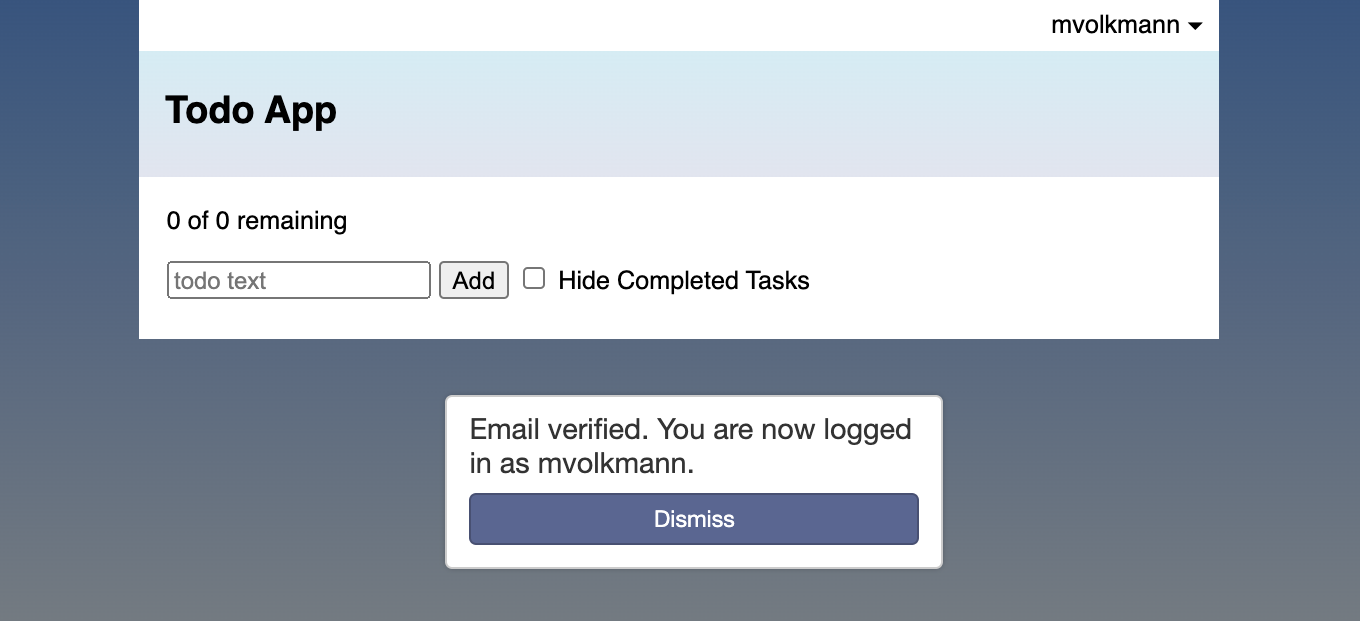
The user can dismiss the dialog and proceed with using the app.
-
That's it! We now have a functioning Todo app that supports user accounts and tasks are persisted in a database. I can't imagine doing all of this in less code using anything other than Meteor!
Routing
For apps that need client-side page routing there are two popular libraries:
- FlowRouter (with flow-router-extra) - recommended by the Meteor Guide
- Iron.Router
Typically these are used with the Blaze framework. When using a different web framework such a Svelte or React, routing approaches for those can be used instead.
Meteor Shell
The meteor shell command launches a REPL that is used to
examine and interact with the server side of a Meteor app.
TODO: How is it used?
Building and Deploying
Now that we have our app running locally, we are ready to deploy it to a server so real users can access it.
MongoDB Hosting
If your Meteor app uses MongoDB, and most do, the first step is to select a hosting platform. One option is MongoDB Atlas. Another option is mLab.
MongoDB Atlas has an endless free tier referred to as "Shared Clusters" that does not provide backup.
To configure MongoDB Atlas:
- Browse here.
- Choose between AWS, GCP, and Azure for the cloud provider.
- Create a cluster.
- In the left nav. under "SECURITY", click "Database Access" and press "Add New Database User".
- Optionally change the default username and password.
- Select "Database User Privileges" from the drop-down. You will likely want "Read and write to any database".
- Press "Add User".
- In the left nav. under "SECURITY", click "Network Access" and press "ADD IP ADDRESS".
- Enter IP addresses that should have access. You will likely want to add the IP address of your machine AND the IP address of your cloud or Galaxy server.
To view databases and collections:
- In the left nav. under "DATA STORAGE", click "Clusters".
- Press "COLLECTIONS".
- Select a database names to see the collections in it.
- Select a collection name to see the documents in it.
- Hover over a document and click the pencil icon to modify the document. Press the "UPDATE" button when finished. It can take about five seconds for Meteor apps that use the document to update.
- Hover over a document and click the trash can icon to delete the document.
To connect from the mongo shell:
- In the left nav. under "DATA STORAGE", click "Clusters".
- Press "CONNECT".
- Click "Connect with the mongo shell".
- If you do not already have the mongo shell installed, click "I do not have the mongo shell installed" and follow the platform-specific instructions to install it.
- Otherwise, click "I have the mongo shell installed".
- Press "Copy" after the supplied connection string.
- Open a terminal window.
- Paste the connection string.
- Replace "
" with the name of an existing database and press return. - Enter the password.
- Enter "show collections" to list the collections within the database.
To connect from the MongoDB Compass app:
- In the left nav. under "DATA STORAGE", click "Clusters".
- Press "CONNECT".
- Click "Connect using MongoDB Compass".
- If you do not already have MongoDB Compass installed, click "I do not have MongoDB Compass" and follow the platform-specific instructions to install it.
- Otherwise, click "I have MongoDB Compass".
- Press "Copy" after the supplied connection string.
- Open the MongoDB Compass app.
- Paste the connection string.
- Replace "
" with the password and press "CONNECT". - Click a database name to see the collections inside it.
For more detail on using MongoDB Atlas with Meteor, see https://medium.com/@cfnelson/mongodb-atlas-with-meteor-a-step-by-step-guide-da34093665f4.
Configuring a Cloud Server
There are many options to choose from including AWS, Google Cloud Platform (GCP), and Azure.
An option that is fairly simple with a low cost is DigitalOcean.
You will want to associate a domain name with your DigitalOcean server so you can enable SSL encryption later. There are many domain registrars to choose from. A popular, low cost option is hover.com. You can also get a free domain name from freenom.com.
To associate a domain name with a DigitalOcean project, browse cloud.digitalocean.com, sign in, click "Networking" in the left nav., enter a domain for a project, and press "Add Domain". Then under "Create new record", select "A", enter "@" for "HOSTNAME", enter your DigitalOcean server IP address for "WILL DIRECT TO", and press "Create Record". Repeat this using "www" instead of "@" for "HOSTNAME". You can also create A records from the domain registrar site such as Hover.
After ssh'ing to your instance for the first time,
it is helping to edit your .bashrc file.
Some things you may want to add include:
# Make it easier to clear the screen.
alias cls='clear'

# Ask for confirmation before overwriting or deleting files.
alias cp="cp -i"
alias mv="mv -i"
alias rm="rm -i"

# Make the delete key work.
export TERM=xterm-256color

# Set environment variables that the Meteor server will need.
export MONGO_URL='{your-mongodb-url}'
export ROOT_URL=https://{ip-address-of-this-server}:{port-of-meteor-server}
To find processes that are listening on ports, enter netstat -tulpn.
My DigitalOcean server has nginx listening on port 80
and node listening on port 3000.
A different port can be used for the Meteor server.
To enable accessing you MongoDB Atlas server:
- Browse cloud.mongodb.com and log in.
- In the left nav. under "SECURITY", click "Network Access".
- Press "ADD IP ADDRESS".
- Add the IP address of your cloud server.
TODO: mup works now! Try to get it to use HTTPS! TODO: Get Galaxy to work. TODO: Get manual deploy to work.
Enabling HTTPS
To determine the version of Ubuntu you are using, enter lsb_release -a.
For me this is 20.04.
DigitalOcean provides an nginx proxy that is started by default.
To enable nginx to act as a proxy for a server that listens on a particular port:
-
Enter
sudo touch /etc/nginx/conf.d/sysmon.conf -
Enter
sudo vim /etc/nginx/conf.d/sysmon.conf -
Add the following:
server { listen 1919; # node port server_name sysmon.{your-domain}; location / { proxy_set_header X-Forwarded-For $remote_addr; proxy_set_header Host $http_host; proxy_pass http://{node-ip}:{node-port}; } } -
Enter
sudo systemctl restart nginx -
Now you should be able to browse https://{your-domain}:{node-port}
-
TODO: THIS DID NOT WORK! There is a probably a conflict with
/etc/nginx/sites-available/{your-domain}below.
Setup nginx "server blocks" by following the steps here which are summaries below:
-
Enter
sudo mkdir -p /var/www/{your-domain}/html -
Enter
sudo chown -R $USER:$USER /var/www/{your-domain}/html -
Enter
sudo chmod -R 755 /var/www/{your-domain} -
Enter
vim /var/www/{your-domain}/html/index.html -
Add content like the following for testing your site:
<html> <head> <title>Welcome to {your-site}!</title> </head> <body> <h1>Success, the {your-site} server block is working!</h1> </body> </html> -
Enter
sudo vim /etc/nginx/sites-available/{your-domain} -
Add content like the following to serve your site:
server { listen 80; listen [::]:80; root /var/www/your_domain/html; index index.html index.htm index.nginx-debian.html; server_name your_domain www.your_domain; location / { try_files $uri $uri/ =404; } } -
Enter
sudo ln -s /etc/nginx/sites-available/{your-domain} /etc/nginx/sites-enabled/ -
Enter
sudo vim /etc/nginx/nginx.conf -
Uncomment the line
server_names_hash_bucket_size 64; -
Enter
sudo nginx -tto verify that there are no syntax errors in the edited files. -
Enter
sudo systemctl restart nginxto restart nginx. -
Browse http://{your-domain} to verify that nginx can server the earlier HTML.
Enable SSL by following the steps here. These instructions specific to Ubuntu version 20.04. It uses a "certbot" which will automatically renew the certificate before it expires.
- Enter
sudo apt install python3-certbot-nginx - Enter
sudo ufw statusto see that network traffic is currently allowed. - If "Nginx FULL" is not set to "ALLOW" ...
- Enter
sudo ufw allow 'Nginx Full' - Enter
sudo ufw delete allow 'Nginx HTTP'because it is implied byNginx Full.
- Enter
- Enter
cdto change to your home directory. - Enter
sudo certbot --nginx -d {your-site} -d www.{your-site}to obtain an SSL certificate. You will be prompted to enter your email, agree to the LetsEncrypt terms of service, optionally receive email from the Electronic Freedom Foundation, and whether HTTP requests should be redirected to HTTPS.
Your certificate and chain are saved at
/etc/letsencrypt/live/{your-site}/fullchain.pem.
Your key file is saved at /etc/letsencrypt/live/mvolkmann.site/privkey.pem.
Normally your cert will expire in three months any you need to obtain a
new version by running the certbot command again with the --certonly option.
You can also non-interactively renew all of your certificates
by entering certbot renew.
But certbot makes this unnecessary and will automatically renew your cert.
Make a backup of the /etc/letsencrypt directory.
You can now browse https://{your-domain}.
Manual Deploy
To build a Meteor app for deployment:
- cd to the root project directory.
- You may need to enter
meteor remove-platform iosbefore running the next command. - Enter
meteor build {dir-name} --architecture {a-name}where{a-name}is replaced by the target architecture such asos.linux.x86_64.
This creates the specified directory if it doesn't exist and creates
a TAR file named {project-name}.tar.gz inside it.
The TAR file contains a single directory named bundle which contains
all the files for the client-side and server-side of the application.
For help on the build command, enter meteor help build.
To deploy the app:
- Copy the TAR file to a server, perhaps using the
scpcommand. For example,scp {project-name}.tar.gz root@{server-ip-address}:. - Start a terminal session on the server using the
sshcommand. For example,ssh root@{server-ip-address}. (I store the IP address and password in 1Password.) - Verify that a recent version of Node.js is installed
by entering
node -v. - Create a directory to receive the contents of the tar file
by entering
mkdir {project-name} - Un-tar the file by entering
tar zxf {project-name}.tar.gz -C {project-name} - Enter
cd {project-name}/bundle/programs/server - Enter
npm install - Enter
cd ../.. - Set the
MONGO_URLenvironment variable to your MongoDB server URL. For example,mongodb+srv://{username}:{password}@{mongo-host}/meteor - Set the
ROOT_URLenvironment variable to your HTTP server URL. For example,http://{server-ip-address}:{server-port}For example,http://{server-ip-address}:4000 - Expose the port that will be used.
With DigitalOcean this is done by entering
sudo ufw allow {port}/tcp. Meteor uses port 3000 by default, but my DigitalOcean instance has an HTTP server that is always listening on that port, so choose another such as 4000. - Enter
node main.jsto start the server. TODO: Do you need to do something to tell it to use port 4000 TODO: or does it get that from the ROOT_URL environment variable?
This gives the error MongoNetworkError: failed to connect to server [cluster0-shard-00-00.tqq7g.mongodb.net:27017] on first connect [MongoNetworkError: connection 5 to cluster0-shard-00-00.tqq7g.mongodb.net:27017 closed
Other alternatives for deploying Meteor apps include
Galaxy (here)
and Meteor Up (here).
Meteor Up, a.k.a mup, can be used to deploy a Meteor app
to any server to which you can ssh.
Meteor Up (mup)
Meteor Up uses Docker to deploy Meteor apps.
The steps to deploy a Meteor app using Meteor Up are:
- Enter
npm install -g mup - cd to the root project directory.
- Enter
mup initto create the filesmup.jsonandsettings.jsonin the./deploydirectory. - Add
.deploy/mup.jsand.deploy/settings.jsonto.gitignore. - Edit
.deploy/mup.js.- Set
servers.one.hostto the IP address of the server. - Set
servers.one.usernameto an account username, possibly'root'. - Set
servers.one.passwordto an account password. - Set
app.nameto the app name. If you change this value later, you will have to ssh to the server, rundocker psto find the container started for the old name, and stop it withdocker stop {container-id}before you can runmup deployagain. - Set
app.pathto'../' - Set
app.env.ROOT_URLto the app URL. For example,'https://{server-ip-address}:{server-port}'or'https://{domain-name}:{server-port}' - Set
app.env.PORTto the value ofserver-port. The deploy will fail if this port is already in use. Before redeploying the app, kill the existing process that is listening on this port. Also kill the process for MongoDB listening on port 27017. - Set
app.env.MONGO_URLto the URL of your MongoDB server. - To enable SSL:
- See How to Secure Nginx
- This requires a domain name, not just an ip address.
- Set
proxy.domainsto'https://{server-ip-address}:80', // nginx proxy - Set
proxy.ssl.forceSSLtotrue. - Set
proxy.ssl.letsEncryptEmailto'email@domain.com'.
- Delete the top-level
mongoproperty.
- Set
- Enter
cd .deploy - Enter
mup setup - If you get the error "endpoint mup-nginx-proxy not found",
this is not your first time running
mupfor this project, and you have made certain changes to yourmup.jsfile, you may need to entermup stopandmup reconfiginstead ofmup setup. - Enter
mup deploy(This works in Node 12, but may not yet work in newer versions.)
If the last step is successful, browse the URL in app.env.ROOT_URL.
This defaults to use a MongoDB database named "test", not "meteor".
Galaxy
Galaxy provides a free, one-month trial.
Galaxy does not provided MongoDB hosting.
To use Galaxy:
-
Browse galaxy.meteor.com
-
Press "SIGN IN WITH METEOR" and authenticate.
-
Create a free trial account
-
Choose a region (ex. "US-East-1")
-
Open a terminal window and cd to the root project directory.
-
Create the file
settings.jsoncontaining the following:{ "galaxy.meteor.com": { "env": { "MONGO_URL": "mongodb+srv://{username}:{password}@{mongo-host}/meteor", "MAIL_URL": "smtp://volkmannm@objectcomputing.com:$&oBDvwWTTms9d6dxYDG@smtp.gmail.com:587" } } } -
Add
settings.jsonto.gitignore. -
Enter
DEPLOY_HOSTNAME=us-east-1.galaxy-deploy.meteor.com \meteor deploy {hostname} --settings settings.jsonwhere{hostname}can be "{username}.meteorapp.com".
This will output the following:
Talking to Galaxy servers at {some-url}
Preparing to deploy your app...
Uploaded app bundle to upgrade {username}.meteorapp.com to version 3.
Galaxy is building the app into a native image.
Building app image...
Deploying app...
The last step will fail if it cannot connect to the MongoDB server. Note that Galaxy-provided servers have dynamic IP addresses. For this reason, the MongoDB server must accept requests from an IP address range, not specific IP addresses. The free tier of MongoDB Atlas does not support whitelisting IP address ranges, so upgrading to a paid tier is required to connect to it from a Galaxy server.
Creating Meteor Packages
Early in the "Meteor Packages" section we discussed Isopacks which are packages containing code that often can run on the client or server. You can create your own Isopacks. They can existing locally, only for use by your applications. You can also publish them so anyone can use them, similar to npm packages.
To create an Isopack:
- Register as a Meteor developer. Your username will be the prefix be used to identify packages you author.
- Enter
meteor create --package {your-prefix}:{package-name}
This creates a directory using the package name containing the filesREADME.md(empty),{package-name}.js,{package-name}-tests.js, andpackage.js. - Edit
{package-name}.jsto add functions. Keep the export of the constantname. Add exports of functions, classes, and other values. - Edit
{package-name}-test.jsto add tests for code in{package-name}.js.
Follow the naming convention used in the example test provided for the package name. Thetestobject passed to each test function supports the following methods for making assertions:equal,notEqual,instanceOf,isTrue,isFalse,isNull,isNotNull,isUndefined,isNan,matches, andlength. - Run tests by entering
meteor test-packages ./.
The names of tests run in the server are preceded by "S:". Those run in the client are preceded by "C:". - Browse localhost:3000 to see test results.
- Modify code until tests pass. Tests rerun automatically when changes are detected and browser refreshes.
- Create a Git repository for the package.
- Push the code to the Git repository.
- Modify
package.jsto set version and add summary and git URL. - Publish the package by entering
meteor publish --create.
It can take 5-10 minutes for the package to appear on atmosphere.js, but it should be found bymeteor searchimmediately. - To publish changes after the initial publish,
bump the version in
package.js, push changes to the Git repository, and entermeteor publish. These changes will appear on atmosphere.js immediately.
See the earlier "Meteor Packages" section for details on adding the use of packages to a project and importing values from them.
Building a Mobile App
- Create a new Meteor app following the steps described earlier.
- See http://guide.meteor.com/cordova.html#installing-prerequisites.
meteor add-platform androidmeteor add-platform iosmeteor run iosto run in a simulatormeteor run androidto run in a simulatormeteor run ios-deviceto run on an iOS devicemeteor run android-deviceto run on an Android device
Resources
- Meteor home page
- Meteor Guide
- Meteor API docs
- Awesome Meteor curated list of packages and libraries
- Atmosphere Meteor package repository
- Meteor Forum
- Stack Overflow