Morphic is a GUI framework that is included in popular Smalltalk images such as Squeak, Pharo, and Cuis. It defines user interfaces with “morphs” which are objects that know how to render themselves in the Smalltalk environment. They are what other graphical systems refer to as widgets or components.
For a great introduction to Morphic, see Holistic computing with Smalltalk and Morphic. Part 1.
Morphic 3 was developed by Juan Vuletich and is used in Cuis Smalltalk. It adds display resolution independence, float coordinates, modeling of coordinate systems as objects, alias free rendering based on signal processing theory, use of textures and photos, zoomable user interfaces (not tied to pixel density), and vector graphics.
Morphs
Any Morph be embedded in another.
These are referred to as “submorphs”.
However, not all morphs draw their submorphs.
Examples that do include WorldMorph and LayoutMorph.
TODO: How are the submorphs of a LayoutMorph drawn? TODO: I thought it would have a drawOn: method that sends #drawOn: TODO: to each submorph using the same canvas, but it doesn’t.
Each Morph holds a reference to its parent Morph
in its instance variable owner.
Those references can be followed all the way up to an instance of WorldMorph
whose owner is nil.
Each Morph stores its children (embedded) morphs
in its Array instance variable submorphs.
If there are no children, the value is an empty Array rather than nil.
Morphic uses the term “extent” to describe the width and height of a Morph.
It is represented by a Point object with
an x instance variable that holds the width and
a y instance variable that holds the height.
The location of a Morph is represented by
a MorphicTranslation or AffineTransformation object,
both of which are subclasses of GeometricTransformation.
Instances of MorphicTranslation have the properties deltaX and deltaY.
Instance of AffineTransformation hold matrix entries that specify
translation, scaling, and rotation in indexed properties.
Each Morph can store additional properties in its properties instance variable
which holds a reference to a Dictionary of key/value pairs.
Pluggable
Several of the Morph subclasses are “pluggable”. This means
they can be configured through composition rather than inheritance.
Configuration is achieved by specifying a model object and a selector
for messages to be sent to the model object when an interaction occurs.
An example is the PluggableButtonMorph class whose instances
can be created with the model:action:label: class method.
The model: keyword specifies a model object,
the action: keyword specifies a selector on the model object, and
the label: keyword specifies the text that will appear in the button.
Creating and Modifying Morphs
Only a small set of morphs are provided by default. The package UI-MetaProperties is a good source of additional morphs. To install it:
-
Clone the https://github.com/Cuis-Smalltalk/Cuis-Smalltalk-UI repository into the same directory as the Cuis-Smalltalk-Dev repository.
-
Open a Workspace.
-
Enter
Feature require: 'UI-MetaProperties'and “Do it”.This installs the following other packages that can also be installed individually:
- Complex
- UI-Color-Panel
- UI-Components
- UI-Layout-Panel
- UI-Packager
- UI-Shapes
-
The UI-Components package installed above installs the following other packages:
- UI-Click-Select
- UI-Core
- UI-DragAndDrop
- UI-Entry
- UI-Panel
- UI-Widgets
The set of “Basic” morphs will now include BorderedBoxMorph,
ColoredBoxMorph, EllipseMorph, FrameMorph, ImageMorph,
LabelMorph, LineMorph, and PointerLineMorph.
To create a Morph:
- Open the World menu.
- Select “New morph…”.
- In the dialog that appears, select a category of morphs
and then a specific kind (ex.
BorderedBoxMorph). - The
Morphwill appear attached to the cursor (uses theMorphmethodopenInHand). - Move the cursor to the location where the
Morphshould be placed and click to drop it.
To modify an existing Morph:
- cmd-click a
Morphto open its halo. - Click the orange Explore handle to open an Explorer OR Click the orange Debug handle and select “inspect morph” to open an Inspector.
- Send a message to
selfin the bottom pane of the Explorer or the Inspector to change a property of theMorph. For example,self color: Color red.
Alternatively, to modify a Morph from a Workspace:
- cmd-click a
Morphto open its halo. - Click the blue Menu handle on the top and select “copy to clipboard”.
- Open a Workspace window.
- Press cmd-v to paste the
Morphreference from the clipboard. - Send messages to the
Morphreference to modify it.
To change the colors used by a Morph from its halo:
- Ensure that the “UI-Color-Panel” package is installed (a dependency of the “UI-MetaProperties” package).
- cmd-click a
Morphto open its halo. - Click the blue menu button on the top and select “change color…”.
- A window titled “Click-Select a Color” will appear attached to the cursor.
- Position the window by moving the cursor and click to drop it.
- Click a color swatch.
- A menu will appear with the options “Cancel”,
“adoptWidgetsColor:”, “color:”, and “borderColor:”.
Select an option to change that color property of the
Morph. Some morphs don’t support all the options. For example, “color” of aLabelMorphcan be changed, but it does not have a border. TODO: What does “adoptWidgetsColor:” do?
To get the size of an instance of BoxMorph or one of its subclasses,
send it the #extentInWorld message.
To explicitly set the size of a Morph, send it:
#morphExtent:with aPointvalue that represents the new width and height. For example,morph morphExtent: 200 @ 100.#morphWidth:with aNumbervalue that represents the new width.#morphHeight:with aNumbervalue that represents the new height.
See my Morphic demos in package Volkmann
in the classes VButtonDemo and VGreet.
In a Workspace, enter VButtonDemo new or VGreet new and “Do it”.
Halo
A Morph halo is a set of circle buttons,
referred to as “handles”, that surround a Morph.
Each handle changes the Morph in some way or reveals information about it.
Hover over a handle to see a tooltip that describes its purpose.
To open the halo for a Morph,
cmd-click it in Cuis or option-click it in Squeak.
If the item is embedded in other morphs, repeat this multiple times
until a halo appears around the desired Morph.
The class of the Morph will be displayed at the bottom of the Morph.

The following buttons are provided:
| Button | Location | Tooltip | Purpose |
|---|---|---|---|
| red circle with white “x” | upper-left | Remove | removes the item |
| blue circle with white document | top | Menu | opens menu “A” (1) |
| black circle with house | top | Pick up | drag to move the item within its parent (2) |
| brown circle with resize icon | top | Move | drag to move the item out of its parent |
| green circle with copy icon | upper-right | Duplicate | drag to position a duplicate of the item |
| orange circle with wrench | right side | Debug | opens a menu of debugging options |
| blue circle with magnifier glass | right side | Change Scale | drag to change scale of item |
| yellow circle with resize icon | lower-right | Change Size | drag to resize the item |
| light blue circle with question mark | bottom | Help | click and hold to display a related tooltip (3) |
| blue circle with rotate icon | lower-left | Rotate | drag to rotate item (4) |
| dull yellow circle with odd shape | left side | Collapse | click to collapse (hide) the item (5) |
| orange circle with wrench | left side | Explore | opens an “Explore” window (6) |
A Morph can also be dragged directly without
opening its halo and using the drag buttons.
This only works if the area that is dragged
does not process mouse events.
For example, you cannot drag a Morph that contains a button
by dragging the button.
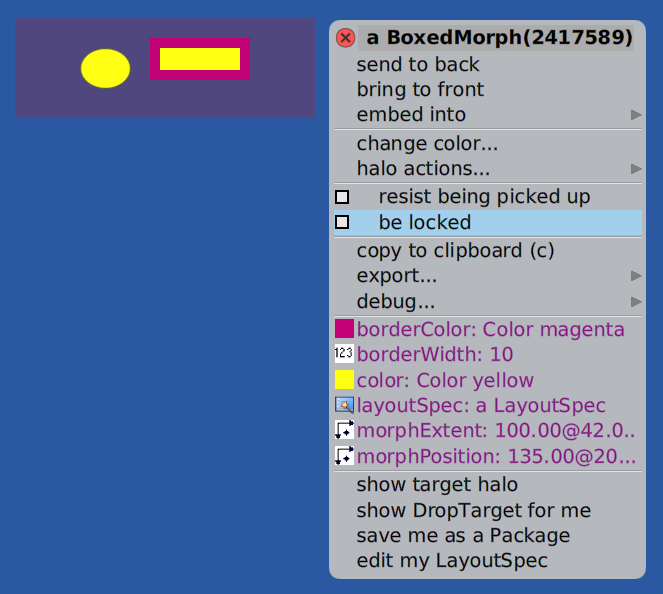
(1) This menu contains the following options:
- send to back
- bring to front
- embed into >
- change color…
- halo actions…
- checkbox for “resist being picked up”
- checkbox for “be locked”
- copy to clipboard
- export…
- debug…
It is often useful to click the red pin in the upper-right of the menu
so it remains open if you click outside it.
This enables dragging values onto it (such as color swatches)
to change the values of instance variables.
If you forget the Morph to which a pinned menu belongs,
click “show target halo” to open the halo of the Morph.
To change the value of an instance variable in the menu, such as
borderColor, click it and use the provided editor to change its value.
When changing a color, select a color palette and
drag a color swatch onto the instance variable.

Color swatches can be dragged from one menu to another to copy colors. Fonts can also be dragged from one menu to another to copy fonts.
(2) If the Morph is embedded in another Morph,
this changes the owner to world, which un-embeds it.
(3) It seems most of the help tooltips default to “Help not yet supplied”. To edit the help text, click the orange circle on the right, select “edit balloon help”, and modify the help text.
(4) To change the center of rotation of a Morph, click the “Explore” handle,
enter the following in the bottom pane, and “Do it”:
self setProperty: #rotationCenter toValue: newX @ newY.
(5) To restore a collapsed item, click it’s thumbnail in the bottom bar.
(6) “Explore” windows enable viewing data associated with an item
such as its location, extent (width and height), and color.
Send messages to self in the bottom pane to modify the Morph.
To add a method to the mo
For more detail, see A brief introduction to Inspectors.
Desktop Color
One way to change the desktop color is to:
- Right-click the desktop to open its halo.
- Click the blue menu button.
- Select “debug…inspect morph” to open an Inspect window.
- Click in the bottom pane of the Inspect window.
- Enter
self color: Color redor use some other color name. - “Do it”.
This works with all colors except transparent and alpha values are ignored.
Submorphs
All Morph instances have the instance variable submorphs
whose value is an array of child morphs.
The order of the morphs in the array indicates their stacking order
with the lower indexes rendered on top of higher indexes.
The following methods can be used to add a submorph to any morph:
| Method | Description |
|---|---|
addMorph: | delegates to addMorphFront: |
addMorph:behind: | adds immediately after a given child morph |
addMorph:inFrontOf: | adds immediately before a given child morph |
addMorph:position: | same as addMorphFront:position: |
addMorphBack: | adds to end |
addMorphBack:position: | adds at end AND sets x,y position |
addMorphFront: | adds to beginning |
addMorphFront:position: | adds at beginning AND sets x,y position |
addMorphFrontFromWorldPosition: | adds to beginning AND performs owner location transformations to compute the location of the morph being added |
NOTE: The addMorph:position: method should just delegate
to addMorphFront:position:, but doesn’t current do that.
Embedding
To embed a Morph into another (such as a LayoutMorph) so
they are treated as a single unit and can be positioned together:
- Drag a
Morphon top of its intended parentMorph. - Open the halo of the
Morph. - Click the blue Menu handle.
- Hover over “embed into” to display a popup containing
the names of every
Morphunder the one being embedded. Hover over each option to highlight the correspondingMorph, which helps to verify the correct selection. - Click the name of the
Morphthat will become the parent. Often the intended parentMorphis a “LayoutMorph”.
To embed a Morph in another using code send the message #addMorph:.
For example:
lm := LayoutMorph newRow.
b1 := BorderedBoxMorph new.
b2 := EllipseMorph new.
lm addMorph: b1.
lm addMorph: b2.
lm openInWorld.
lm morphPosition: 200 @ 200. "relative to upper-left corner of World"
LayoutMorph
A LayoutMorph instance can only have submorphs that are
instances of PlacedMorph or its subclasses.
The order of the morphs within the submorphs collection of a LayoutMorph
only indicates their stacking order, not their x/y locations.
LayoutMorph instances actively manage the position and size
of their submorphs based on the following instance properties:
-
direction:#horizontalfor a row or#verticalfor a columnThis is automatically set when the class methods
newRowandnewColumnare used to create an instance. -
gap: aNumberThis specifies the space between each of the submorphs.
By default, there is no gap or padding.
To add a gap, send the
gap:message with a number argument. -
padding: aNumberorPointThis property is inherited from the superclass
BorderedBoxMorph. It adds space inside theLayoutMorphso the submorphs are not positioned at its edges. By default, there is no padding.To specify padding, send the
padding:message with aNumberorPointargument. If a number is passed, it used as the padding on all four sides. If aPointis passed, its x value is used for left and right padding and its y value is used for top and bottom padding.To add both a gap AND padding, send the
separation:message with a number orPointargument. If aPointis passed, the gap value is its x value for rows and its y value for columns. -
axisEdgeWeight: a number from 0 to 1 or one of the following symbols:- for rows:
#rowLeft,#center, or#rowRight - for columns:
#columnTop,#center, or#columnBottom
This specifies the alignment of the submorphs in the same direction as the
LayoutMorph, referred to as the “major axis”.By default, all the submorphs will be pushed to the left of a row or top of a column. To change this, send the
#axisEdgeWeight:message with a number from 0 to 1. A value zero pushes to the left/top, a value one pushes to the right/bottom, and a value of 0.5 centers. - for rows:
Practically any layout can be achieved by nesting instances of this class.
An instance of LayoutMorph can be created with
LayoutMorph newColumn or LayoutMorph newRow,
but not with LayoutMorph new because the direction must be specified.
For example, myLayout := Layout newRow.
To add a submorph to an instance of LayoutMorph,
send it the #addMorph: message.
For example:
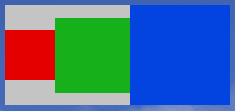
box1 := ColoredBoxMorph new color: Color red; morphExtent: 50 @ 50.
box2 := ColoredBoxMorph new color: Color green; morphExtent: 75 @ 75.
box3 := ColoredBoxMorph new color: Color blue; morphExtent: 100 @ 100.
layout := LayoutMorph newRow
    addMorph: box1;
    addMorph: box2;
    addMorph: box3;
    openInWorld.
The submorphs collection in the LayoutMorph above will hold
the three boxes in the reverse order from which they were added.
But they will be rendered from left to right
in the order in which they were added.
This happens because the LayoutMorph methods
layoutSubmorphsHorizontallyIn and layoutSubmorphsVerticallyIn
both get the morphs to render with self submorphsToLayout reversed.
If the UI-Layout-Panel package is installed then the direction, gap, edge weight, and background color can be configured interactively.
- Open the halo for a
LayoutMorph. - Click the blue menu button.
- Select “edit me (a LayoutMorph)”. The dialog below will appear.
- Click the red push pin to enable trying multiple changes.
- After each set of changes, click the “Update” button.
- When satisfied with the changes, close the dialog.

To change the background color of a LayoutMorph instance,
send it #color: with an argument that is the new color.
LayoutSpec
LayoutMorph instances also have a layoutSpec instance variable
that is inherited from the superclass PlacedMorph.
It defaults to nil and can be set to an instance of LayoutSpec.
This specifies how to layout the submorph within its owner LayoutMorph.
This is ignored if the owner is not a LayoutMorph.
Instances of LayoutSpec have the following instance variables:
morph, fixedWidth, fixedHeight, offAxisEdgeWeight,
proportionalWidth, and proportionalHeight.
More Ways to Add Submorphs
The LayoutMorph class defines the following additional instance methods,
beyond those defined in the Morph class,
that can be used to add submorph to an instance.
Each of these set the layoutSpec instance variable
to a new instance of LayoutSpec.
| Method | Description |
|---|---|
addMorph:fixedHeight: | The height remains at the specified size and the width adjusts to fill the available space. |
addMorph:fixedWidth: | The width remains at the specified size and the height edjusts to fill the available space. |
addMorph:layoutSpec: | |
addMorph:proportionalHeight: | The height adjusts to be the specified percentage (number between 0 and 1) of the available height and the width adjusts to fill the available space. |
addMorph:proportionalWidth: | The width adjusts to be the specified percentage (number between 0 and 1) of the available width and the height adjusts to fill the available space. |
addMorphBack: | Adds at the left of row or top of column (seems opposite of expected). |
addMorphFront: | Adds at the right or row or top of column (seems opposite of expected). |
addMorphFrontFromWorldPosition: | Same as addMorphFront:, but adds self layoutSubmorphs at end (unclear when this would be used). |
addMorphKeepWorldHeight: | Unclear when this would be used. |
addMorphUseAll: | Unclear when this would be used. |
addMorphs: | Adds a collection of morphs making each take the same percentage of the LayoutMorph width. |
addMorphsWidthProportionalTo: | Adds a collection of moprhs making each take a given proportion of the LayoutMorph width (percentage of total) |
The addMorphs: method takes a collection of Morphs and adds each
using the addMorph:proportionalWidth: method with a value of 1.
This causes all the newly added submorphs have the same width
that is adjusted to fill the available space.
The addMorphs:withProportionalWidth: method is similar, but takes
a collection of widths to use as the proportionalWidth of each submorph.
A potential issue with using addMorph:proportionalHeight:
and addMorph:proportionalWidth: is that they
create and use a new LayoutSpec object.
The LayoutSpec instance method initialize method sets
both the proportionalHeight and proportionalWidth properties to 1.0
which may not be the desired values.
So if the goal is to add a morph to a LayoutMorph,
set one of the “proportional” properties to a given value,
and not change the other, consider adding the morph with the addMorph: method
and then set the desired LayoutSpec property with an expression like
someMorph layoutSpec proportionalWidth: 1.0.
If the extent of a LayoutMorph instance is not
explicitly set by sending it #morphExtent:,
it will default to smallest size that contains its submorphs.
The Morph subclass PlacedMorph adds the instance methods
layoutSpec and layoutSpec: that get and set a LayoutSpec object
specific to the PlacedMorph.
The submorphs added to a LayoutMorph can each specify their alignment in
the opposite direction of the LayoutMorph, referred to as the “minor axis”.
It defaults to centering.
To change this, send the #axisEdgeWeight: message with a number from 0 to 1.
A value zero pushes to the top/left,
a value one pushes to the bottom/right,
and a value of 0.5 centers.
For example:
submorph layoutSpec offAxisEdgeWeight: 0
There is no provided method to set the offAxisEdgeWeight
to the same value for all submorphs.
To achieve that, use code like the following:
layout submorphs do: [ :submorph | submorph layoutSpec offAxisEdgeWeight: 0 ].
Consider adding the following instance method to LayoutMorph:
offAxisEdgeWeight: aNumber
    "Sets offAxisEdgeWeight of all submorphs."

    self submorphs do: [ :submorph | submorph layoutSpec offAxisEdgeWeight: 0 ].
The following code demonstrates layout of submorphs.

row := LayoutMorph newRow.
row morphExtent: 250@100.
row borderColor: Color yellow; borderWidth: 5.
row color: Color tan.
row gap: 10.
"left-aligned by default"
"row axisEdgeWeight: 1." "right-aligned"
row axisEdgeWeight: 0.5. "centered horizontally"

box := ColoredBoxMorph new.
box color: Color red.
box morphExtent: 70@60.
row addMorph: box.

box := ColoredBoxMorph new.
box color: Color green.
"Keeping default extent of 50@40."
row addMorph: box.

box := ColoredBoxMorph new.
box color: Color blue.
box morphExtent: 30@20.
row addMorph: box.

"row submorphs do: [ :submorph | submorph layoutSpec offAxisEdgeWeight: 0 ]."
row offAxisEdgeWeight: 1.

row openInWorld.
Here is one more example.
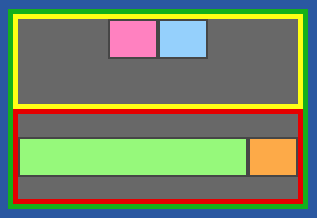
column := LayoutMorph newColumn.
column layoutSpec fixedWidth: 300; fixedHeight: 200.
"Add a border to the LayoutMorph."
column borderColor: Color green; borderWidth: 5.

row := LayoutMorph newRow.
row borderColor: Color yellow; borderWidth: 5.
row addMorph: (BorderedBoxMorph new color: Color pink).
row addMorph: (BorderedBoxMorph new color: Color lightBlue).
"By default, the submorphs will be pushed to the left and centered vertically."
"Center the submorphs horizontally."
row axisEdgeWeight: 0.5.
"Move all the submorphs to the top of the row."
row submorphsDo: [:submorph | submorph layoutSpec offAxisEdgeWeight: 0].
column addMorph: row.

row := LayoutMorph newRow.
row borderColor: Color red; borderWidth: 5.
item := BorderedBoxMorph new color: Color lightGreen.
item layoutSpec proportionalWidth: 1. "grows width to maximum available"
row addMorph: item.
row addMorph: (BorderedBoxMorph new color: Color lightOrange).
column addMorph: row.

"Each of the column submorphs will have the same height be default.
Since the column has a fixed height of 200, each row will have a height of 100."

"The column LayoutSpec won't be honored unless it is inside a LayoutMorph."
container := LayoutMorph newRow.
container addMorph: column.
container openInHand.
Editing Characteristics
Many characteristics of a Morph can be edited by
opening its halo and clicking its blue menu button.
To get a halo for a submorph, cmd-click repeatedly
until the halo appears around the target Morph.
The following menu will appear:
Click the push pin at the upper-right of the menu to keep the menu open, which simplifies making multiple changes.
To change the border width, size (morphExtent), or position (morphPosition)
of a Morph:
- Click
borderWidth,morphExtent, ormorphPosition. - Modify the numbers in the dialog that appears.
- Click the “Accept” to save the changes or the “Cancel” button to discard them.
Why do a small subset of Morph instance methods begin with morph?
These include morphExtent, morphExtentInOwner, morphId,
morphLocalBoundsForError, morphPosition, morphPosition:,
morphPositionInWorld, and morphPositionInWorld:.
Juan Vuletich answered with the following:
There are, perhaps, 3 different groups of selectors. For very few, like
#morphId,#morphBoundsAfterDraw, and maybe others are used in other classes, and as they are about the morph they are dealing with, it just seemed right to me.Others including
morphExtentInOwner,#morphPositionInWorld, andmorphPositionInWorld:were created when I converted the Morphic framework from Squeak’s style global coordinates to Morph local coordinates. It was a way to separate the two semantics while they were both there, during that redesign. So they are no longer needed. I pushed updates to rename them and to deprecate the old implementations. They will be removed later.Finally, we have others like
#morphPosition,#morphExtent, and such. The problem with them is that#positionand#position:are part of theStreamprotocol.#extentand#extent:are part of theFormandRectangleprotocol. This looks like polymorphism, but it isn’t. In no way can aMorphand aStreambe used in the same code. The same is true for aMorphand aForm, or aMorphand aRectangle. In this cases, when using Senders and Implementors in such messages, you need to keep in your mind the fact that they form two distinct subsets of senders and implementors that will never intersect. The lists of senders and implementors become twice as large for no reason, and working in that code is much harder than needed.Yes, I really dislike false polymorphism. So
#morphPosition,#morphExtent, and a few others have the “morph” prefix only so they are never confused with Stream, Form and Rectangle protocol.
To change the border color or color of a Morph:
- Click “borderColor” or “color”.
- Select one of the following color sets to open a dialog containing color swatches: CSS3 (Web) Colors, Crayon Colors, NBSISCC Colors, XKCD Colors, or ColorMix Editor (opens a Color Editor dialog). A Color Editor dialog enables selecting a color with RGB, HSL, and transparency. For more detail on these color dictionaries, see Cuis-NamedColors.
- Drag a color swatch from the dialog onto the swatch for “borderColor” or “color”.
- Close the color swatch dialog.
- Close the
Morphmenu.
To edit the width, height, and off-axis edge weight of a submorph
- Open the halo for a submorph.
- Click the blue menu button.
- Select “edit my LayoutSpec”. The dialog below will appear.
- Click the red push pin to enable trying multiple changes.
- After each set of changes, click the “Update” button.
- When satisfied with the changes, close the dialog.

For more detail on layouts, see Exploring morph layouts in Cuis.
Coordinate Systems
The world coordinate system places (0, 0) in the upper-left corner of the main window. X values increase going right and Y values increase going down.
Each Morph has its own local coordinate system
with (0, 0) in the upper-left corner of the Morph.
This coordinate system is used for drawing the Morph.
Changing the translation, rotation, or scale of a Morph
changes its local coordinate system.
Positive rotations are clockwise and negative rotations are counter-clockwise.
ImageMorph
An ImageMorph can render an image from a file.
For example, the following image is from
VisualParadox.

"Relative file references start from the Cuis-Smalltalk-Dev-UserFiles directory."
filePath := '/Users/volkmannm/Pictures/images/altitude1600.jpg'.
form := Form fromFileNamed: filePath :: magnifyBy: 0.25. "scale to 1/4 size"
morph := ImageMorph newWith: form.
morph openInWorld.
A Form is a rectangular array of pixels that holds an image.
PNG and TIFF files are not supported by default.
To add support for those,
evaluate Feature require: 'Graphics-Files-Additional'.
Creating a Custom Morph
A custom morph is implemented as a subclass of Morph or one of its subclasses.
The drawOn: method must be implemented to describe what to render.
This is passed an object from a subclass of MorphicCanvas object.
Typically this is VectorCanvas or HybridCanvas.
This defines the supported drawing methods.
Subclasses of Morph:
- do not have a specified “extent” (size)
- use the coordinate system of their owner, which can be a
WorldMorph(for example, if the owner is scaled by a factor of 2 then this will be also) - use a
VectorCanvas - if the
drawOn:method is not overridden, it will fill the morph with a blue rectangle that is centered at origin, has a width of 150, and a height of 140
Subclasses of PlacedMorph
- do not have a specified “extent” (size)
- use their own local coordinate system
- can be dragged to a new location
- use a
VectorCanvas - inherits the
drawOn:method defined in its superclassMorph
Subclasses of BoxMorph:
- have an “extent” (size) specified by their
defaultExtentmethod which defaults to50@40 - use a
HybridCanvasby default, but will use aVectorCanvasif theirrequiresVectorCanvasmethod returnstrue - if the
drawOn:method is not overridden, it will fill the morph with a light green rectangle - automatically clips its contents to its extent
While BoxMorph provides clipping of content drawn outside its bounding box,
its contract states that such drawing should not occur.
Doing so will result in the display of drawing artifacts
from the pixels drawn outside it if the morph is dragged or rotated.
BoxMorph provides excellent drag performance in part because
it does not take the time to clean up the drawing artifacts.
Subclasses of BoxMorph should implement the defaultExtent method
to return the desired size. For example:
defaultExtent
    ^`200@200`
Submorphs added to instances of Morph and PlacedMorph
(using the addMorph: method) will be clipped to the bounds of what is
drawn on them if they implement the clipsSubmorphs method to return true.
For an example, see the class Sample07Clipping.
NOTE: It seems that only drawing of shapes is clipped, not images.
Custom morphs that are subclasses of PlacedMorph (or one of its subclasses)
can be directly dragged to new locations.
Otherwise dragging requires opening the Morph halo and using the “Move” handle.
The following example includes the instance variable extent
to allow the width and height to be used to determine what to draw.
PlacedMorph subclass: #CanvasDemo
    instanceVariableNames: 'extent fillColor'
    classVariableNames: ''
    poolDictionaries: ''
    category: 'Volkmann'
In subclasses of PlacedMorph, the instance method drawOn:
is passed a VectorCanvas object.
In subclasses of BorderedBoxMorph, the instance method drawOn:
is passed a HybridCanvas object.
To force a subclass of BorderedBoxMorph to use a VectorCanvas,
implement the requiresVectorCanvas method to return true.
Instances of PlacedMorph subclasses have a location instance variable.
If the Morph only has a location and has not be rotated or scaled
then location will hold a MorphicTranslation object
with deltaX and deltaY instance variables.
If the Morph has been rotated or scaled
then location will hold an AffineTranslation object
with scale, degrees, and translation instance variables.
By default, morphs rotate about their center. To change this,
override the rotationCenter method to return a different Point.
For example, the following causes rotation
to occur around the upper-left corner:
rotationCenter
    ^ 0@0
The Morph method openInHand causes the Morph to appear
and be attached to the cursor.
Move the cursor to the location where it should be placed and click to drop it.
Alternatively, send the message #openInWorld to cause the Morph to appear
and not be attached to the cursor.
If the location of the Morph was specified by sending the
#location# message to it with a MorphicTranslation argument
then it will be placed at that location.
Otherwise it will be placed at a random location.
Also see the custom method openAtCursor that I added to the Morph class.
It is defined as follows:
openAtCursor
    "Opens Morph, attempting to center it at hand location,
    but keeping it in the world bounds."
    | world |
    world := self runningWorld.
    world
        ifNil: [UISupervisor whenUIinSafeState: [self openInWorld]]
        ifNotNil: [:w |
            w addMorph: self centeredNear: w activeHand morphPosition.
        ]
Adding Borders
To add a border around a morph with a given color and width,
send it the message #borderColor:borderWidth.
For example:
myMorph borderColor: Color red; borderWidth: 3.
Drawing Lines and Shapes
Many of the drawing methods are defined in the superclasses
AbstractVectorCanvas and MorphicCanvas.
Examples include:
arcTo:radius:angleOfXAxis:largeFlag:sweepFlag:circleCenter:radius:drawString:from:to:atBaseline:font:color:ellipseCenter:radius:rotationAngle:ellipseCenter:-Pointwhere x/y represents the center locationradius:-Pointwhere x is major axis radius and y is minor axis radiusrotationAngle:-Numberof radians
fillRectangle:color:image:at:(see example below under “Drawing Images”)line:to:width:color:- TODO: Add more!
For examples of using these methods, see the classes in the category “Morphic … Examples”.
The following code draws a green rectangle with a red border and a red line from its upper-left to lower-right. It has a default width of 100, height of 100, and default location of the upper-left corner of the world.
drawOn: aCanvas
    | x1 x2 y1 y2 |
    x1 := 0.
    y1 := 0.
    x2 := extent x.
    y2 := extent y.
    aCanvas
        strokeWidth: 10
        color: Color red
        fillColor: fillColor
        do: [
        aCanvas
            moveTo: x1 @ y1;
            lineTo: x2 @ y2;
            lineTo: x2 @ y1;
            lineTo: x1 @ y1;
            lineTo: x1 @ y2;
            lineTo: x2 @ y2
    ]

extent
    ^ extent

extent: aPoint
    extent := aPoint

initialize
    super initialize.
    extent := 100@100 "default size"
    "Place in upper-left corner by default."
    self location: (MorphicTranslation withTranslation: 0@0).
To try this:
- Open a Workspace.
- Enter
(CanvasDemo new extent: 300@400) openInHand. - Press cmd-d to “Do it”.
- Move the cursor to where the
Morphshould be dropped. - Click to drop it.
VectorCanvas is a subclass of AbstractVectorCanvas,
which is a subclass of MorphicCanvas.
The MorphicCanvas class defines several methods
whose names begin with drawString: method.
To draw text in this Morph that is centered,
add the following in the drawOn: method:
font := FontFamily defaultFamilyPointSize: 24.
aCanvas
    drawString: 'Hello'
    atCenterXBaselineY: x1 + x2 / 2 @ (y1 + y2 / 2)
    font: font "pass nil to use default font"
    color: Color yellow.
Lines have rounded endpoints by default. TODO: Can the line cap be changed to square, butt, or round like in SVG?
The following code demonstrates many of the methods for drawing on a canvas:
drawOn: aCanvas
    | center filePath font form halfHeight halfWidth height padding rect text textStart width |

    "filePath := '/Users/volkmannm/Pictures/images/altitude1600.jpg'."
    filePath := '/Users/volkmannm/Pictures/logos/Smalltalk-balloon.png'.
    form := Form fromFileNamed: filePath.
    form := form magnifyBy: 0.25.
    aCanvas image: form at: 0@0.

    width := 250.
    height := 200.
    halfWidth := width / 2.
    halfHeight := height / 2.
    center := halfWidth @ halfHeight.
    padding := 10.
    rect := Rectangle origin: 0@0 extent: width@height.
    font := FontFamily familyName: 'DejaVu Sans' pointSize: 24.
    text := 'Hello, World!'.
    textStart := padding @ height -  padding.

    aCanvas fillRectangle: rect color: Color yellow.

    aCanvas drawString: text from: 1 to: text size atBaseline: textStart font: font color: Color black.

    aCanvas strokeWidth: 20 color: Color purple do: [
        aCanvas circleCenter: center radius: 50.
    ].

    aCanvas strokeWidth: 5 color: Color blue do: [
        "radius is a Point with x as major axis radius and y as minor axis radius.
        rotationAngle is clockwise rotation in radians."
        aCanvas ellipseCenter: 50@50 radius: 40@20 rotationAngle: Float pi / 4.
    ].

    aCanvas strokeWidth: 10 color: Color red do: [
        aCanvas line: center to: width @ height width: 5 color: Color red.
        "moveTo: 100 @ 100;
        lineTo: 200 @ 200."
    ].

    aCanvas strokeWidth: 5 color: Color green do: [
        aCanvas
            moveTo: width @ 0;
            lineTo: halfWidth @ halfHeight;
            arcTo: width * 3/4 @ (height * 3/4) radius: 30 angleOfXAxis: Float pi largeFlag: false sweepFlag: false
    ].

    "A frameRectangle doesn't seem useful."
    "aCanvas frameRectangle: rect topLeftColor: Color red bottomRightColor: Color blue borderWidth: 10."
The following code demonstrates using the
arcTo:radius:angleOfXAxis:largeFlag:sweepFlag: method
to draw an oval at a 45 degree angle.
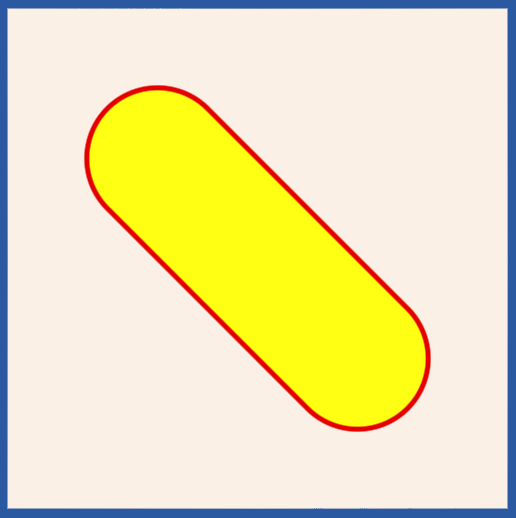
drawOn: aCanvas
	| height linen radius rect width |

	width := 500.
	height := 500.
	rect := Rectangle origin: 0@0 extent: width@height.
	linen := Color fromHexString: '#faf0e6'.
	aCanvas fillRectangle: rect color: linen.

	radius := 50 * 2 sqrt.
	aCanvas strokeWidth: 5 color: Color red fillColor: Color yellow do: [
		aCanvas
			moveTo: 200 @ 100;
			lineTo: 400 @ 300;
			arcTo: 300 @ 400 radius: radius angleOfXAxis: 0 largeFlag: false sweepFlag: true;
			lineTo: 100 @ 200;
			arcTo: 200 @ 100 radius: radius angleOfXAxis: 0 largeFlag: false sweepFlag: true.

	].
Custom methods related to drawing like drawOn:
should be placed in the “drawing” method category.
Drawing Images
The following code can be used in a drawOn: method
to draw an image on a canvas:
filePath := '/Users/volkmannm/Pictures/logos/Smalltalk-balloon.png'.
form := Form fromFileNamed: filePath.
form := form magnifyBy: 0.25.
aCanvas image: form at: 0@0
Text Entry
The TextModelMorph class defined in the base image Morphic package
can be used for single or multiple line text entry.
The following code creates an instance of TextModelMorph,
changes its value, and prints its value:
tmm := TextModelMorph withText: 'initial content'.
tmm openInWorld.
tmm editor actualContents: 'new content'.
tmm text print.
Typically you will want to modify many aspects of this morph such as its size and whether words automatically wrap to a new lines.
The value associated with a TextModelMorph will either be
held in a TextModel object or a TextProvider object.
There are three common ways to create an instance of TextModelMorph.
The choice is based on how the initial value is supplied
and where the current value will be held.
-
TextModelMorph withText: aTextOrStringThis creates a
TextModelobject that is initialized with the given value and passes it to the next method. -
TextModelMorph withModel: aTextModelThe approach allows the same
TextModelto be used by multiple other morphs. It creates an instance, sets its model toaTextModel, and returns the instance. -
TextModelMorph textProvider: aTextProvider textGetter: selectorSymbol1 textSetter: selectorSymbol2This approach allows the value to maintained in any object (
aTextProvider) that responds to the given selectors. It creates an instance, setsnewModelto an instance ofPluggableTextModelthat usesaTextProvider, addsaTextProvideras a dependent ofnewModel, sets its model tonewModel, and returns the instance.
To display prompting text inside a TextModelMorph
until the user begins typing a value,
send it #emptyTextDisplayMessage: with a string message.
The default background color of a TextModelMorph is white.
A TextModelMorph only displays a border when it has focus.
One way to make its bounds apparent when it doesn’t have focus
is to set the background color of the parent component.
tmm owner color: (Color blue alpha: 0.1)
Another way is to set the background color of the TextModelMorph.
tmm color: (Color blue alpha: 0.1)
By default, words that would extend past the right side will wrap to the next line. To prevent wrapping:
tmm wrapFlag: false
By default, when there are more lines than will fit in the height, a vertical scroll bar will appear. When wrapping is turned off, if the text does not fit in the width then a horizontal scroll bar will appear.
To prevent scroll bars from appearing, send one of the following messages to an instance:
#hHideScrollBarfor horizontal (doesn’t seem to work!)#vHideScrollBarfor vertical (doesn’t seem to work!)#hideScrollBarsIndefinitelyfor both
The default size of a TextModelMorph is 200 by 100.
This is set in the initialize method of PluggableMorph
which is the superclass of PluggableScrollPane
which is the superclass of TextModelMorph.
Depending on the font, the default size will display around four lines
of wrapping text with around 17 characters per line.
To change the size:
tmm morphExtent: width @ height
The size should include space for scroll bars if they may be needed.
Setting the height to zero will cause it to actually be set to the height required for a single line in the current font.
By default, pressing the tab key will not move focus from
one TextModelMorph instance to another.
To enable this, do the following for each instance:
tmm tabToFocus: true
When the user changes the text in a TextModelMorph,
the object that holds its value is not automatically updated.
To manually request the update:
tmm scroller acceptContents
There are multiple ways to configure user actions that trigger an update. The easiest are:
tmm acceptOnAny: true. "updates after every keystroke"

tmm acceptOnCR: true. "updates after return key is pressed"
To listen for changes to the value of a TextModelMorph:
tmm keystrokeAction: [:event |
    | value |
    value := tmm text.
    "Do something with the value."
].
By default, if the user attempts to close a SystemWindow
and it contains TextModelMorph instances that have unsaved changes,
the user will be asked to confirm this with the message
“Changes have not been saved. Is it OK to cancel those changes”.
They must select “Yes” to close the window.
To disable this check for a particular instance of TextModelMorph,
send it askBeforeDiscardingEdits: false.
The following code creates a single-line text input with a given width that never shows scroll bars:
tmm := TextModelMorph withText: '' ::
    hideScrollBarsIndefinitely;
    morphExtent: 200 @ 0; "calculates required height for one line"
    wrapFlag: false.
If the text exceeds the width, use the left and right arrow keys to scroll the text.
To select all the content in an instance, send it #selectAll.
To select content from one index to another where both are inclusive:
tmm selectFrom: startIndex to: endIndex.
To place the text cursor at the end of the current content:
index := tmm text size + 1.
tmm selectFrom: index to: index.
The following code demonstrates listening for key events. It prints their ASCII codes to the Transcript.
tmm keystrokeAction: [ :evt |
    evt keyValue print.
    evt keyCharacter print.
].
Another option that is suitable for single-line text entry is
to use the TextEntryMorph class defined in the UI-Entry package.
Also, consider using the TextInputMorf class
defined in my Cuis-Smalltalk-Morf package.
Let’s combine what we have learned above to create a small application. The user can enter their first and last name. Clicking the “Greet” button displays a greeting message below the button.
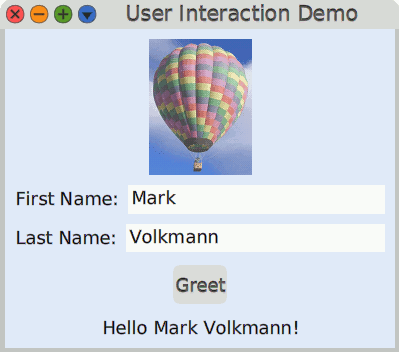
Create the class UserInteractionDemo as follows:
Object subclass: #UserInteractionDemo
    instanceVariableNames: 'firstName greetLabel lastName'
    classVariableNames: ''
    poolDictionaries: ''
    category: 'Demo'
Define the following accessor methods:
firstName
    ^ firstName

firstName: aString
    firstName := aString

lastName
    ^ lastName

lastName: aString
    lastName := aString
Define the instance method textEntryOn: as follows:
textEntryOn: aSymbol
    "Answer a TextModelMorph where aSymbol provides
     the name for the getter and setter."
    | entry |

    entry := TextModelMorph
        textProvider: self
        textGetter: aSymbol
        textSetter: (aSymbol, ':') asSymbol ::
        acceptOnAny: true;
        askBeforeDiscardingEdits: false;
        hideScrollBarsIndefinitely;
        "Width is made proportional below.
        Setting height to zero causes it to use minimum height for one line."
        morphExtent: 0 @@ 0;
        tabToFocus: true;
        wrapFlag: false.
    entry layoutSpec proportionalWidth: 1.
    ^ entry.
Define the instance method rowLabeled: as follows:
rowLabeled: aString for: aMorph
    "Answer a row LayoutMorph containing a LabelMorph and a given morph."
    | row |

    row := LayoutMorph newRow
        gap: 10;
        addMorph: (LabelMorph contents: aString);
        addMorph: aMorph.
    row layoutSpec proportionalHeight: 0.
    ^ row.
Define the instance method greet as follows:
greet
    | greeting |

    greeting := firstName isEmpty
        ifTrue: ''
        ifFalse: [ 'Hello @{1@} @{2@}!' format: @{firstName. lastName@} ].
    greetLabel contents: greeting.
Define the instance method initialize as follows:
initialize
    | button extent firstNameEntry form image lastNameEntry window |

    firstName := ''.
    lastName := ''.

    "Relative file paths start from the Cuis-Smalltalk-Dev-UserFiles directory."
    form := Form fromFileNamed: './hot-air-balloon.png' :: magnifyBy: 0.5.
    image := ImageMorph newWith: form.

    firstNameEntry := self textEntryOn: #firstName.
    lastNameEntry := self textEntryOn: #lastName.
    button := PluggableButtonMorph model: self action: #greet label: 'Greet'.

    greetLabel := LabelMorph contents: ''.

    window := SystemWindow new.
    window layoutMorph separation: 10.
    window
        setLabel: 'User Interaction Demo';
        addMorph: image;
        addMorph: (self rowLabeled: 'First Name:' for: firstNameEntry);
        addMorph: (self rowLabeled: 'Last Name:' for: lastNameEntry);
        addMorph: button;
        addMorph: greetLabel.

    "Set window size to the smallest height that contains its submorphs."
    extent := window layoutMorph minimumExtent.
    window
        morphExtent: 400 @@ extent y;
        openInWorld.

    "Set a background color so it's clear where the TextModelMorphs
    are placed when they do not have focus."
    window layoutMorph color: (Color blue alpha: 0.1).
Mouse Events
To handle mouse clicks on a custom morph,
add instance methods like the following to a Morph subclass.
On each click, this changes the fillColor instance variable
to a random color and signals that the Morph needs to be redrawn.
handlesMouseDown
    ^ true

mouseButton1Up: aMouseEvent localPosition: aPosition
    fillColor := Color random.
    self redrawNeeded.
An alternative to adding instance methods is to set properties as follows,
perhaps in the instance method initialize.
self
    setProperty: #handlesMouseDown
    toValue: true.
self
    setProperty: #mouseButton1Up:localPosition:
    toValue: [:event :position |
        fillColor := Color random.
        self redrawNeeded
    ].
Using a receiver other that self for the message sends above enables
configuring event handling on a specific instance of a Morph subclass
rather than for all instances.
When listening for mouse events in a morph that is a subclass of SystemWindow,
it is necessary to avoid intercepting mouse clicks
on the buttons in the title bar.
To do this, implement the handlesMouseDown method as follows:
handlesMouseDown: aMouseEvent
    | localPoint |

    localPoint := self internalizeFromWorld: aMouseEvent eventPosition.
    ^ localPoint y > self labelHeight.
Keyboard Events
To handle keyboard events on a custom morph,
add instance methods like the following to a Morph subclass.
handlesKeyboard
    ^ self visible

mouseEnter: event
    (Preferences at: #focusFollowsMouse)
        ifTrue: [event hand newKeyboardFocus: self].

mouseLeave: event
    (Preferences at: #focusFollowsMouse)
        ifTrue: [event hand releaseKeyboardFocus: self].

keyboardFocusChange: aBoolean
    ('has keyboard focus? {1}' format: {aBoolean}) print.

keyStroke: aKeyboardEvent
    | char |
    char := Character codePoint: aKeyboardEvent keyValue.
    char logAs: 'character'. "defined in Getting Started"
    aKeyboardEvent isArrowUp ifTrue: ['got up arrow' print].
Also see the isArrowRight, isArrowDown, and isArrowLeft methods.
MorphicCanvas
The MorphicCanvas class has many subclasses including
BitBltBoundsFinderCanvas, BitBltCanvas, BoundsFinderCanvas,
HybridCanvas, and VectorCanvas.
BitBltCanvas is a legacy class that doesn’t support
vector graphics operations, anti-aliasing, or zooming.
But it provides great performance due to its simplicity.
TODO: Is it worthwhile to learn about any of these besides VectorCanvas?
Drawing Details
How does the message #drawOn: get sent to each currently visible morph?
The abstract class MorphicCanvas defines the method drawCurrentAndSubmorphs
as subclassResponsibility.
The subclasses of MorphicCanvas which include
BitBltCanvas, BoundsFinderCanvas, HybridCanvas, and VectorCanvas.
all implement the drawCurrentAndSubmorphs method.
The MorphicCanvas method fullDraw:
sends the message #drawCurrentAndSubmorphs to
an instance of one of these MorphicCanvas subclasses.
The drawCurrentAndSubmorphs method
sends the message #drawOn: to the current morph and
sends the message #fullDraw to each submorph.
The sequence of message sends that lead to the first call to fullDraw: is:
UISupervisor class newUIProcessUISupervisor class spawnNewMorphicProcessFor:WorldMorph runProcessWorldMorph mainLoopWorldMorph displayWorldOn:MorphicCanvas drawWorld:repair: callsMorphicCanvas drawRoots:rootsDamage:backgroundDamage:MorphicCanvas fullDraw:
BorderedBoxMorph
The BorderedBoxMorph class is a subclass of ColoredBoxMorph,
which is a subclass of BoxMorph, which is a subclass of PlacedMorph.
The BorderedBoxMorph class adds the instance variables
borderColor, borderWidth, and padding.
The ColoredBoxMorph class adds the instance variable color.
The BoxMorph class adds the instance variable extent (width and height)
and is intended for morphs that are rectangular.
TODO: The class comment for BoxMorph says “DON’T subclass from here.” Why?
All the developer tool windows are subclasses of BorderedBoxMorph.
For example, System Browsers are implemented by the BrowserWindow class
which has the following inheritance hierarchy.
ObjectMorphPlacedMorphBoxMorphColoredBoxMorphBorderedBoxMorphPluggableMorphSystemWindowCodeWindowBrowserWindow
SystemWindow
To implement a custom window, create an instance of the class SystemWindow
or a custom subclass of it.
This supplies the standard buttons in the upper-left to
close the window (red), minimize it (orange),
toggle to and from full screen (green; not really the full screen),
and open a menu of other window-related commands (blue).
The menu includes:
- change title…
- window color… (broken)
- close others…
- send to back
- make next-to-topmost (moves behind one other window)
- make undraggable/draggable (toggles)
- close (same as red button)
- collapse (same as orange button)
- expand/contract (same as green button)
- resize… (graphically select both location and size)
The simplest way to create a SystemWindow that displays a single morph
is to send #embeddedInMorphicWindowLabeled: to the morph
with an argument that is the label to be displayed in the window title bar.
SystemWindow subclasses have a default extent (size)
that is the returned by the initialExtent method
which returns RealEstate standardWindowExtent
which is 1079@830.
Override the initialExtent method to use a different size.
The window title defaults to “Untitled Window”.
To change this, send #setLabel: with an argument
that is the desired title string to an instance.
Instances of this class have the instance property layoutMorph
that is set to a LayoutMorph whose direction defaults to #vertical.
To specify the size of a SystemWindow,
implement the instance method initialExtent. For example:
initialExtent

    ^ 400@300
To size a SystemWindow based on its contents,
do the following AFTER the window has been opened,
perhaps by sending it #openInWorld:
extent := window layoutMorph minimumExtent.
window morphExtent: extent.
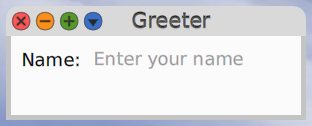
Here’s a basic example that demonstrates adding a World menu item
that opens a custom subclass of SystemWindow.
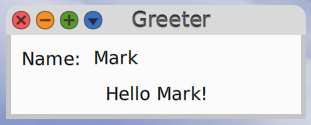
The window prompts for your name.
When a name is entered, it displays “Hello {name}!” below in the text input.
SystemWindow subclass: #Greeter
    instanceVariableNames: ''
    classVariableNames: ''
    poolDictionaries: ''
    category: 'Greeter'

"class method"
worldMenuOptions
    ^`{
        {
            #submenuOf -> TheWorldMenu openLabel.
            #itemGroup -> 10.
            #itemOrder -> 42.
            #label -> 'Greeter'.
            #object -> Greeter.
            #selector -> #open.
            #icon -> #chatIcon.
            #balloonText -> 'Opens a window where you can greet yourself'.
        } asDictionary
    }`

"class method"
open
    | extent window |

    window := self new.

    "Set window size to the smallest height that contains its submorphs."
    extent := window layoutMorph minimumExtent.
    window
        morphExtent: 300 @ extent y;
        openInWorld.

"instance method"
initialize
    | column greetingLabel nameInput row |

    super initialize.

    self setLabel: 'Greeter'.

    nameInput := TextModelMorph withModel: (TextModel withText: '').
    nameInput emptyTextDisplayMessage: 'Enter your name'.

    "Don't warn the user that changes have not been saved when the window is closed."
    nameInput askBeforeDiscardingEdits: false.

    greetingLabel := LabelMorph contents: ''.

    "Update greetingLabel on any keystroke in nameInput."
    nameInput keystrokeAction: [ :event |
        | name |
        name := nameInput text.
        greetingLabel contents: (name isEmpty
            ifTrue: ''
            ifFalse: [ 'Hello ', name, '!' ]
        ).
    ].

    row := LayoutMorph newRow.
    row separation: 10. "between child morphs; defaults to 0"
    row padding: 0. "must set after separation"
    row
        addMorph: (LabelMorph contents: 'Name:');
        addMorph: nameInput proportionalWidth: 1. "fills row"

    column := self layoutMorph.
    column separation: 10. "between child morphs; defaults to 0"
    column padding: 10. "around window edges; must set after separation"
    column
        addMorph: row fixedHeight: 0; "to use minimum height that fits row children"
        addMorph: greetingLabel.

    "To left align all child morphs of column ...
    column submorphs do: [ :morph | morph layoutSpec offAxisEdgeWeight: #leftOrTop ]."
World Menu Items
To add menu items in the World menu,
add the class method worldMenuOptions to any class.
This method must returns an array of Dictionary objects,
each of which describes a single menu item.
Saving a new or modified worldMenuOptions method
immediately updates the World menu.
For example:
worldMenuOptions
    ^`{
        {
            \#submenuOf -> TheWorldMenu openLabel.
            \#itemGroup -> 10.
            \#itemOrder -> 41.
            \#label -> 'Method Finder'.
            \#object -> MethodFinderWindow.
            \#selector -> \#open.
            \#icon -> \#inspectIcon.
            \#balloonText -> 'A tool for finding methods that return a given answer.'.
        } asDictionary
    }`
The #submenuOf key is optional and specifies
the submenu within the World menu where a menu item will be added.
If this is omitted, the menu item will appear directly in the World menu.
For example, the “Open” submenu is identified by TheWorldMenu openLabel.
All the current submenus of the World menu are defined in the
class method worldMenuOptions in the class TheWorldMenu.
These include:
TheWorldMenu openLabelTheWorldMenu preferencesLabelTheWorldMenu windowsLabelTheWorldMenu helpLabelTheWorldMenu changesLabelTheWorldMenu debugLabel
The #itemGroup key specifies the group within the target menu
where a menu item will be added.
The “Open” menu has four groups numbered 10, 20, 30, and $0.
The #itemOrder key specifies the order in which
a menu item will appear in its menu.
Within the “Open” menu, the existing menu items use the following values:
- Text Editor: 10
- Workspace: 20
- Browser: 30
- SearchBrowser: 40
- MessageNames: 40
- Transcript: 50.
So the example above places the menu item “Method Finder” after “Message Names”.
The #label key specifies the text that will appear in the menu item.
The #object key specifies the class that implements the menu item.
An instance of this class will be created when the menu item is selected.
This defaults to the current class when omitted.
The #selector key specifies the message that will be sent
to the class (not an instance of it) specified in the #object key.
Often the corresponding class method creates an instance
of a SystemWindow subclass and opens it.
The #icon key is optional and specifies
the icon that will appear before the menu item label.
The value is a selector for a Theme class instance method
in the “icons” method category.
The #balloonText key is optional and specifies
tooltip text that will appear when hovering over the menu item.
To learn more about the existing menu items in the World menu,
search for implementors of the worldMenuOptions method.
Here’s a simple example where selecting a custom menu item
writes to the Transcript.
Create the class Greeter as a subclass of Object
and add the following class methods:
worldMenuOptions
    ^`{
        {
            #submenuOf -> TheWorldMenu openLabel.
            #itemGroup -> 10.
            #itemOrder -> 42.
            #label -> 'Greet'.
            #object -> MyMenuItem.
            #selector -> #greet.
            #icon -> #chatIcon.
            #balloonText -> 'Writes a greeting to the Transcript'.
        } asDictionary
    }`

greet

    'Hello World!' print
Fonts
To see a popup list of the installed fonts and fonts available to install,
enter FontFamily promptUser in a Workspace and “Do it”.
The installed font names are displayed using their font.
To install a font, click its checkbox under “Available to install”.
The list may include the following:
- Alex Brush
- Amaranth
- CMU Typewriter Text
- DejaVu Sans (default)
- JetBrains Mono NL
- Kiwi Maru Light
- Kurinto Sans (defines many Unicode characters such as the wastebasket)
- Learning Curve
- Noto Sans EqyptHiero
- Parc Place Legacy
- Source Sans 3
The font files are located in the Cuis-Smalltalk-Dev/TrueTypeFonts directory.
To add a new font, create a subdirectory whose name is the font name
and place .ttf files for each variation of the font inside it.
To set the default font size used in the development environment:
Preferences at: #defaultFontSize put: 14
To set the default font family used in the development environment:
PreferenceSet setDefaultFont: 'Alex Brush'
If an invalid font name is used, the environment will lock up. TODO: Report this!
To get a Dictionary of available font families:
fontFamilies := FontFamily availableFamilies
To get the default font:
font := FontFamily defaultFamilyAndPointSize
To get the default font with a specified point size:
font := FontFamily defaultFamilyPointSize: 18
To get the point size from a FontFamily object, send it #pointSize.
To get a font for a specific family and point size:
font := FontFamily familyName: 'Alex Brush' pointSize: 36.
To get the point size from a FontFamily object, send it #pointSize.
To change the font used by all instances of TextEditor,
add a line like the following to its initialize method:
defaultFont := FontFamily familyName: 'JetBrains Mono NL' pointSize: 14.
Button Labels
Button labels are automatically shortened to fit within the button width
using the String instance method squeezeTo:.
It begins by removing spaces from right to left.
It then removes vowels from right to left.
Finally, it removes consonants from right to left
and adds an ellipsis at the end.
Button Issue
The class PluggableButtonMorph uses the value of Theme current buttonLabel
as the color for the label on all instances.
But sending #color: to an instance changes its background color.
Depending the background color selected, this can result in poor contrast.
It also uses an embossed font for the label.
A way to fix this, suggested by Mariano Montone,
is to create a subclass of PluggableButtonMorph as follows:
-
Define the following new class:
PluggableButtonMorph subclass: #VButtonMorph instanceVariableNames: 'labelColor' classVariableNames: '' poolDictionaries: '' category: 'Volkmann' -
Define the following instance methods in the
VButtonMorphclass:labelColor ^labelColor ifNil: [Theme current buttonLabel] labelColor: anObject labelColor := anObject -
Override
VButtonMorphinstance methoddrawEmbossedLabelOn:by copying the same method fromPluggableButtonMorphand modifying two lines, the one that setscolorForLabeland the one that setsembossed.drawEmbossedLabelOn: aCanvas | availableW center colorForLabel f l labelMargin targetSize w x y | label ifNotNil: [ "The next line was modified." colorForLabel := self enableLabelColorWith: self labelColor. self isPressed ifFalse: [ self mouseIsOver ifFalse: [ colorForLabel := colorForLabel adjustSaturation: -0.10 brightness: 0.10 ] ] ifTrue: [ colorForLabel := colorForLabel adjustSaturation: 0.0 brightness: -0.07 ]. f := self fontToUse. center := extent // 2. labelMargin := 3. w := f widthOfString: label. availableW := extent x - labelMargin - labelMargin. availableW >= w ifTrue: [l := label] ifFalse: [ x := labelMargin. targetSize := label size * availableW // w. l := label squeezedTo: targetSize. (f widthOfString: l) > availableW ifTrue: [ targetSize := targetSize - 1. l := label squeezedTo: targetSize ] ]. w := f widthOfString: l. x := center x - (w // 2). y := center y - (f lineSpacing // 2). aCanvas drawString: l at: x@y font: f color: colorForLabel "The next line was modified." embossed: false ]
Button Demo in Cuis
Add this code in a Workspace, select it all, and “Do it”.
It uses the class VButtonMorph defined above.
label := LabelMorph new
  contents: '0';
  color: Color white.
decBtn := VButtonMorph new
  color: Color yellow;
  label: 'Decrement';
  labelColor: Color red;
  model: [label contents: (label contents asNumber - 1) asString];
  action: #value.
incBtn := VButtonMorph new
  color: Color yellow;
  label: 'Increment';
  labelColor: Color green;
  model: [label contents: (label contents asNumber + 1) asString];
  action: #value.
layout := LayoutMorph new
  addMorph: decBtn;
  addMorph: label;
  addMorph: incBtn;
  "color: Color transparent ;"
  separation: 10;
  location: (MorphicTranslation withTranslation: 70@70);
   rotateBy: 15 degreesToRadians;
  scale: 1.5;
  openInWorld.

"Add horizontal padding in buttons."
decBtn morphWidth: (incBtn morphWidth + 20).
incBtn morphWidth: (incBtn morphWidth + 20).
To delete this from the World,
enter layoutDelete in the Workspaces and “Do it”, or
open the halo for the LayoutMorph and click the red button in the upper-left.
SVG
To work with SVG images:
-
Clone the following Git repositories from Cuis Smalltalk:
-
Open a Workspace and install the package
SVG.enter
Feature require: #SVGand “Do it”. -
Enter
SVGMainMorph exampleTiger openInWorldand “Do it”.
There are many more example class methods in the SVGMainMorph class.
To open all the SVG examples,
enter SVGMainMorph openAllExamples SVGMainMorph and “Do it”.
To delete all those morphs, enter
SVGMainMorph allInstancesDo: [:obj | obj delete].
Another way to open all the SVG examples is to use reflection as follows:
selectors := SVGMainMorph class allMethodsInCategory: #examples.
selectors do: [:selector |
    (selector beginsWith: 'example') ifTrue: [
        (SVGMainMorph perform: selector) openInWorld
    ]
].
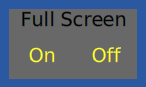
Full Screen Buttons
You can add buttons to the World that simplify toggling full screen mode.
The following class defines a class method buttons that displays buttons
that activate and deactivate full screen mode.
Object subclass: #VFullScreenButtons
    instanceVariableNames: ''
    classVariableNames: ''
    poolDictionaries: ''
    category: 'Volkmann'

fullScreen: aBoolean
    Display fullScreenMode: aBoolean.
    Display newDepth: Display depth

fullScreenOff
    self fullScreen: false

fullScreenOn
    self fullScreen: true

initialize
    "renders buttons for setting full screen on or off"

    super initialize.
    LayoutMorph newColumn
        addMorph: (LabelMorph contents: 'Full Screen');
        addMorph: (LayoutMorph newRow
            addMorph: (
                VButtonMorph label: 'On' block: [self fullScreenOn]
            );
            addMorph: (
                VButtonMorph label: 'Off' block: [self fullScreenOff]
            );
            color: Color transparent
        );
        location: (MorphicTranslation withTranslation: 10@10);
        openInWorld
Morph Methods
The Morph class provides a large number of instance methods.
Highlights are provided in the following table:
| Method | Description |
|---|---|
collides | answers Boolean indicating if receiver contour overlaps argument contour |
TODO: Add more methods to this table.
Popups
The classes PopUpMenu, SelectionMenu, and StringRequestMorph all display
a dialog that shares information with users or prompts them for input.
PopUpMenu
The class PopUpMenu provides an easy way to render a dialog that
displays information, asks the user for confirmation,
or ask the user to select an option.
It is similar to the JavaScript DOM functions alert and confirm.
For example:

PopUpMenu inform: 'Something interesting just happened.'.
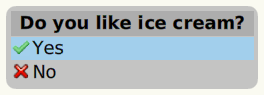
likesIceCream := PopUpMenu confirm: 'Do you like ice cream'.
likesIceCream print. "prints true or false"
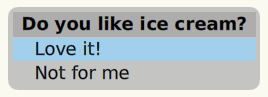
likesIceCream := PopUpMenu
    confirm: 'Do you like ice cream'
    trueChoice: 'Love it!'
    falseChoice: 'Not for me'.
likesIceCream print. "prints true or false"
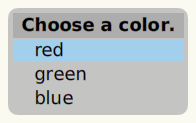
color := PopUpMenu withCaption: 'Choose a color.' chooseFrom: #('red' 'green' 'blue').
color print. "prints choice index 1, 2, or 3"
SelectionMenu
The SelectionMenu class is a subclass of PopupMenu.
For example:
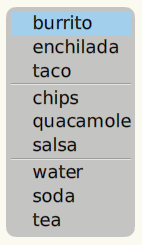
labels := #(burrito enchilada taco chips quacamole salsa water soda tea).
lines := #(3 6). "draw lines after these indexes"
menu := SelectionMenu labels: labels lines: lines.
selection := menu startUpMenu.
selection print. "prints selected label index"
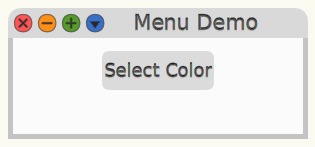
The following code demonstrates opening a SelectionMenu
when a button is clicked.
Define the following class:
Object subclass: #MenuDemo
    instanceVariableNames: 'colorButton colorMenu statusLabel colors window'
    classVariableNames: ''
    poolDictionaries: ''
    category: 'Demos'
Define the following instance methods:
initialize
| layout |
colorButton := PluggableButtonMorph
model: self
action: #openMenu
label: 'Select Color'.
colors := #(red orange yellow green blue purple).
colorMenu := SelectionMenu labels: colors lines: #().
statusLabel := LabelMorph contents: ''.
window := SystemWindow new.
window
setLabel: 'Menu Demo';
addMorph: colorButton;
addMorph: statusLabel.
"Set window size to the smallest height that contains its submorphs."
layout := window layoutMorph.
layout separation: 10.
window
morphExtent: 300 @ layout minimumExtent y;
openInWorld.
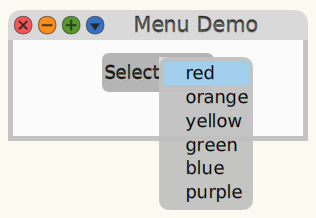
openMenu
| color colorName index |
index := colorMenu startUpMenu.
index = 0 ifFalse: [
colorName := colors at: index.
colorButton label: colorName.
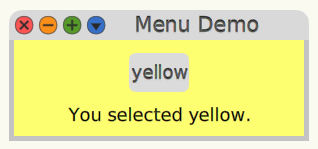
statusLabel contents: ('You selected {1}.' format: { colorName }).
color := colorName
ifNil: [ Color gray ]
ifNotNil: [
[ Color perform: colorName ]
on: MessageNotUnderstood
do: [ Color gray ]
].
window layoutMorph color: (color alpha: 0.6).
]
To run this, evaluate MenuDemo new in a Workspace.
StringRequestMorph
The class StringRequestMorph prompts the user to enter a text response.
It can verify the response using a provided block that returns
a Boolean value indicating whether the response is valid.
It can also evaluate a block if the user clicks the cancel button.
For example:
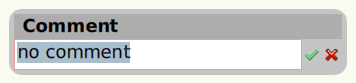
StringRequestMorph
    request: 'Comment'
    initialAnswer: 'no comment'
    verifying: [ :answer | answer isEmpty not ]
    do: [ :answer | answer print ]
    orCancel: [ 'canceled' print ].
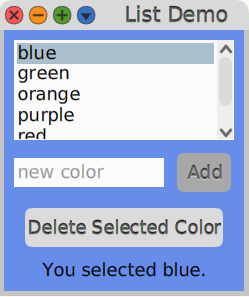
PluggableListMorph
The PluggableListMorph displays a scrollable list of items.
Users can select an item by clicking it or by typing its first few letters.
The follow code implements a small application that allows users to select a color from a list to change the background color of the window. Users can also add new colors and delete existing colors.
In addition to demonstrating the use of PluggableListMorph,
this also disables buttons when their use is not appropriate.
Create the following class:
Object subclass: #ListDemo
    instanceVariableNames: 'colorList colors deleteButton newColorEntry selectedColorIndex selectedLabel window'
    classVariableNames: ''
    poolDictionaries: ''
    category: 'LayoutMorphDemos'
Add the following instance methods:
initialize
    | addButton layout row |

    colors := SortedCollection newFrom: #(red orange yellow green blue purple).
    selectedColorIndex := 0.
    colorList := PluggableListMorph
        withModel: self
        listGetter: #colors
        indexGetter: #selectedColorIndex
        indexSetter: #selectedColorIndex:.
    colorList layoutSpec proportionalWidth: 1.

    newColorEntry :=  self textEntryOn: #newColor.
    newColorEntry emptyTextDisplayMessage: 'new color'.

    addButton := PluggableButtonMorph model: self action: #addColor label: 'Add'.

    row := LayoutMorph newRow
        gap: 10;
        addMorph: newColorEntry;
        addMorph: addButton.

    deleteButton := PluggableButtonMorph
        model: self
        action: #deleteColor
        label: 'Delete Selected Color'.

    selectedLabel := LabelMorph contents: ''.

    window := SystemWindow new.
    window
        setLabel: 'List Demo';
        addMorph: colorList;
        addMorph: row;
        addMorph: deleteButton;
        addMorph: selectedLabel.

    "Set window size to the smallest height that contains its submorphs."
    layout := window layoutMorph.
    layout separation: 10.
    window
        morphExtent: 250 @ layout minimumExtent y;
        openInWorld.

    self selectedColorIndex: 0. "sets initial background color"

colors
    ^ colors

newColor
    "In this app there is no need to retrieve this value
    or even hold it in an instance variable, but
    TextModelMorph requires that this method exists."

    ^ ''

newColor: aText
    | potentialColor |

    potentialColor := aText asString withBlanksTrimmed.
    potentialColor ifNotEmpty: [
        colors add: potentialColor asSymbol.
        colorList updateList.
        self selectedColorIndex: (colors indexOf: potentialColor ).
        self changed: #clearUserEdits.
        self changed: #newColor.
    ].

selectedColorIndex
    ^ selectedColorIndex

selectedColorIndex: anIndex
    | color colorName selected |

    selectedColorIndex := anIndex.

    selected := anIndex ~= 0.
    deleteButton enable: selected.
    colorName := selected ifTrue: [ colors at: anIndex ].

    selectedLabel contents: (colorName
        ifNil: ''
        ifNotNil: [ 'You selected {1}.' format: { colorName } ]
    ).

    color := colorName
        ifNil: [ Color gray ]
        ifNotNil: [
          [ Color perform: colorName ]
              on: MessageNotUnderstood
              do: [ Color gray ]
        ].
    window layoutMorph color: (color alpha: 0.6).

addColor
    self newColor: newColorEntry text

deleteColor

    selectedColorIndex = 0 ifFalse: [
        colors removeAt: selectedColorIndex.
        self selectedColorIndex: 0.
        colorList updateList.
        selectedLabel contents: ''.
    ]

textEntryOn: aSymbol
    "Answer a TextModelMorph where aSymbol provides the name for the getter and setter."
    | entry |

    entry := TextModelMorph
        textProvider: self
        textGetter: aSymbol
        textSetter: (aSymbol, ':') asSymbol ::
        acceptOnCR: true;
        askBeforeDiscardingEdits: false;
        hideScrollBarsIndefinitely;
        "Width is made proportional below.
        Setting height to zero causes it to use minimum height for one line."
        morphExtent: 0 @ 0.
    entry layoutSpec proportionalWidth: 1.
    ^ entry.
To run this, evaluate ListDemo new in a Workspace.
Event Handling
The Morph class provides many methods for event handling
in the “events” method category. Examples include:
keyDown:keyStroke:keyUp:keyboardFocusChange:keyboardShortcut:mouseButton1Down:localPosition:mouseButton1Up:localPosition:mouseButton2Down:localPosition:mouseButton2Up:localPosition:mouseButton3Down:localPosition:mouseButton3Up:localPosition:mouseEnter:mouseHover:localPosition:mouseLeave:mouseMove:localPosition:mouseScroll:localPosition:windowEvent:
The keyboard and mouse event handling methods are only called
if the Morph is configured to handle them.
For example, the keyDown:, keyUp:, and keyStroke: methods are only called
if the handlesKeyboard: method is implemented to return true.
Also, the mouseEnter: and mouseLeave: methods are only called
if the handlesMouseOver: method is implemented to return true.
See comments in each event handling method to determine how to enable it.
TODO: For a good code example, see VGreet class in the Volkmann category.
Each of these methods is passed a MorphicEvent object.
To get the Morph object that triggered the event,
send the message #hand to the event object.
To move focus to a Morph, get the instance of the HandMorph and
send it the message #newKeyboardFocus: with the morph as the argument.
To give up focus from a Morph, send the HandMorph
the message #releaseKeyboardFocus: with the morph as the argument.
The HandMorph can be obtained by
sending runningWorld activeHand to any morph.
The Morph class provides several methods for focus handling
in the “focus handling” method category. These include:
hasKeyboardFocus- answers aBooleanhasMouseFocus- answers aBooleankeyboardFocusChange- sent to morphs when they gain or lose focuskeyboardFocusedTODO: Why does this not have any code?
Consider changing the background color of a custom Morph
when it gains and loses focus.
The class EventSensor handles keyboard and mouse events.
TODO: Add much more detail on this.
The inheritance hierarchy of classes that describe events is as follows:
MorphicEventDropEventDropFilesEventUserInputEventKeyboardEventMouseEventMouseButtonEventMouseMoveEventMouseScrollEvent
WindowEvent
To add event handling to a specific Morph instances
instead of adding it to the definition of a Morph subclass:
-
Open the halo of the
Morph. -
Click the blue Menu button.
-
Press cmd-c (copy to clipboard).
-
Open a Workspace.
-
Press cmd-v (paste) which will insert a
Morphreference likeellipseMorph2611483. -
After the
Morphreference, add code like the following:ellipseMorph2611483 setProperty: #handlesMouseDown toValue: true. ellipseMorph2611483 setProperty: #mouseButton1Up:localPosition: toValue: [:event :position | self inform: 'got click'].Be careful when using
setProperty:that theSymbolargument value is spelled correctly! -
Select those lines of code and “Do it”.
-
Click the
Morph. -
Verify that a PopUpMenu appears containing “got click”.
To create and configure an EllipseMorph in code:
em := EllipseMorph new openInWorld.
em setProperty: #handlesMouseDown toValue: true.
em
    setProperty: #mouseButton1Up:localPosition:
    toValue: [:event :position | self inform: 'got click'].
The following class defines a Morph subclass that renders a close icon.
The icon changes color when the mouse cursor is over it or it is pressed.
PluggableButtonMorph subclass: #CloseButton
    instanceVariableNames: ''
    classVariableNames: ''
    poolDictionaries: ''
    category: 'Demo'

drawOn: aCanvas
    super drawOn: aCanvas.
    aCanvas drawCloseIcon.
Other methods to draw icons provided in the AbstractVectorCanvas class
include drawCollapseIcon, drawDownIcon, drawExpandIcon,
drawHandleLarge, drawHandSmall, drawLeftIcon, drawMenuIcon,
drawPushPinIcon, drawRightIcon, and drawUpIcon.
The following code demonstrates using the CloseButton class
in another morph to delete it.
PlacedMorph subclass: #DeletableMorph
    instanceVariableNames: ''
    classVariableNames: ''
    poolDictionaries: ''
    category: 'Demo'

 initialize
    | closeButton label layout |

    super initialize.

    closeButton := CloseButton model: [ self delete ] action: #value.
    closeButton layoutSpec offAxisEdgeWeight: 1.

    label := LabelMorph contents: 'Delete Me'.
    label layoutSpec offAxisEdgeWeight: 0.

    layout := LayoutMorph newColumn.
    layout
        separation: 10;
        addMorph: closeButton;
        addMorph: label.

    self addMorph: layout.

drawOn: aCanvas
    "This overrides the method in Morph to do nothing
    so a blue rectangle is not drawn."
Animation
Animation in Morphic is achieved through stepping.
Subclasses of Morph add animation by defining two instance methods.
The step method defines what to do at each step of the animation and
the optional stepTime method returns
the number of milliseconds to delay between each step (defaults to 1000).
After an instance of the morph is opened,
send it the messages #startStepping and #stopStepping
to start and stop the animation.
The following class animates the size of a ColoredMorph subclass.
ColoredBoxMorph subclass: #AnimatedMorph
    instanceVariableNames: 'delta maxSize minSize'
    classVariableNames: ''
    poolDictionaries: ''
    category: 'Demo'

"class methods"

open

    self new openInWorld startStepping

"instance methods"

initialize

    super initialize.
    delta := 1.
    maxSize := 200.
    minSize := 50.
    self morphExtent: minSize @ minSize.
    self color: Color red.

step
    | newSize |

    newSize := self morphExtent x + delta.
    self morphExtent: newSize @ newSize.
    delta = 1
        ifTrue: [ newSize = maxSize ifTrue: [ delta := -1 ] ]
        ifFalse: [ newSize = minSize ifTrue: [ delta := 1 ] ]

stepTime
    ^ 10
The following class implements a morph that renders a red circle
and animates to a random location in the World every time it is clicked.
After defining this class in a System Browser,
enter AnimatedMorph new openInWorld in a Workspace and “Do it”.
This only animates position changes, but other properties such as
rotation, scale, and color can also be animated.
EllipseMorph subclass: #AnimatedMorph
    instanceVariableNames: 'dx dy stepNumber'
    classVariableNames: ''
    poolDictionaries: ''
    category: 'Volkmann'

"instance methods"

initialize
    | size |

    super initialize.
    size := self size.
    self morphExtent: size @ size.
    self color: Color red.

size
    ^ 100

handlesMouseDown
    ^ true

mouseButton1Up: aMouseEvent localPosition: aPosition
    | newX newY oldX oldY size worldExtent |

    oldX := self morphPosition x.
    oldY := self morphPosition y.
    "UISupervisor ui answers the WorldMorph instance."
    worldExtent := UISupervisor ui morphExtent.
    size := self size.
    newX := (worldExtent x rounded - size) atRandom.
    newY := (worldExtent y rounded - size) atRandom.
    dx := newX - oldX / self stepCount.
    dy := newY - oldY / self stepCount.
    stepNumber := 0.
    self startStepping. "must send after morph is opened, not in initialize"

step

    self morphPosition: self morphPosition + (dx @ dy).
    self redrawNeeded.
    stepNumber := stepNumber + 1.
    stepNumber = self stepCount ifTrue: [self stopStepping]

stepCount
    ^ 50

stepTime
    ^ 5 "default is 1000 for once per second"
Blocking UI Updates
UI updates do not become visible until the method that made them completes. This can be an issue when methods are long-running. This affects all morphs, including those provided by the development environment, such as the Transcript window. To address this, run such methods in a new process. See the section “Running in Another Process” in the “Blocks” chapter.
Redrawing
After making code changes, if the UI does not update properly, there are two things that can be done to update the display.
- Open the World menu and select “Restore Display”.
- Open the World menu and select “Debug … Start drawing all again”.
TODO: What is the difference between these?
Creating JPEG Images
To create a JPEG image from any morph:
myMorph imageForm: 32 :: writeJPEGfileNamed: 'myMorph.jpg'
Consider adding the following method to the Morph class to simplify this:
writeJPEG: aFilePath

   self imageForm: 32 :: writeJPEGfileNamed: aFilePath
The base image doesn’t contain methods for writing other image formats such as PNG.
More Morphs
TODO: Study the following morphs defined in Cuis-Smalltalk-UI.
Clone the Cuis-Smalltalk-UI repository and
install the morphs by evaluating Feature require: 'UI-Click-Select'.
CheckButtonMorphRadioButtonMorphCheckGroupRadioGroupDropDownButtonMorphDropDownListMorphMultiSelectMenuPluggableDropDownListMorphPluggableListOfMorph
Annoyances
Some of the methods in Morphic classes are inconsistently named.
For example, the class TextModelMorph defines the methods
alwaysHideVerticalScrollbar and hideScrollBarsIndefinitely.
Note how the “b” is sometimes lowercase and sometimes uppercase.
Todo App
See https://github.com/mvolkmann/Cuis-Smalltalk-TodoApp. TODO: Learn how to deploy this app.