Overview
SwiftUI document-based apps "are apps that let users create, edit, and share documents such as text files."
The information below was derived form the Hacking With Swift article at How to create a document-based app using FileDocument and DocumentGroup.
Steps
In this example we are building a way to create Lua source files in a SwiftUI app.
The steps to create such a document-based app are:
Add the
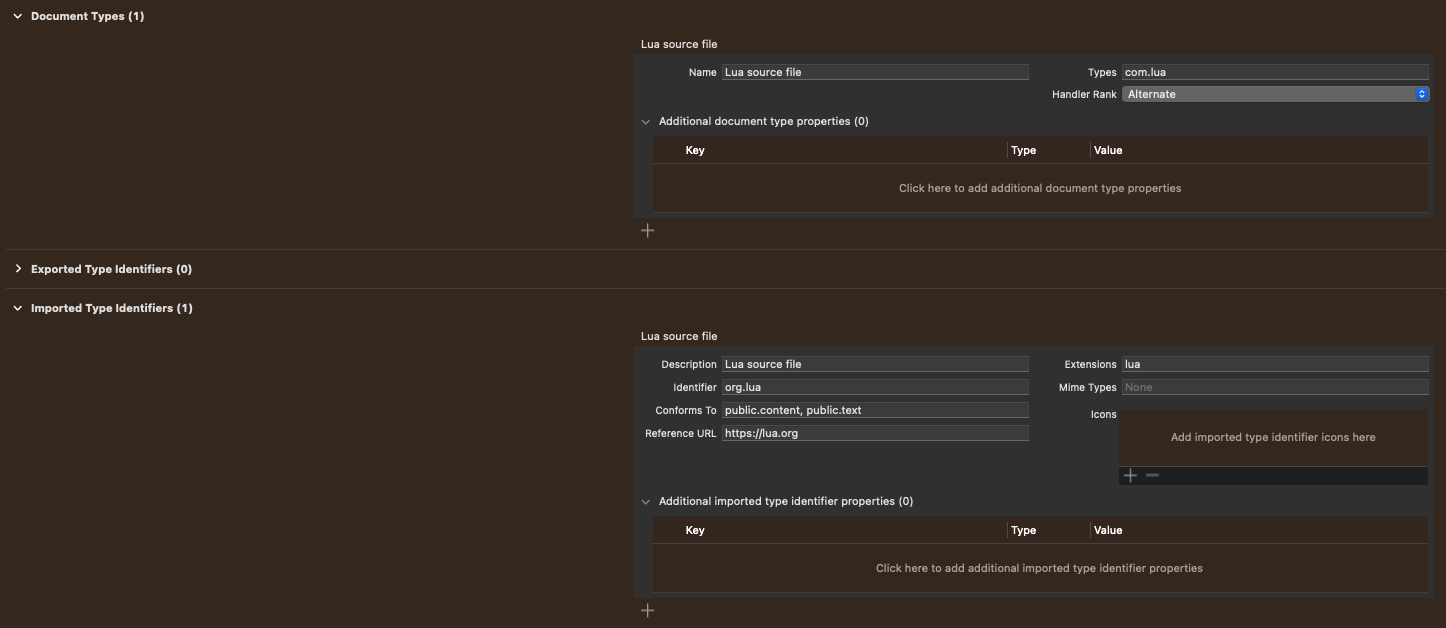
.icnsfile to the project.Define a custom file extension for your documents. If the type is known outside of your app, add an entry in the "Imported Type Identifiers" section. If the type is unique to your app, add an entry in the "Exported Type Identifiers" section. The form fields in each section are the same. Then add an entry in the "Document Types" section.

Optionally create an icon for your file type. Create an image that is 1024 x 1024. Browse cloudconvert, click the "Select File" button, select your file, select "ICNS" in the "Convert to" dropdown, and click the "Convert" button. When it completes, click the "Download" button. Within the "Icons" section, click the "+" button, select your
.icnsfile, and click the "Add" button.In the struct that conforms to
App, in the computed propertybody, replace the following:WindowGroup {
ContentView()
}with this:
DocumentGroup(newDocument: TextFile()) { file in
    ContentView(document: file.$document)
}
Define a struct that conforms to the FileDocument protocol. This will hold all the data associated with each document using one or more properties. For example, for basic text documents we could create the file
TextFile.swiftcontaining the following:import SwiftUI
import UniformTypeIdentifiers
extension UTType {
// If you defined an "Imported Type Identifier" use "importedAs" here.
// If you defined an "Exported Type Identifier" use "exportedAs" here.
static let luaSource = UTType(importedAs: "org.lua")
}
struct LuaFile: FileDocument {
static let fileExtension = "lua"
static var readableContentTypes = [UTType.luaSource]
static let defaultCode = """
x = 3
y = 4
if x >= y then
color = "green"
else
color = "red"
end
-- color = x >= y and "red" or "green"
greeting = "Hello!"
"""
var code = ""
// This creates a document containing the given code.
init(initialCode: String = defaultCode) {
code = initialCode
}
// This creates a document containing previously saved code.
init(configuration: ReadConfiguration) throws {
if let data = configuration.file.regularFileContents {
code = String(decoding: data, as: UTF8.self)
} else {
throw CocoaError(.fileReadCorruptFile)
}
}
// This is called when the system wants to save code in a file.
// TODO: How can the file name be specified?
func fileWrapper(configuration: WriteConfiguration) throws -> FileWrapper {
let data = Data(code.utf8)
return FileWrapper(regularFileWithContents: data)
}
}Add a view for editing the current document. This can be a custom UI that is suitable for the struct defined above. For a text document it could be as simple as a
TextEditorview. For example:@Binding var luaFile: LuaFile
...
TextEditor(text: $luaFile.text)
.autocapitalization(.none)
.disableAutocorrection(true)
.lineLimit(lines)
.frame(
maxWidth: .infinity,
maxHeight: CGFloat(lines * lineHeight)
)
.border(.gray)Change the project settings to indicate that it will use the system document browser.
- Select the top entry in the Project Navigator.
- Select the main target.
- Select the "Info" tab.
- Hover over an existing row and click the "+" button.
- Select "Supports Document Browser".
- Set the value to "YES".
Result
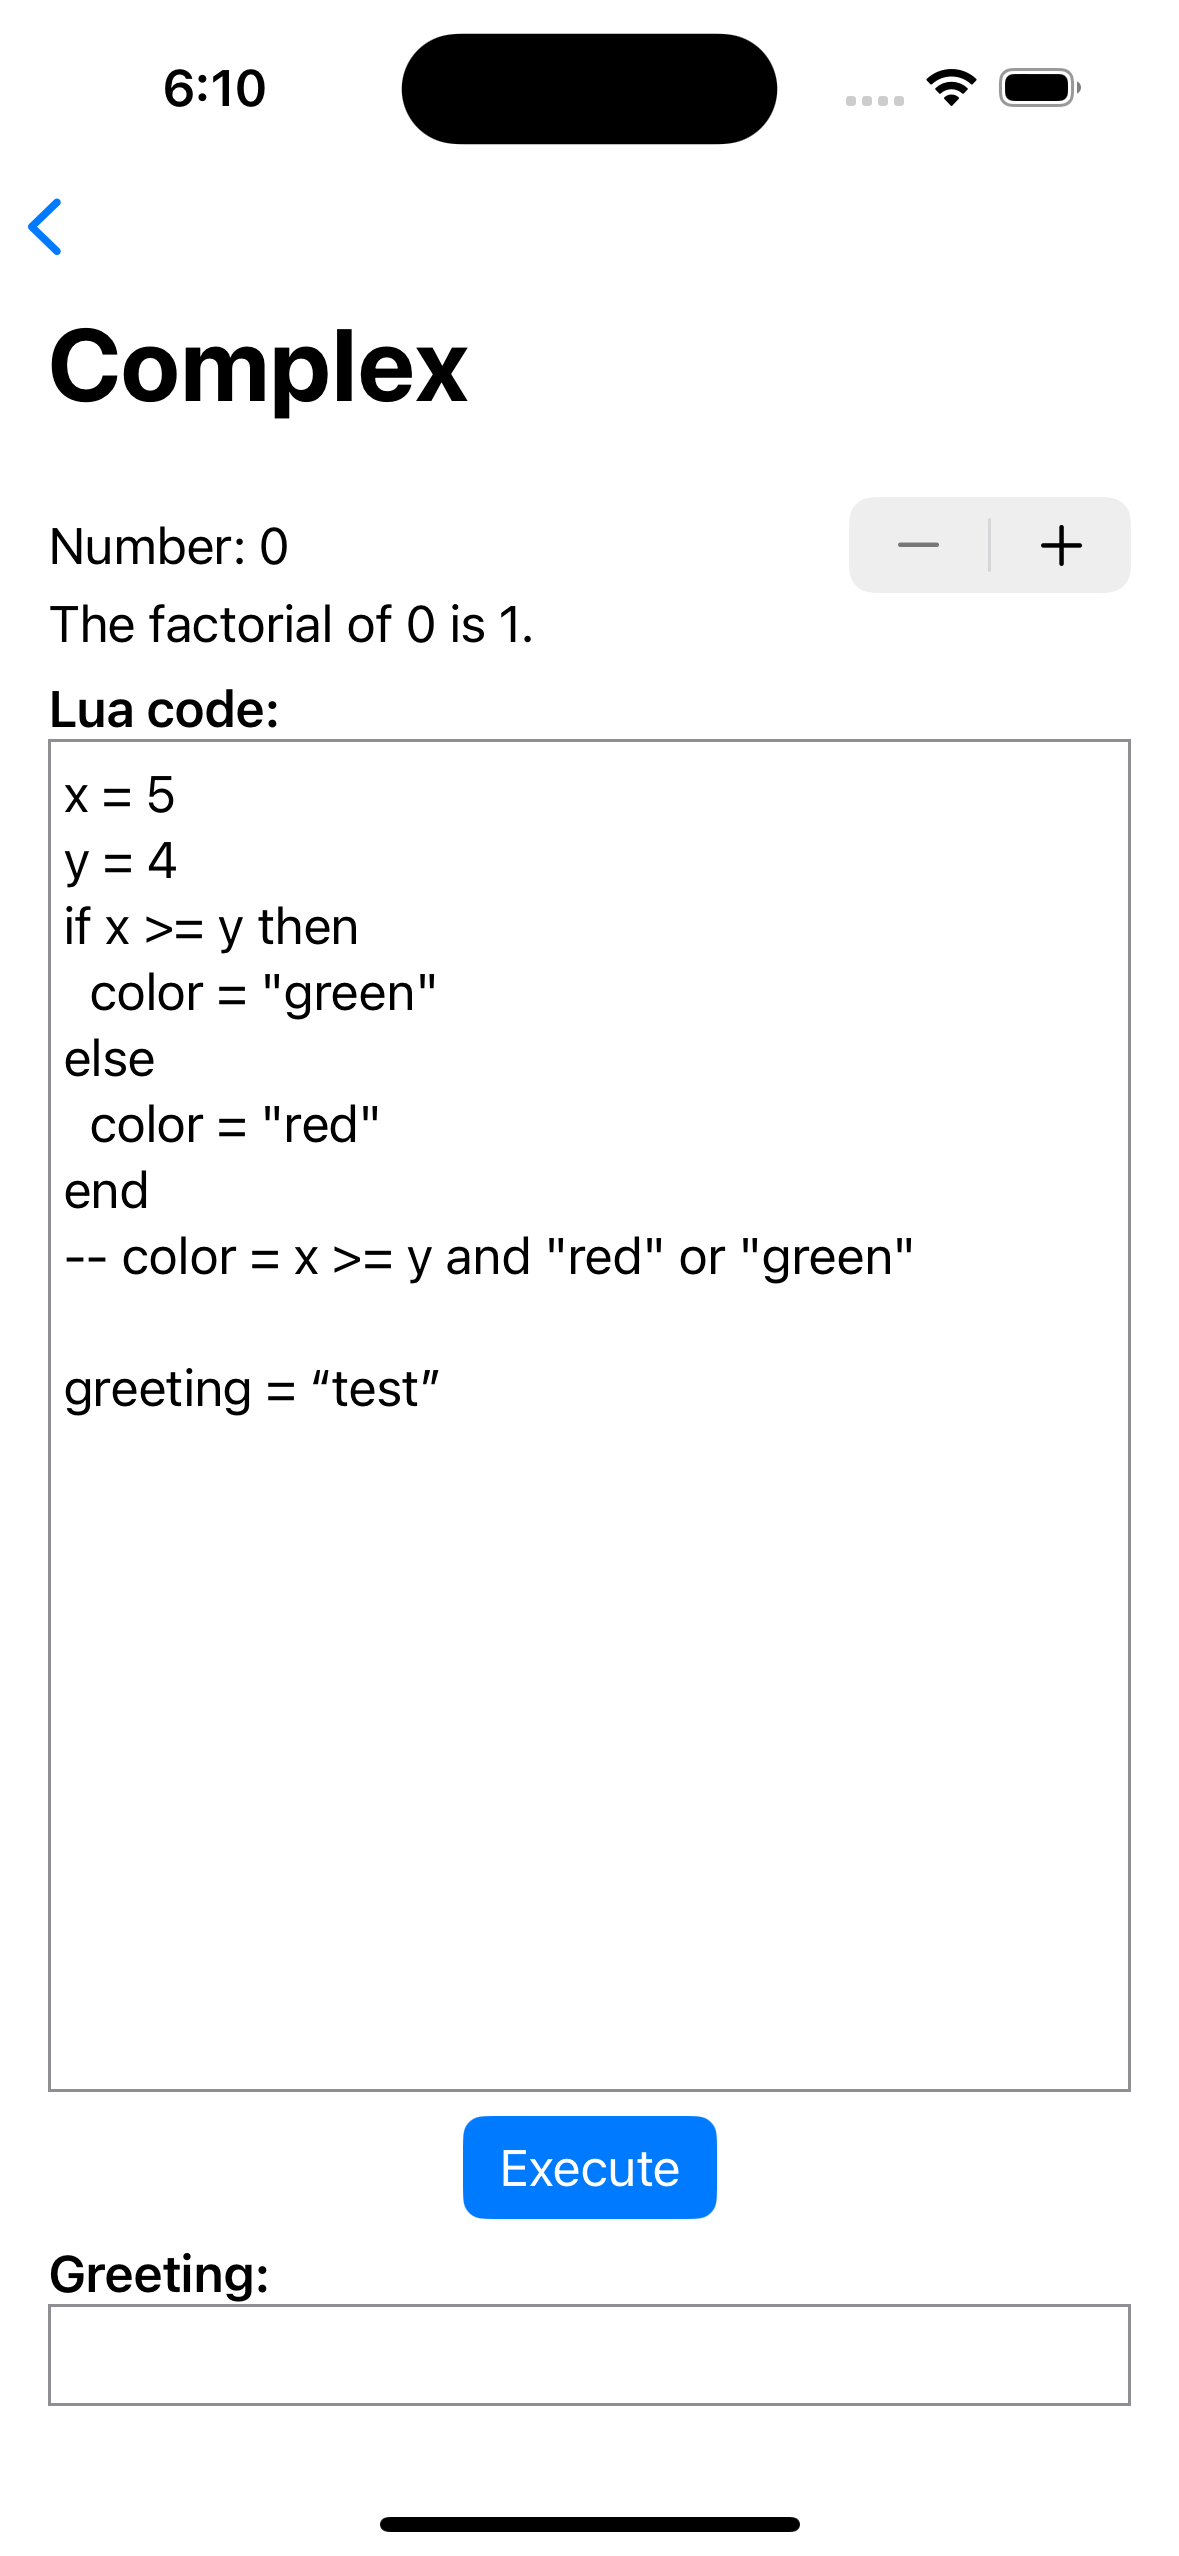
The app in the screenshots below can be found at SwiftUICallsC. It demonstrates embedding the Lua interpreter in a SwiftUI app. Each document contains Lua code that is executed by tapping the "Execute" button.
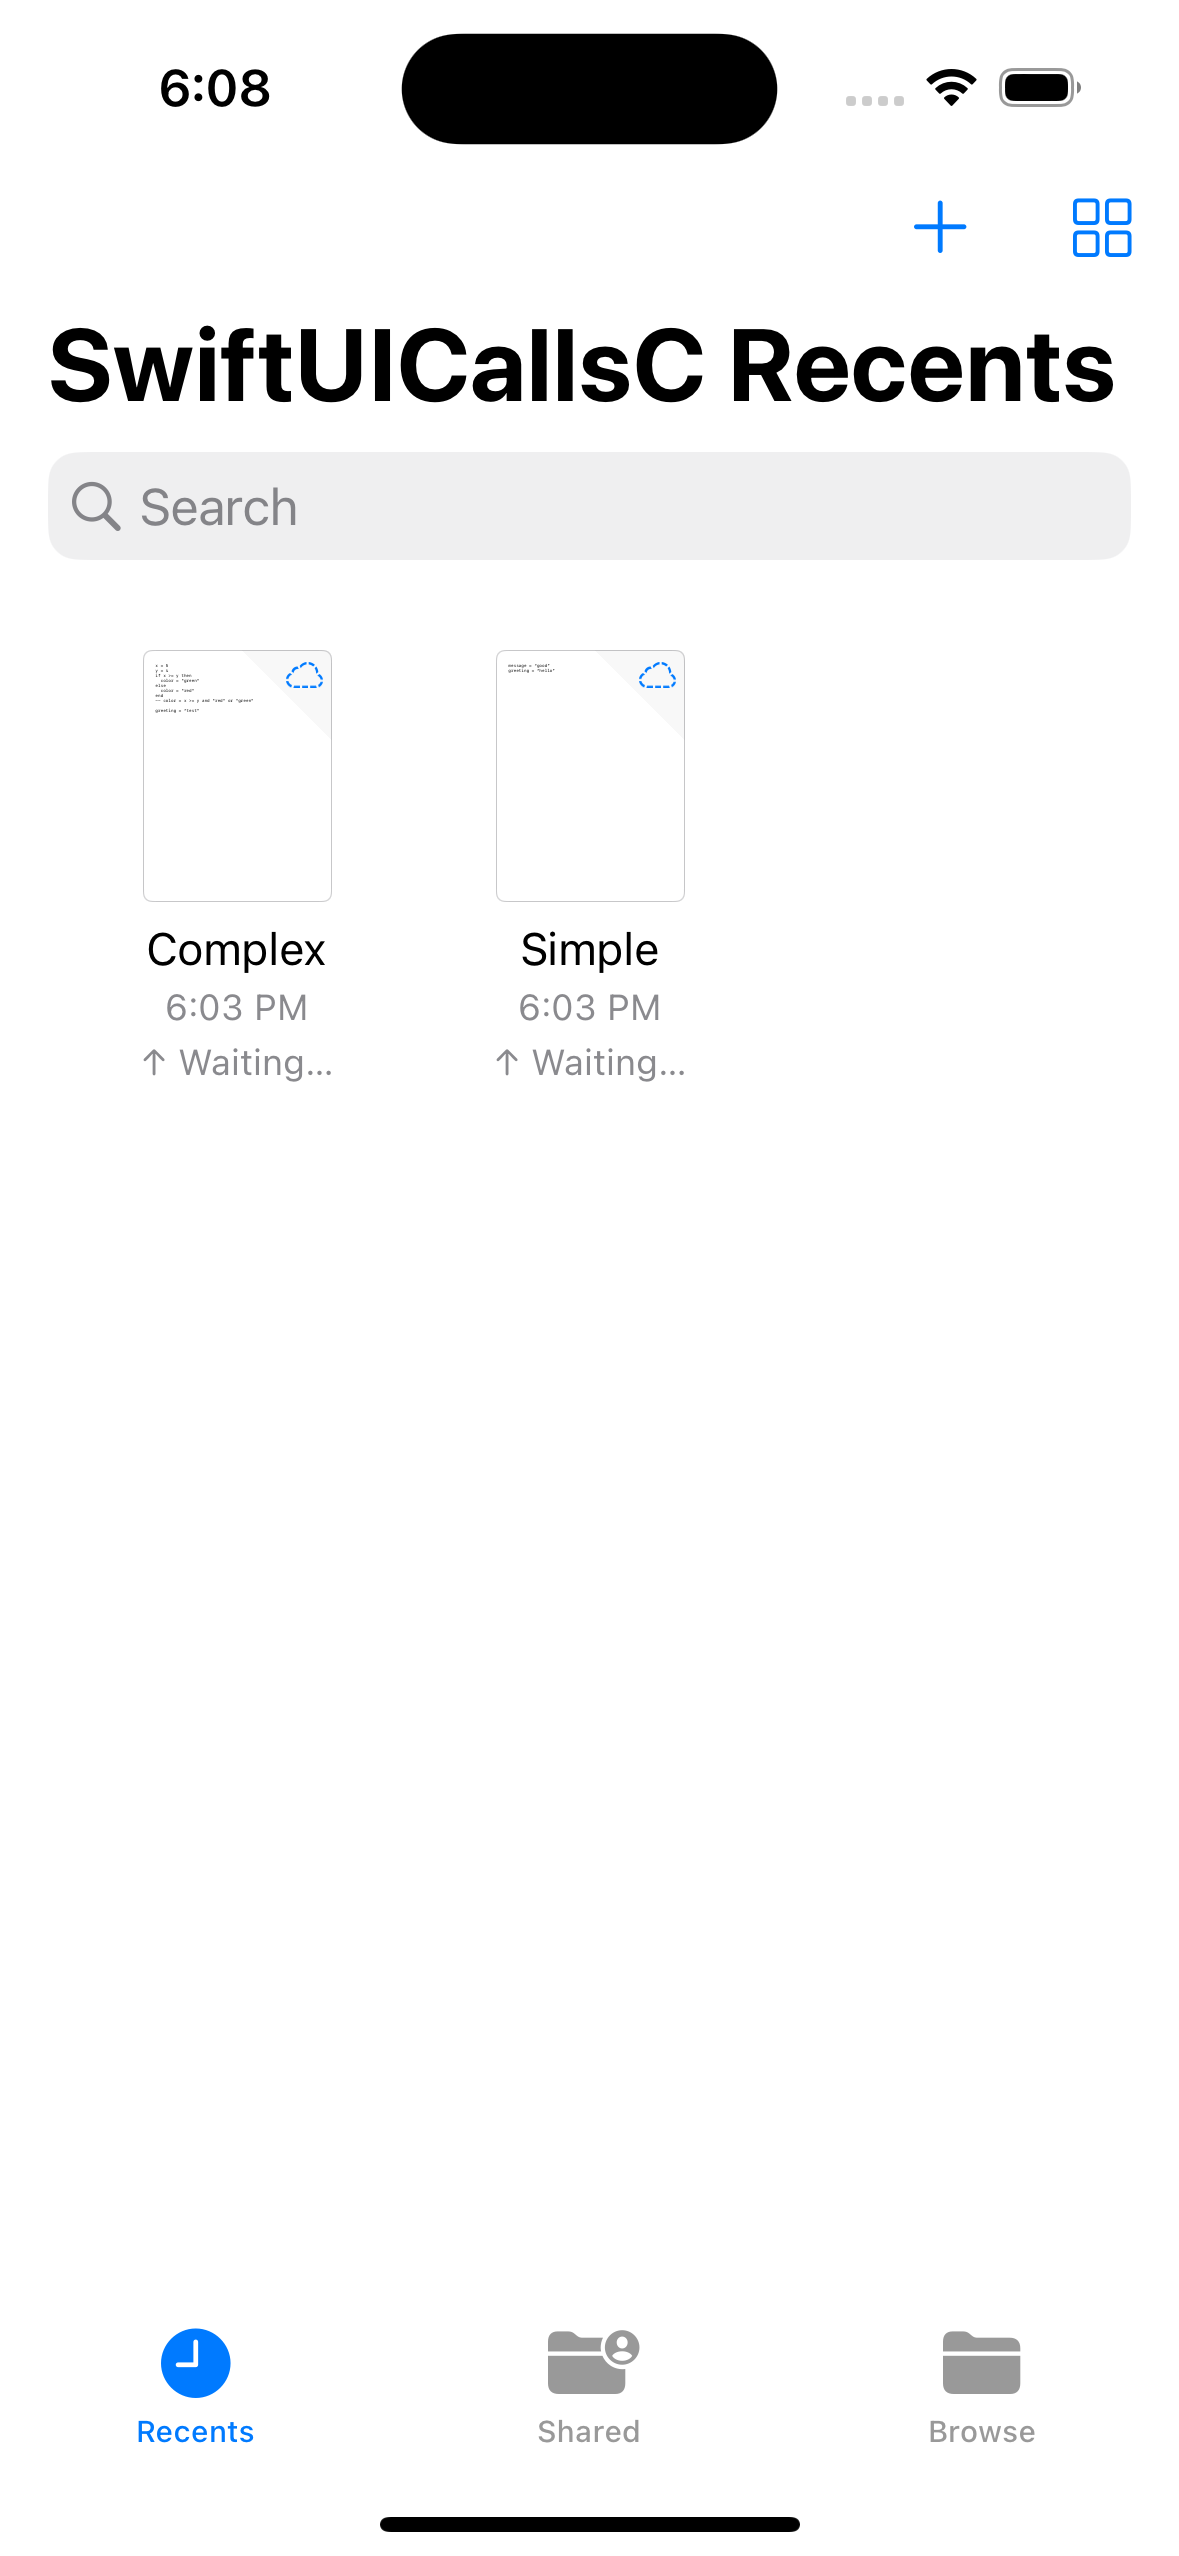
When users run the app they are presented with a document picker screen. There are three tabs at the bottom labelled "Recents", "Shared", and "Browse". The "Recents" tab displays thumbnail buttons for recently accessed documents. Initially there will not be any. In the screenshot below, two documents named "Complex" and "Simple" have already been created.

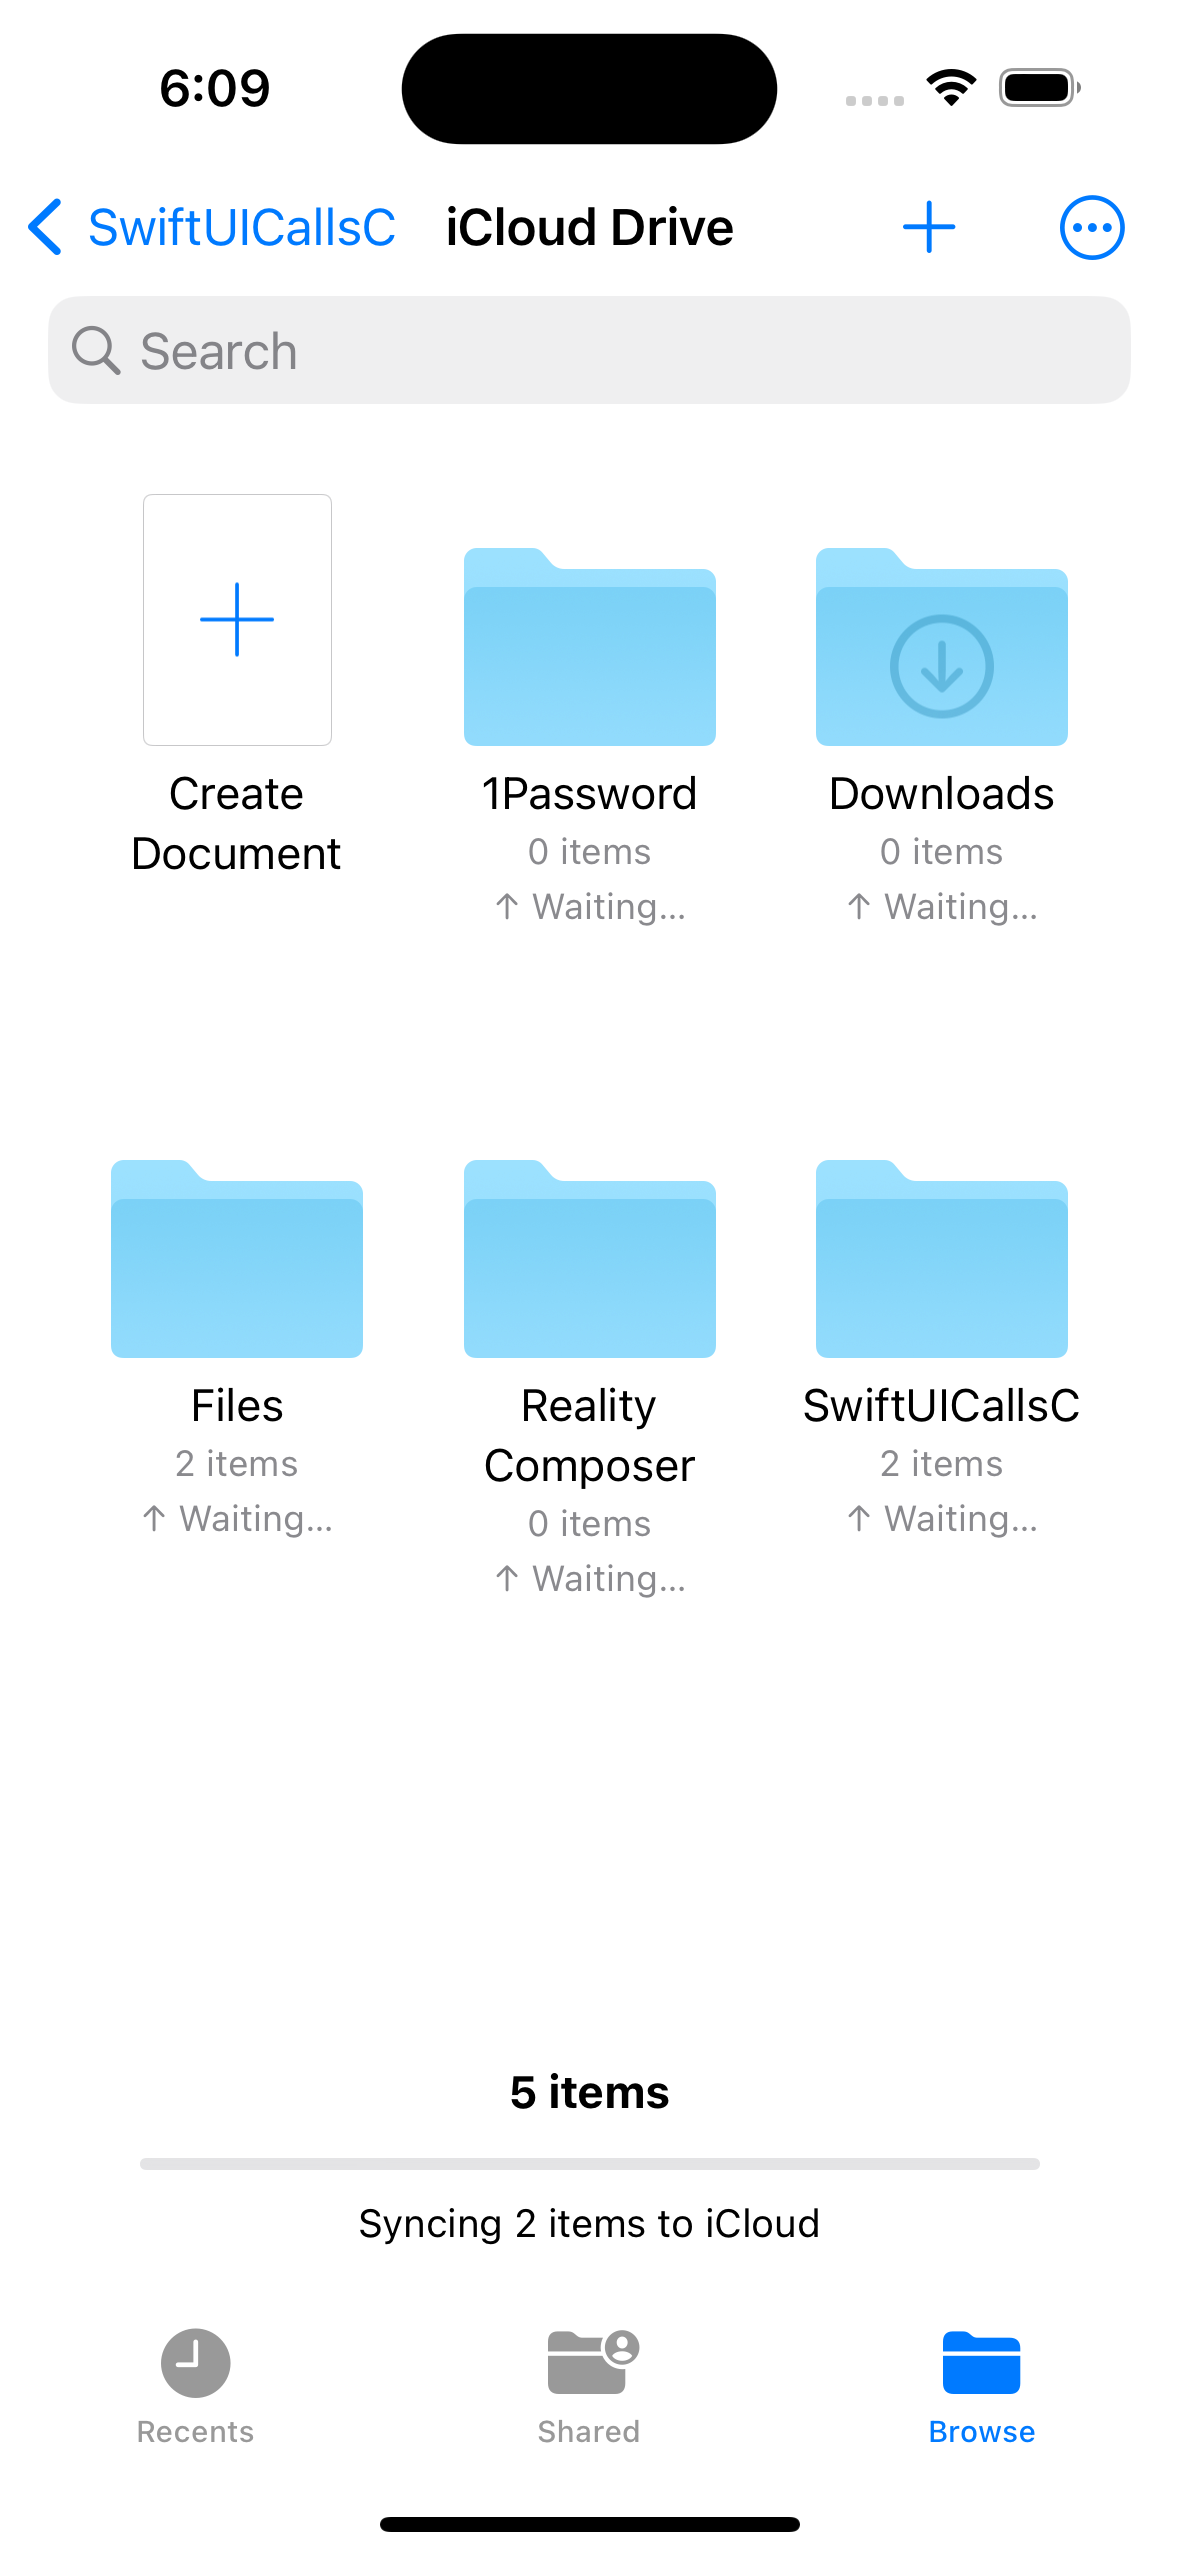
The "Browse" tab displays a "Create Document" button along with thumbnail buttons for all documents already created.

Clicking the "Create Document" button or the button for an existing document advances to the view passed to DocumentGroup inside the struct that conforms to App.

To return to the document picker screen, tap the "<" button in the upper-left.
To rename a document, long press it, select "Rename", and replace the current name.