Overview
There are many popular integrated development environments (IDEs) for creating software applications. Popular examples include VS Code and various JetBrains products such as Intellij IDEA, GoLand, PyCharm, and WebStorm that are all native applications. But is it possible to get the same level of features from a terminal based editor? This article hopes to convince you that you can using Neovim.
Neovim is a modern fork of Vim that adds many features such as Language Server Protocol (LSP) integration and configuration using the Lua programming language.
In general software developers either love or hate Vim. This is heavily influenced by the fact that it is a modal editor. Being modal means that at any point in time it is in one of the following modes:
- normal: for navigating document content and selecting text in a non-visual way
- insert: for inserting new text
- replace: for replacing existing text
- command: for entering commands such as "write" to save and "quit" to exit
- visual: for visually selecting text
A primary benefit of being modal is that keyboard shortcuts can be simplified. For example, in insert mode, pressing the "j" key inserts the letter "j". But when in normal mode, pressing the "j" key moves the cursor down.
Vim focuses on allowing users to keep their fingers on the keyboard rather than constantly moving between the keyboard and a mouse or trackpad. This substantially increases efficiency, decreasing the time required to convert thoughts to code.
Becoming proficient in using Vim requires a time investment. In my experience it can take around two weeks to reach the point that you have become more efficient that using a non-modal editor. When I was learning Vim if had to move my mouse behind my monitor to prevent myself for using it out of habit.
Vim Basics

The following sections describe the use of selected Vim features that are not unique to Neovim, but important to know. If you are new to Vim, checkout Vim Jump Start.
Spell Checking
Spell checking is a built-in feature of Vim, but it is not enabled by default in Vim, Neovim, or AstroNvim.
To enable spell checking in Vim, add the following in your .vimrc file:
set spell spelllang=en_us
To enable spell checking in Neovim, add the following in ~/.config/nvim/lua/user/init.lua:
return {
  polish = function()
    vim.opt.spell = true
    -- vim.opt.spelllang = "en_us" -- defaults to "en"
    vim.opt.spelloptions = "camel"
    vim.api.nvim_set_hl(
      0, -- global highlight group
      'SpellBad',
      -- { bg = "gray", fg = "red", underline = true }
      { fg = "red", underline = true }
    )
  end
}
Camel-cased words are not handled properly. For example, "catDog" is marked as misspelled. See this reddit post.
The following default key mappings perform actions related to spell checking.
| Key | Action |
|---|---|
]s | jumps to the next misspelled word |
[s | jumps to the previous misspelled word |
zg | good; adds the word under the cursor to the dictionary |
zw | wrong; removes the word under the cursor from the dictionary |
z= | opens a list of suggested replacements |
The list of suggested replacements appears at the bottom of the window. Each suggestion is identified by a number or letter that can be pressed to substitute it.
Shell Commands
To run a shell command from Vim, type ! followed by the command.
Any selected text is passed to the command as stdin and is replaced by the stdout of the command. An example of when this is useful is sorting lines. Select any number of lines and enter !sort to sort them.
Macros
Macros record a series of keystrokes and assign them to a lowercase letter so they can be replayed any number of times.
To define a macro:
- Press
qfollowed by the lowercase letter to which it will be assigned. - Type the keystrokes to be recorded.
- Press
qto end recording.
To replay a macro:
- Move the cursor to where it should be when the macro begins playing.
- Press
@followed by the assigned lowercase letter.
To replay the last macro used, press @@.
To replay a macro multiple times, type the desired number followed by @ and the assigned macro letter.
For example, suppose we want to define a macro named "i" that adds a hyphen and a space to the beginning of a line and add a period at the end.
- Move the cursor to the beginning of a line that needs these changes.
- Press
qi. - Type
ito go into insert mode. - Type
-and a space. - Press
<esc>to exit insert mode. - Press
Ato move the end of the line and enter insert mode. - Type
. - Press
<esc>to exit insert mode. - Press
0to move the beginning of the line and pressjto move down to the next line. These prepare for executing the macro again on the next line. - Press
qto end macro recording.
To execute this macro on the next 15 lines, type 15@i or 15@@.
Language Server Protocol (LSP)
Microsoft invented the LSP in order to provide better support for TypeScript in VS Code. LSP is an open protocol that anyone can implement.
An LSP client sends source code to an LSP server. The LSP server examines the code and returns information that supports:
- displaying error and warning messages
- providing code completions
- jumping to definitions of variables, functions, classes, and more
- finding all references to a symbol
- displaying documentation for a symbol
- syntax highlighting
LSP servers have been implemented for many programming languages.
Any text editor or IDE can embed an LSP client to manage communication with LSP servers. This is exactly what Neovim does. This enables the same level of language-specific support that is available in VS Code.
Desired Features
Both Vim and Neovim have a minimal set of features out of the box. More can be added through plugins. Neovim can use plugins written in either Vimscript or Lua.
The following table lists features most developers choose to add, along with recommended plugins.
| Feature | Popular Plugins |
|---|---|
| auto pairs | nvim-autopairs |
| better navigation | hop.nvim |
| better status line | heirline |
| code formatting | null-ls.nvim |
| color themes | many to choose from; prefer those with Tree-sitter support |
| completions | cmp-luasnip, nvim-cmp |
| commenting | Comment.nvim |
| debugger | nvim-dap, nvim-dap-ui |
| file explorer | neo-tree.nvim |
| fuzzy finder | telescope.nvim |
| Git support | gitsigns.nvim |
| icons | nvim-web-devicons |
| keymap display | which-key.nvim |
| linting | null-ls.nvim |
| notifications | nvim-notify |
| package manager | mason.nvim |
| plugin manager | lazy.nvim, packer.nvim |
| snippets | LuaSnip |
| split panes | smart-splits.nvim |
| syntax highlighting | nvim-treesitter |
| terminal | toggleterm.nvim |
Neovim Bundles

Configuring a large number of plugins is a daunting task. For this reason, pre-built Neovim configurations are popular. There are many to choose from, but the most popular seem to be:
The remainder of this article focuses on AstroNvim. Using other pre-built configurations will be similar.
AstroNvim

AstroNvim is a popular pre-built configuration for Neovim. It describes itself as "an aesthetic and feature-rich neovim config that is extensible and easy to use with a great set of plugins".
For a list of plugins used by AstroNvim by default, see Acknowledgements.
AstroNvim uses the Lazy plugin manager. For details on the options for configuring plugins using this plugin manager, see the "Plugin Spec" section at the previous link.
There are several optional tools that AstroNvim will use if they are installed. These include:
- ripgrep - for live grep Telescope search;
<leader>fw - lazygit - Git UI;
<leader>ggfor Git Gui or<leader>tl - bottom - process viewer;
<leader>tt - Python - for the Python REPL;
<leader>tp - Node - required by many LSPs and for the Node REPL;
<leader>tn
All of these are great, but I highly recommend installing ripgrep and lazygit. File search performance is dramatically improved by ripgrep and Git integration is much better using lazygit.
ripgrep is "a line-oriented search tool that recursively searches the current directory for a regex pattern." To install it, enter brew install ripgrep. This adds the command rg.
lazygit is a terminal UI for Git commands. To install it, enter brew install lazygit.
bottom is a "graphical process/system monitor for the terminal". To install it, enter brew install bottom. This installs the command btm.
For the best Node.js support, enter npm install -g neovim.
Installing AstroNvim
To install AstroNvim:
- Install Neovim. If using macOS, install Homebrew and enter
brew install neovim. For other operating systems, see Installation. - If you already have a
~/.config/nvimdirectory, rename is to something likenvim-backup. - Enter
git clone --depth 1 https://github.com/AstroNvim/AstroNvim ~/.config/nvim - Install the Lua LSP server which will be useful when entering Lua configuration code. In macOS, enter
brew install lua-language-server. - Enter
nvim. On first launch this will install many things. - Install language parsers by entering
:TSInstall {language-name}for each language. For example, supported language names include "javascript", "lua", and "swift". - Install LSP servers by entering
:LspInstall {server-name}for each server. For example, supported server names include "eslint", "tsserver", and "lua_ls". To see a list of all the available LSP servers for a given file type, open a file of that type and enter:LspInstall. - For code formatting of JavaScript and TypeScript, enter
:NullLsInstall prettier. - Optionally enter
:DapInstall {debug-adapter}for each language-specific Debug Adapter Protocol server. (I could not find any of these.) - Enter
:Lazy syncto update used plugins and remove unused plugins. When this completes, pressqto close the window. - Enter
:AstroUpdatePackagesto get the latest AstroNvim updates. - If JavaScript will be edited then it is likely that Babel will be used parse files. This requires setting the environment variable
NODE_ENV. When using zsh, addexport NODE_ENV=developmentin~/.zshrc.
To check the status of the installation, enter :checkhealth. Fix any issues this identifies.
Once you are ready to commit to using Neovim instead of Vim, it is a good idea to create a vim alias that runs nvim. If using zsh, add the following in your .zshrc file:
alias vim="nvim"Updating AstroNvim
To update AstroNvim after it has been installed:
- If you created the directory
~/.config/nvim/lua/user, copy it to another location such as your home directory. - Start a Neovim session.
- Enter
:AstroUpdate. - Enter
:AstroUpdatePackages. - If you copied to
userdirectory somewhere else, move it back to its original location.
Configuring AstroNvim
AstroNvim configuration files are stored in ~/.config/nvim. It's best to not modify these files and instead override the default configurations if desired with files under the ~/.config/nvim/lua/user directory.
The main configuration file is ~/.config/nvim/init.lua.
The ~/.config/nvim/lua directory contains the subdirectories astronvim and plugins.
The astronvim directory contains:
autocmds.luabootstrap.luahealth.lualazy.luamappings.lua- defines key mappingsoptions.lua
The plugins directory contains separate configuration .lua files for many of the plugins that AstroNvim uses by default. These include:
alpha.luacmp.luacore.luadap.luagit.luaheirline.lualsp.luamason.luaneo-tree.luatelescope.luatreesitter.luaui.lua
The AstroNvim default settings found in ~/.config/nvim/lua/astronvim/options.lua use:
- 2-space indentation;
shiftwidth = 2andtabstop = 2 - relative line numbers;
relativenumber = true - 24-bit colors;
termguicolors = true - tabs expand to spaces;
expandtab = true - line numbers shown;
number = true - automatic indentation;
smartindent = true - no line wrapping;
wrap = false
For better snippet support, create the file ~/.config/nvim/lua/user/plugins/luasnip.lua containing the following:
return function(_, opts)
  local ls = require("luasnip")

  ls.config.set_config({
    history = true,
    updateevents = "TextChanged,TextChangedI"
  })

  if opts then ls.config.setup(opts) end

  vim.tbl_map(
    function(type)
      require("luasnip.loaders.from_" .. type).lazy_load()
    end,
    { "vscode", "snipmate", "lua" }
  )
end
Key Mappings
The default key mappings provided by AstroNvim are described here. Most of these are defined in ~/.config/nvim/lua/astronvim/mappings.lua.
AstroNvim defines the key mappings jj and jk to exit insert mode as alternatives to pressing the <esc> key.
AstroNvim uses the which-key plugin to display applicable key mappings at the bottom of the screen when you pause during entry. This includes default and custom key mappings. For example, press the leader key (space by default) and pause. All key mappings that begin with the leader key will be displayed. The ones in blue (submenus) require pressing additional keys that are displayed when you press their key. These include "Buffers", "Find", "Git", and more.
For example, type <leader> to see all the key mappings that begin with the <leader> key and type <leader>f to see all the "Find" key mappings.


In order reach maximum efficiency with Neovim it is necessary to make a large number of keyboard shortcuts part of your muscle memory. The "which-key" plugin described above is an important tool for helping you through the journey of learning the keyboard shortcuts.
While a primary reason for using Vim is to improve efficiency by keeping your hands on the keyboard, many actions can also be accomplished using a mouse or trackpad. For example, positioning the cursor and switching between buffer tabs can be accomplished by clicking.
Fonts
Several areas of the AstroNvim UI attempt to display icons. This requires using a Nerd font. One that I recommend is "Caskaydia Cove Nerd Font" which is very similar to the non-Nerd font Cascadia Code from Microsoft.
Basics
The leader key defaults to space.
To open a new, unnamed, empty buffer, press <leader>n. To write the buffer to a file relative to the directory from which nvim was launched, enter :w {file-name}.
To open the AstroNvim home screen, press <leader>h.
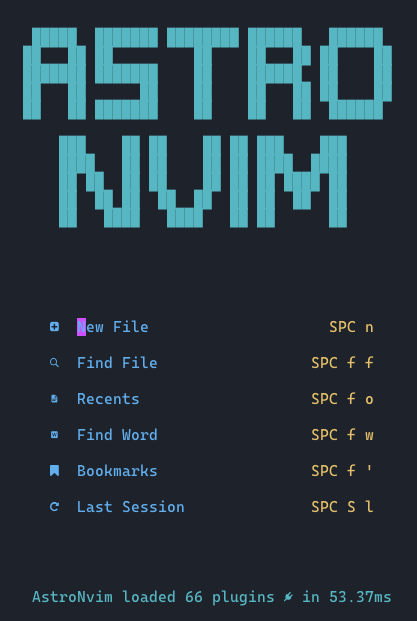
This displays a menu of common commands that includes:
"New File"
This creates a new, unnamed, empty buffer.
"Find File"
This opens a Telescope window where text can be entered to find files that contain it in their name. This performs fuzzy finding. For example, entering "weafor" will find the file "WeatherForecast.js".
Move the cursor to one of the matching file paths and press the
returnkey to open it.The keyboard shortcut for this is
<leader>fffor "Find File".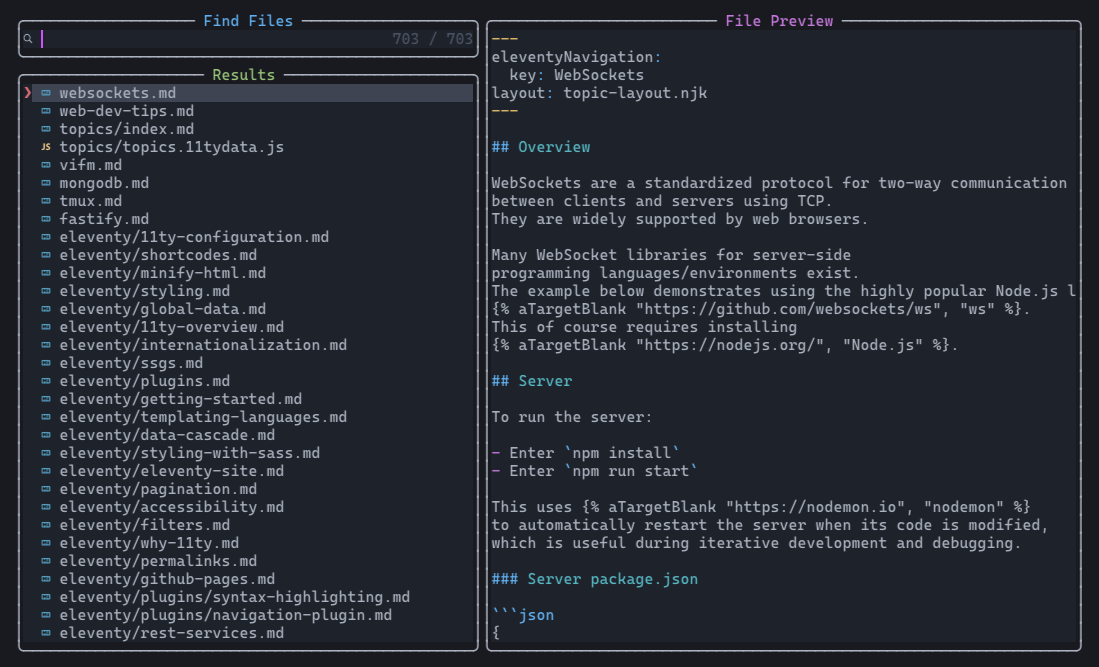
"Recents"
This opens a Telescope window that lists recently opened files. Move the cursor to one of the file paths in the list and press the
returnkey to reopen it.The keyboard shortcut for this is
<leader>fofor "Find Old".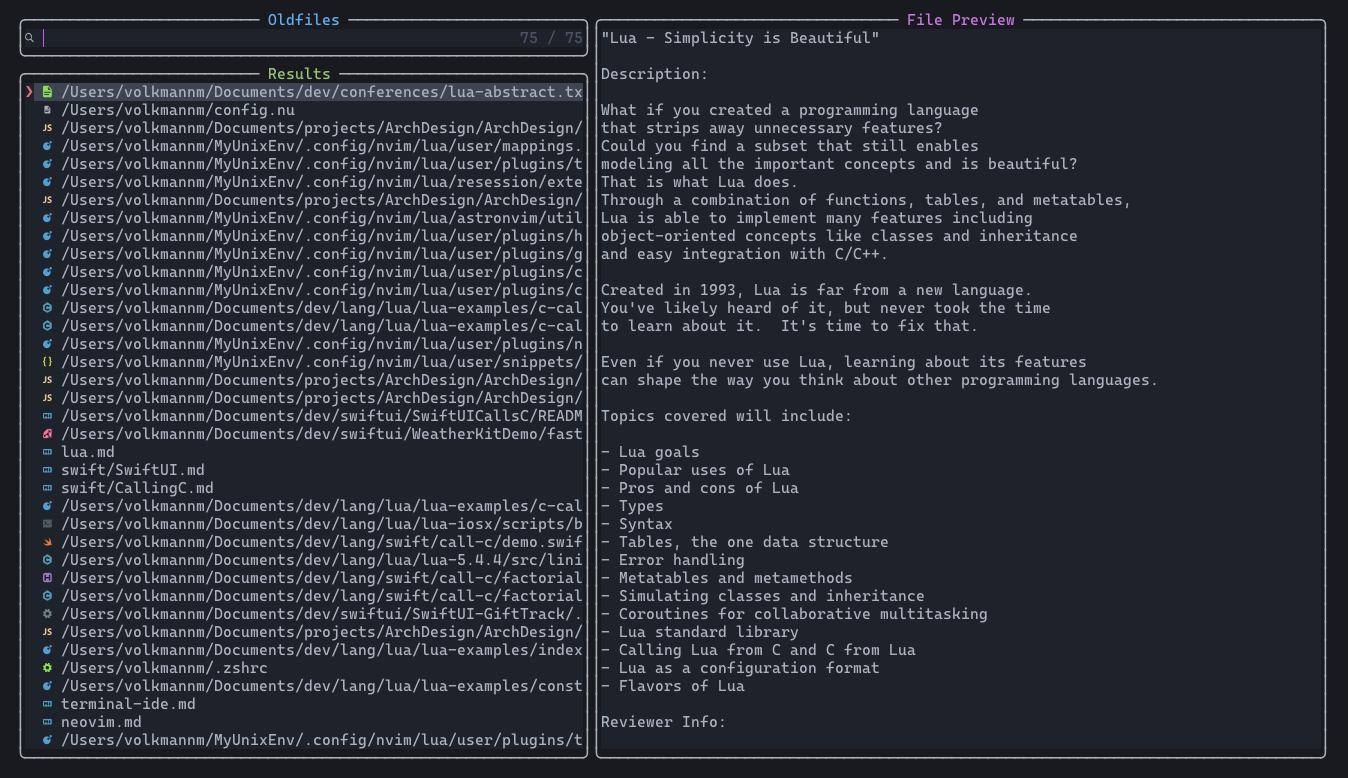
"Find Word"
This opens a Telescope window where words can be entered to find files that contain them. Move the cursor to one of the matching file paths and press the
returnkey to open it.The keyboard shortcut for this is
<leader>fwfor "Find Word".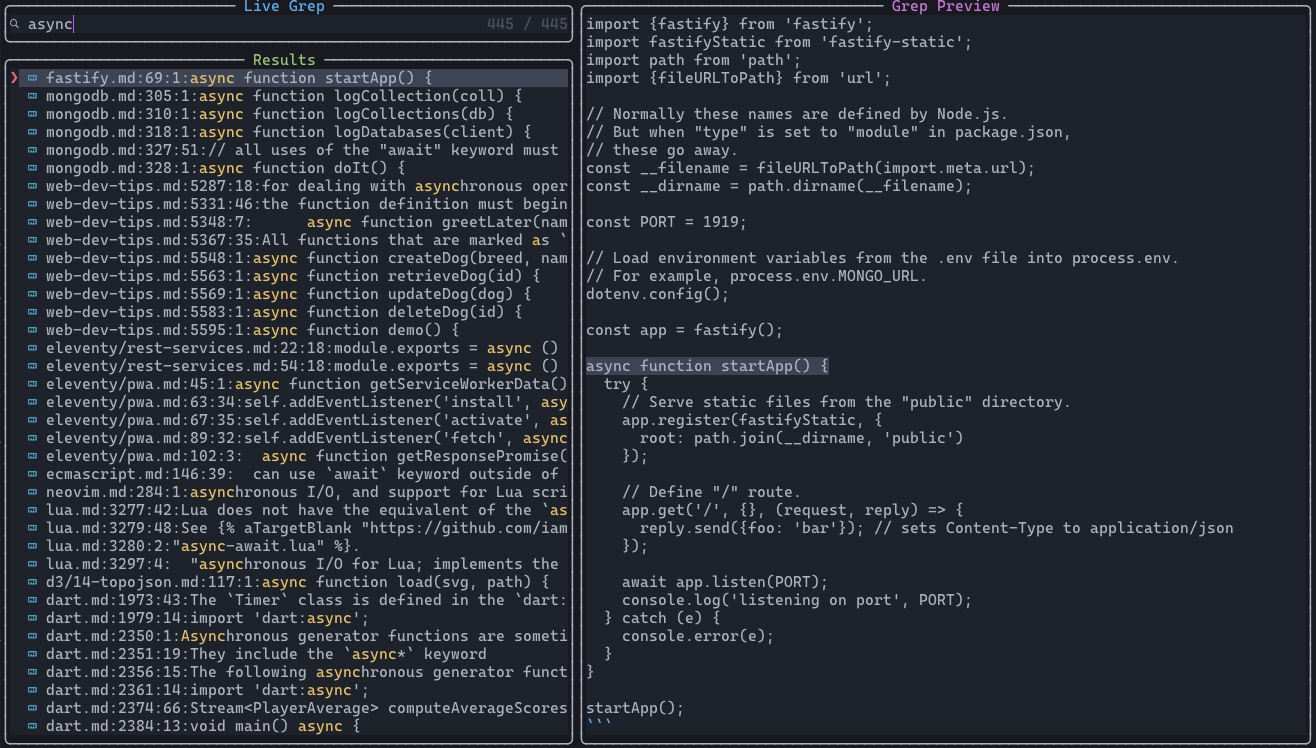
"Bookmarks"
This displays all the current marks in a Telescope window. Move the cursor to one of the marks and press the
returnkey to jump to it. See the "Marks" section below for more detail."Last Session".
This restores the most recent session. See the "Sessions" section below for more detail.
To close any Telescope window, press <esc> to exit insert mode and press q.
File Explorer
AstroNvim uses the neo-tree.nvim plugin for the file explorer that appears on the left side. To toggle display of the file explorer, press <leader>e.
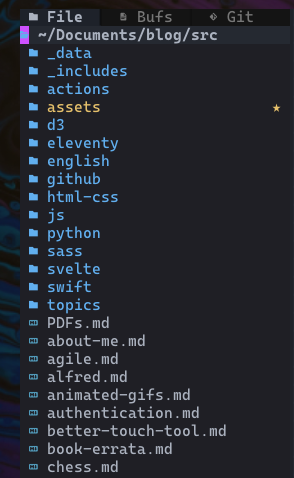
The file explorer contains three tabs:
- File: displays files and directories in and below the directory from which Neovim was started
- Bufs: displays a list of all the current buffers
- Git: displays a list of modified, uncommitted files
Press the < and > keys to navigate between these tabs.
Press j and k to navigate down and up to select a file, directory, or buffer. Press the return key to open the selected item.
Some of the most useful key mappings that can be used when focus is in the file explorer include:
| Key | Action |
|---|---|
? | shows all file explorer key mappings |
/ | filters the list of files and directories based on entered text |
# | fuzzy filters the list of files and directories based on entered text |
< | navigates to previous tab (File, Bufs, or Git) |
> | navigates to next tab (File, Bufs, or Git) |
return | opens selected file or directory |
a | adds a new file or directory |
A | adds a new directory |
H | toggles display of hidden files (hidden by default) |
S | opens selected file in a new horizontal split (below) |
s | opens selected file in a new vertical split (on right) |
c | copies selected file or directory; prompts for new name |
d | deletes selected file or directory |
j | moves down to the next item |
k | moves up to the previous item |
m | moves selected file or directory; prompts for destination |
O | opens selected file using associated app (in macOS image -> Preview) |
r | renames selected file or directory |
t | opens selected file in a new tab (new set of files) |
y | copies selected file to clipboard |
p | pastes file from clipboard into selected directory |
The / filtering looks for names that contain the entered text. For example, "raf" matches the name "giraffe". The # filtering is similar, but is fuzzy. For example, "ife" matches the name "giraffe".
With both / and # filtering, select a file or directory using the up and down arrow keys or by pressing ctrl-n (for "next") or ctrl-p (for "previous"). Press the return key to open the selected file or directory. To clear filtering and return to displaying the full list of files and directories, press the <esc> key.
When t is pressed, a new tab is created. These are represented by numbered buttons starting from 1 in the upper-right. Clicking these switches to the corresponding tab. To close a tab, select it and click the red circle containing an "X" that appears after the last tab number.
The file explorer indicates when there are hidden files in a directory. To show them, press H.
By default neo-tree hides all files and directories listed in ~/.config/nvim/.gitignore. One of the directories listed is lua/user which contains files that configure plugins. One way to make this directory visible is to remove the lua/user line from the .gitignore file. This is a good option when your .config directory is stored in a Git repository. Another way is to create the file ~/.config/nvim/lua/user/plugins/neo-tree.lua with the following content:
return {
  "nvim-neo-tree/neo-tree.nvim",
  opts = function(_, opts)
    -- This part adds key mappings related to incremental selection.
    require 'nvim-treesitter.configs'.setup {
      incremental_selection = {
        enable = true,
        keymaps = {
          init_selection = "<leader>sw",    -- select word
          node_incremental = "<leader>sn",  -- incremental select node
          scope_incremental = "<leader>ss", -- incremental select scope
          node_decremental = "<leader>su"   -- incremental select undo
        }
      }
    }
    opts.filesystem.filtered_items = {
      always_show = { "user" }
      -- hide_gitignored = false

    }
  end
}
Buffers
The contents of opened files are held in buffers.
Editing a buffer and writing it saves the modified content back to its file.
Neovim indicates buffers that have been modified and not written by placing a dot after the file name in the buffer tab.
Neovim provides the following default key mappings related to buffers:
| Key | Action |
|---|---|
<leader>c or :clo | closes current buffer |
[b | navigates to buffer on right |
]b | navigates to buffer on left |
<b | swaps current buffer with one on left |
>b | swaps current buffer with one on right |
Splits
The editing area displays tabs across the top that correspond to each of the current buffers. The area below the tabs can be split into multiple panes referred to as "splits". To edit one of the buffers inside a specific pane, move focus to the pane and then click the tab of the desired buffer.
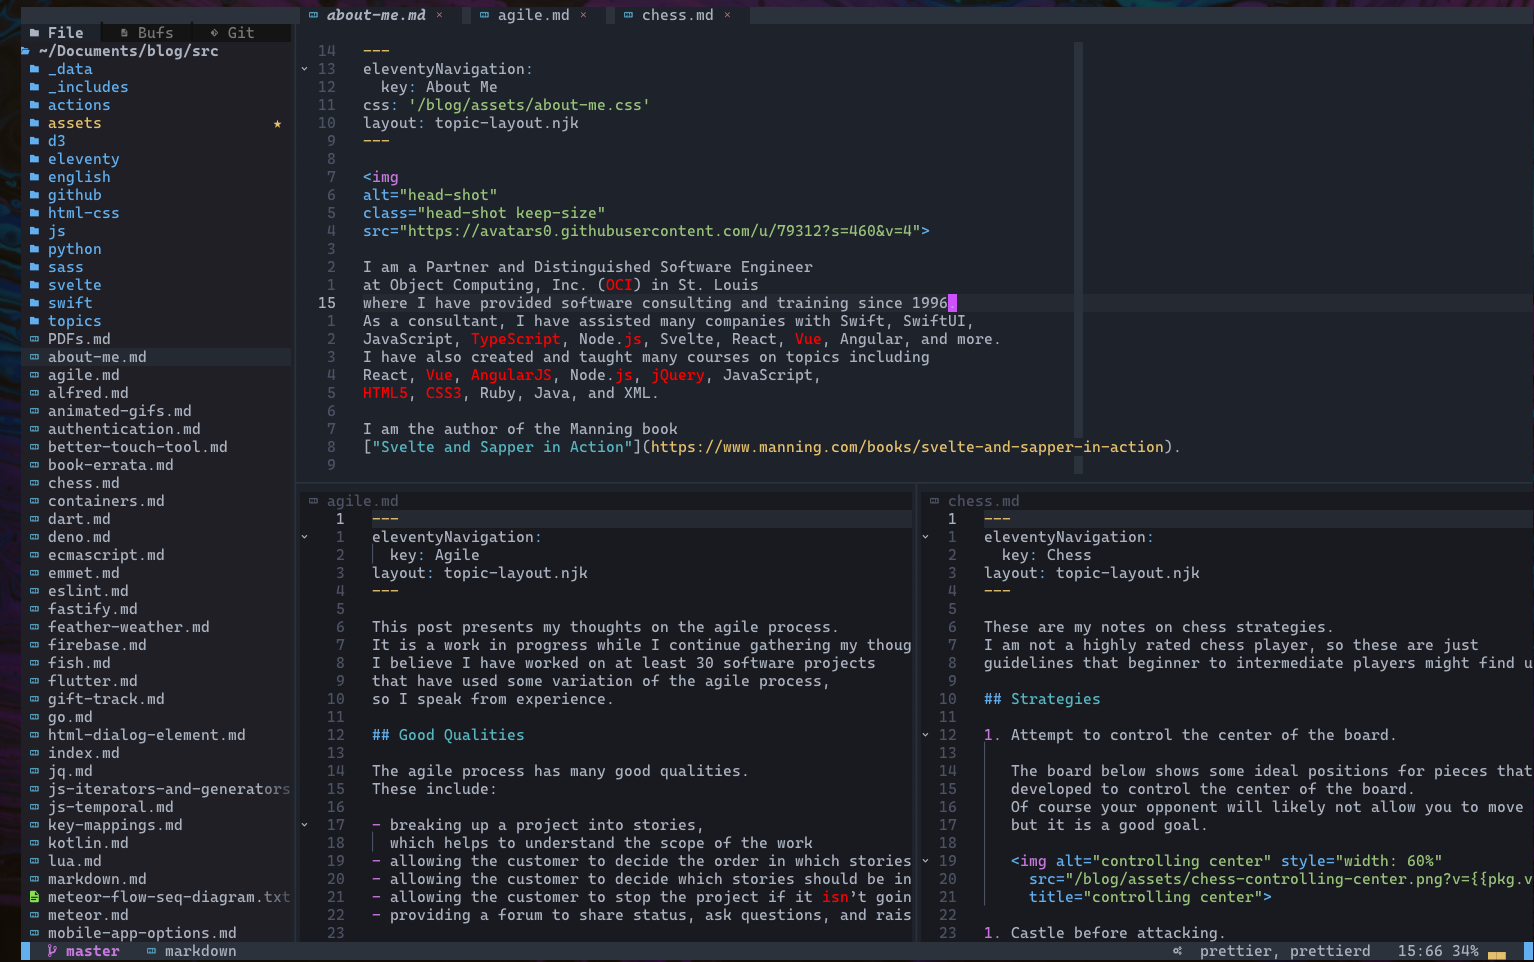
The following key mappings perform actions related to the editing area.
| Key | Action |
|---|---|
<leader>/ | creates a horizontal split (below) |
<leader>| | creates a vertical split (right) |
ctrl-q | closes current split and quits nvim if it is the last |
:clo | same as ctrl-q above |
ctrl-h | moves focus to split on left |
ctrl-j | moves focus to split below |
ctrl-k | moves focus to split above |
ctrl-l | moves focus to split on right |
ctrl-{arrow} | increases size of current split in arrow direction |
Moving focus to a different split includes moving focus from the file explorer to the first buffer and from the first buffer to the file explorer.
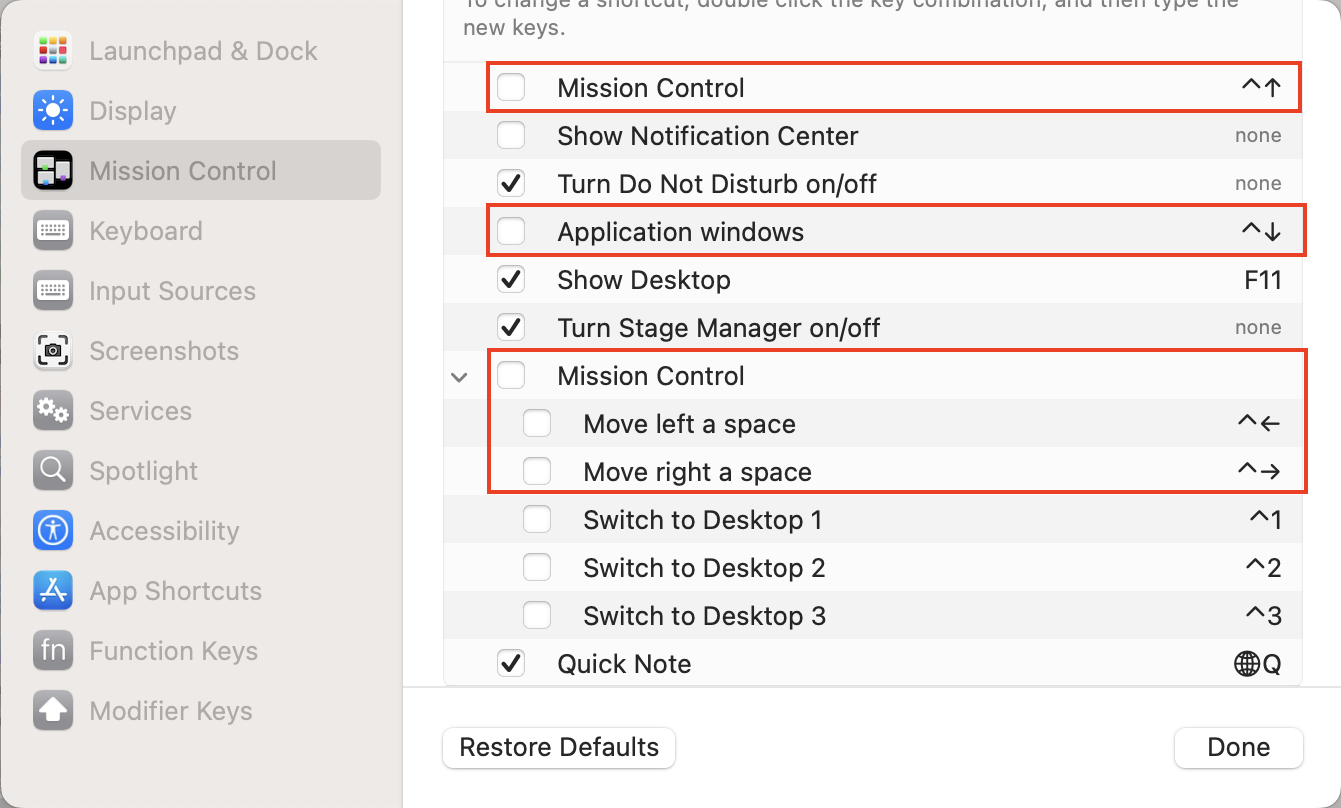
In macOS the ctrl-{arrow} mappings will likely not work due to default key mappings in System Settings. The following screenshot shows the key mappings that need to changed or disabled to allow the AstroNvim default resize key mappings to work.
Telescope
The telescope.nvim plugin "is a highly extendable fuzzy finder over lists". It provides many commands and default key mappings them.
Key mappings for operating on the current buffer include:
| Key | Action |
|---|---|
<leader>lf | formats the contents of the current buffer |
<leader>ls | opens a Telescope window for finding symbol references |
<leader>lS | toggles display of a right pane containing a list of symbols defined in the file |
Symbols include variables, functions, and type declarations. Select a symbol name to scroll to it in the buffer. The list of symbols automatically updates when focus moves to a different buffer.
Key mappings for operating on the symbol under the cursor include those described below. Note that some LSP servers do not support all of these actions.
| Key | Action |
|---|---|
gd | goes to the definition |
gD | goes to the declaration |
gi | lists all implementations in a Telescope window |
gI | goes to the implementation |
gr | shows references in a Telescope window |
gs | displays signature information in a floating window |
gT | goes to the type definition |
K | shows the type of the symbol under the cursor |
<leader>la | opens a menu of applicable code actions in a Telescope window |
<leader>lr | renames the symbol under the cursor; prompts for new name |
ctrl-o | moves backward through location jumps |
Key mappings for operating on diagnostic messages include:
| Key | Action |
|---|---|
[d | move to previous diagnostic in current buffer |
]d | move to next diagnostic in current buffer |
gl | shows full error message when an error is displayed |
lD | displays all diagnostics in a Telescope window |
To close a diagnostic popup, move the cursor in any way.
After pressing gl, press it again to move focus into the diagnostic popup. When focus is in a diagnostic popup, press q to close it.
Some telescope commands display a new window containing multiple sections. The upper-left section contains a text input used to filter the results displayed in the lower-left section. Initially the focus will be in this text input and it will be in insert mode. We will refer to this section as "filter".
The lower-left section displays the filtered results. We will refer to this section as "results". To move focus from the filter section to the results section, press tab or ctrl-j. The selected item displays a > to its left and has a gray background. To select a different item, press tab (down), ctrl-j (down), ctrl-k (up), or the down and up arrow keys. To open a selected file, press the return key.
The right section displays a preview of what is selected in the lower-left section. We will refer to this section as "preview".
Press <esc> key to exit insert mode. When not in insert mode, the following key mappings can be used:
- Move the filter section cursor left and right by pressing
handl. - Change the result section selection by pressing
jandk. - Display all applicable Telescope key mappings by pressing
?.
To close any Telescope window, press <esc> to exit insert mode and press q.
To configure Telescope so pressing the <esc> key also closes the Telescope window, create the file ~/.config/nvim/lua/user/plugins/telescope.lua containing the code below. When in insert mode, it is necessary to press <esc> twice, once to exit insert mode and once to close the window.
return {
  "nvim-telescope/telescope.nvim",
  opts = function(_, opts)
    local actions = require "telescope.actions"
    opts.defaults.mappings.n["<Esc>"] = actions.close
  end
}
The Telescope fuzzy finder can find many things including files, buffers, key mappings, help, and more. The key mappings to initiate fuzzy finder searches include:
| Key | Action |
|---|---|
<leader>fa | finds AstroNvim configuration files |
<leader>fb | finds buffers by name |
<leader>fc | finds files that contain the word under the cursor |
<leader>fC | finds commands made available by plugins |
<leader>ff | finds files by name |
<leader>fh | finds help files by their name |
<leader>fk | finds key mappings |
<leader>fo | finds files opened recently (old files) |
<leader>fr | finds Vim registers (can see their contents) |
<leader>ft | finds themes (can see previews and select one) |
<leader>fw | finds files by consecutive words in their content (live_grep) |
<leader>fW | same as above, but also searches hidden files |
Changing the theme using <leader>ft only affects the current session. To change the default theme used in future sections, specify a colorscheme in ~/config/nvim/lua/user/init.lua.
Key mappings for operating on a Telescope window include:
| Key | Action |
|---|---|
esc esc | closes the window |
ctrl-c | also closes the window |
ctrl-x | opens selected file in a horizontal split (below current buffer) |
ctrl-v | opens selected file in a vertical split (right of current buffer) |
ctrl-d | scrolls down in file preview |
ctrl-u | scrolls up in file preview |
tab | moves focus from filter input to "Results" section |
tab | when in "Results" section, moves down to next item |
shift-tab | moves focus from "Results" section to filter input |
To see all the Telescope key mappings, press the <esc> key to exit insert mode and press ?. The key mappings will appear at the bottom of the window.
Comments
To toggle commenting of the current line or selected lines, press <leader>/.
For more advanced comment support, see the Comment.nvim plugin described in the "Custom Plugins" section.
Auto-pairs
AstroNvim uses the nvim-autopairs plugin to manage pairs of parentheses, square brackets, and curly braces. When one of the opening characters ((, [, or {) is typed, the closing character (), ], or }) is automatically supplied and the cursor is placed between them.
Status Line
AstroNvim uses the heirline.nvim plugin to render a nice status line. This includes information about the current Git repository such as the current branch and number of modified files.

Git Integration
When editing a file in a Git repository, colored vertical lines appear in the gutter to indicate added lines (green), delete lines (red), and modified lines (orange).
The left side of the status bar at the bottom displays the current branch and the numbers of new, modified, and deleted files.
The file explorer Git tab lists the modified files.
To see all the keys mapped to Git commands, press <leader>g and pause. These include:
| Key | Action |
|---|---|
<leader>gb | displays a list of local Git branches and allows switching to one |
<leader>gc | lists all commits for the current file |
<leader>gd | displays a side-by-side diff for the current file |
<leader>gt | displays Git status of current project in a Telescope window |
In the Telescope window displayed by <leader>gb, the "Git Branch Preview" pane on the right shows the commits on the branch.
Lazygit
A better way to manage Git repositories from inside Neovim is to use lazygit which is a terminal UI for executing Git commands.
To launch lazygit from a terminal window, cd to a repository directory and enter lazygit.
To launch lazygit from within AstroNvim, enter <leader>gg (for "Git GUI") or <leader>tl (for "terminal lazygit"). This opens a floating terminal and runs lazygit inside it. To close this window, press q.

The lazygit UI has a left and right side.
The left side contains five numbered sections, Status (1), Files (2), Local Branches (3), Commits (4), and Stash (5). To move focus to the next section press the tab key or the right arrow key. To move focus to the previous section press the left arrow key (shift-tab does not work). To move focus to a specific section press its number.
To see the key mappings that apply to the section that currently has focus, press ? or x.
To move down and up within a section, use the j and k keys or the down and up arrow keys.
To search within any section, press /.
The right side contains information about the item selected on the left side. To scroll down and up, press ctrl-d and ctrl-u.
Status Section
This section shows the repository name and the current branch. The following key mappings apply to this section:
| Key | Action |
|---|---|
a | shows the log for all branches |
u | checks for a lazygit update |
return | opens a dialog for switching to a different repository |
Files Section
This section contains two tabs, "Files" and "Submodules". The "Files" tab lists all the modified files.
To see diffs for a file on the right side, select the file.
The following key mappings apply to the Files section:
| Key | Action |
|---|---|
space | toggles whether the selected file is staged for inclusion in a commit |
a | toggles all modified files between being staged and not staged |
c | commits all staged files; prompts whether to commit all if none are staged |
d | discards all changes in the selected file; press d again to confirm |
D | opens a menu of options where one is "hard reset" |
f | fetches changes from remote branch |
i | adds file to .gitignore |
r | refreshes list of files; useful when files are modified outside of Neovim |
s | stashes all changes; prompts for stash name |
S | stashes only staged changes; prompts for stash name |
| ` | toggles file list between flat and tree views |
ctrl-w | toggles hiding lines in right side that only differ by whitespace |
When committing changes, a dialog will appear where a commit message can be entered. After entering a commit message, press the return key to perform the commit.
The menu that appears when D is pressed contains the following options:
- nuke working tree - runs
git reset --hard HEAD && git clean -fd - discard unstaged changes
- discard untracked files
- discard staged changes
- soft reset - discards the last commit
- mixed reset - discards the last commit and stages (add)
- hard reset - discards the last commit and stages (add) and all changes
Local Branches Section
This section contains three tabs named "Local Branches", "Remotes", and "Tags". The "Local Branches" tab lists all the local branches. The currently checked out branch name is preceded by *. Selecting a local branch shows all of its commits on the right side.
The following key mappings apply to this section:
| Key | Action |
|---|---|
return | displays all commits to the selected local branch; press <esc> to return to branch list |
space | checks out the selected branch |
c | creates a new remote branch |
d | deletes the selected local branch after confirming |
f | fetches changes from remote branch |
M | merges the selected branch into the checked out branch after confirming |
n | creates a new local branch |
o | starts process of opening a pull request in a new browser tab (must push first) |
p | pulls changes from the corresponding remote branch |
P | pushes changes to the corresponding remote branch |
R | renames the selected branch |
r | rebases the selected branch into the checked out branch after confirming |
When attempting to checkout a different branch, if there are uncommitted changes a dialog will appear that offers to stash the changes.
If a merge results in conflicts, a dialog will appear explaining that. Press <esc> to abort the merge or return to resolve the conflicts. Each conflict will be described by a pair of "hunks". To keep one of the hunks, move the cursor to it with j and k and press space. The other hunk will be discarded. To keep both hunks, press b. Another dialog will appear after all merge conflicts have been resolved.
To delete a remote branch, switch to the "Remotes" tab in this section, select the branch, and press d.
To create a new remote branch, switch to the "Remotes" tab in this section, and press n.
To create a new tag, switch to the "Tags" tab in this section, and press n.
To delete a tag, switch to the "Tags" tab in this section, select the tag, and press d.
Commits Section
This section contains two tabs, "Commits" and "Reflog". The "Commits" tab lists all the commits on the current local branch. Selecting a commit shows detail about it on the right side including the commit comment and a list of the new, modified, and deleted files.
From the git docs, "Reflogs record when the tips of branches and other references were updated in the local repository."
The following key mappings apply to this section:
| Key | Action |
|---|---|
d | deletes the selected commit |
o | opens the selected commit in a new browser tab |
s | squashes the selected commit |
S | squashes all commits above the selected commit |
T | adds a tag to the selected commit |
t | reverts the selected commit after confirming |
space | checks out the selected commit |
Stash Section
This section lists all the current stashes. Selecting a stash shows the stashed changes on the right side.
The following key mappings apply to this section:
| Key | Action |
|---|---|
d | drops the selected stash after confirming |
space | applies the selected stash without dropping it after confirming |
g | applies the selected stash and drops it after confirming |
r | renames the selected stash |
| ` | toggles the stash list between flat and tree views |
return | displays diffs for the stash in the right side |
Color Themes
To see all the installed color themes and select one, enter :colo followed by a space and the tab key. Press the tab key repeatedly to select a theme. Press the return key activate the selected theme. Selecting a theme that is compatible with Tree-sitter results in better syntax highlighting.
A better way to see the available color themes and switch to one is to press <leader>ft as described in the "Telescope" section above.
Changing the theme in this way only affects the current session. To change the default theme used in future sections, specify a colorscheme in ~/config/nvim/lua/user/init.lua.
Completions
AstroNvim provides language-specific code completions. To select a suggested completion from a provided list, use ctrl-j and ctrl-k to move down and up and press return to select the highlighted completion.
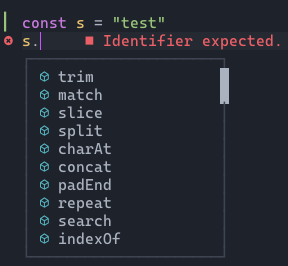
The key mappings related to code completion include:
| Key | Action |
|---|---|
ctrl-space | manually opens a list of suggestions |
ctrl-y | confirms selection of a completion |
ctrl-e | cancels completion and closes the list |
down arrow or ctrl-n | navigates to the next suggested completion |
up arrow or ctrl-p | navigates to the previous suggested completion |
Snippets
AstroNvim uses the LuaSnip plugin to support snippets. Snippet suggestions appear when the beginning of their trigger words are typed. When a list of possible snippets appears, repeatedly press the tab key, ctrl-j, or ctrl-k to highlight one, and press the return key to select it.

For snippets that have placeholders, type text or paste text into each one. Press tab to jump to the next placeholder and shift-tab to jump to the previous placeholder. After entering text for the last placeholder, press tab one more tab to move the end of the snippet and continue typing.
LuaSnip supports two syntaxes for defining snippets, the VS Code style and the LuaSnips style.
To define custom snippets:
Create the file
~/.config/nvim/lua/user/plugins/luasnip.luacontaining the following:return {
"L3MON4D3/LuaSnip",
config = function(plugin, opts)
require "plugins.configs.luasnip" (plugin, opts)
require("luasnip.loaders.from_vscode").lazy_load {
paths = { "./lua/user/snippets" }
}
end
}Create the directory
~/.config/nvim/lua/user/snippets.For the VS Code style, create the file
~/.config/nvim/lua/user/snippets/package.jsoncontaining the following:{
"name": "user snippets",
"engines": {
"vscode": "^1.11.0"
},
"contributes": {
"snippets": [
{
"language": "javascript",
"path": "./javascript.json"
},
{
"language": "markdown",
"path": "./markdown.json"
},
{
"language": "typescript",
"path": "./javascript.json"
},
{
"language": "typescriptreact",
"path": "./javascript.json"
}
]
}
}For the VS Code style, create a file like the following for each file type that needs snippets. Placeholders are represented by a
$followed by a number starting from1. For example, a snippet with three placeholders will contain$1,$2, and$3. The final placeholder can be represented by$0instead of$3, but its not clear what advantage that provides.For JavaScript the file name should be
javascript.json. For example:{
"Log Entry": {
"prefix": "loge",
"body": ["console.log('$TM_FILENAME $1: entered');"],
"description": "Log function entry"
},
"Log Variable": {
"prefix": "logv",
"body": ["console.log('$TM_FILENAME $1: $2 =', $2);"],
"description": "Log variable to console"
}
}
Marks
Vim supports marking locations in files and easily returning to them.
| Key | Action |
|---|---|
m{lowercase-letter} | creates a mark that is local to the current file |
m{uppercase-letter} | creates a global mark |
'{letter} | jumps to first non-whitespace character on line of the mark |
`{letter} | jumps to line and column of the mark |
:marks | lists all the marks |
<leader>f' | lists all the marks in a Telescope window |
When marks are displayed in a Telescope window, select one an press return to jump to it.
To delete marks, enter :delmarks {letter}, {letter}, ...
There are many special marks that are automatically set. All of them seem to have limited usefulness. These are displayed by both :marks and <leader>f'.
Bottom (btm)
bottom is a "graphical process/system monitor for the terminal".
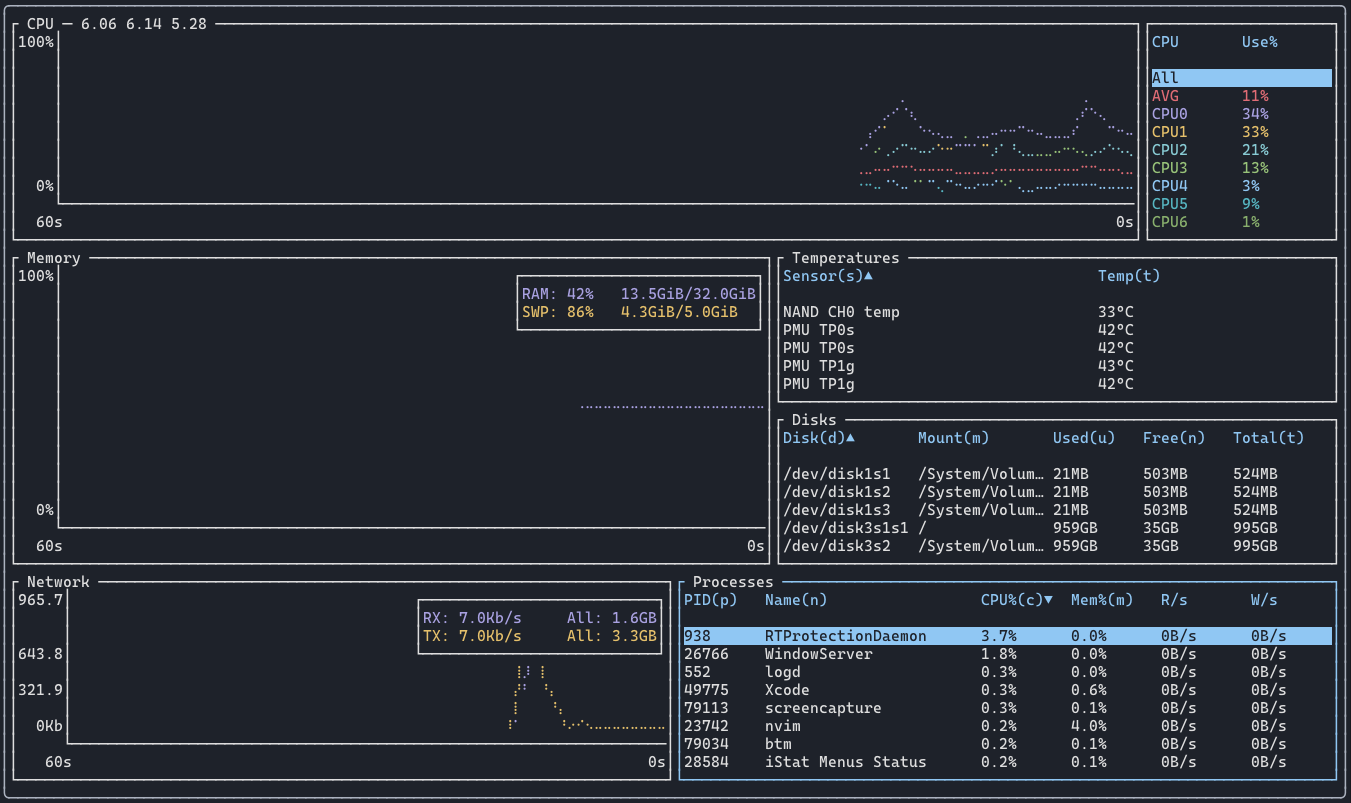
To install btm in MacOS, enter brew install bottom.
To run btm inside Neovim, enter <leader>tt (for "top"). This opens a floating terminal and runs btm inside it.
To quit btm and close the terminal that is running it, press q.
Go DiskUsage (gdu)
gdu is a disk usage analyzer written in Go.
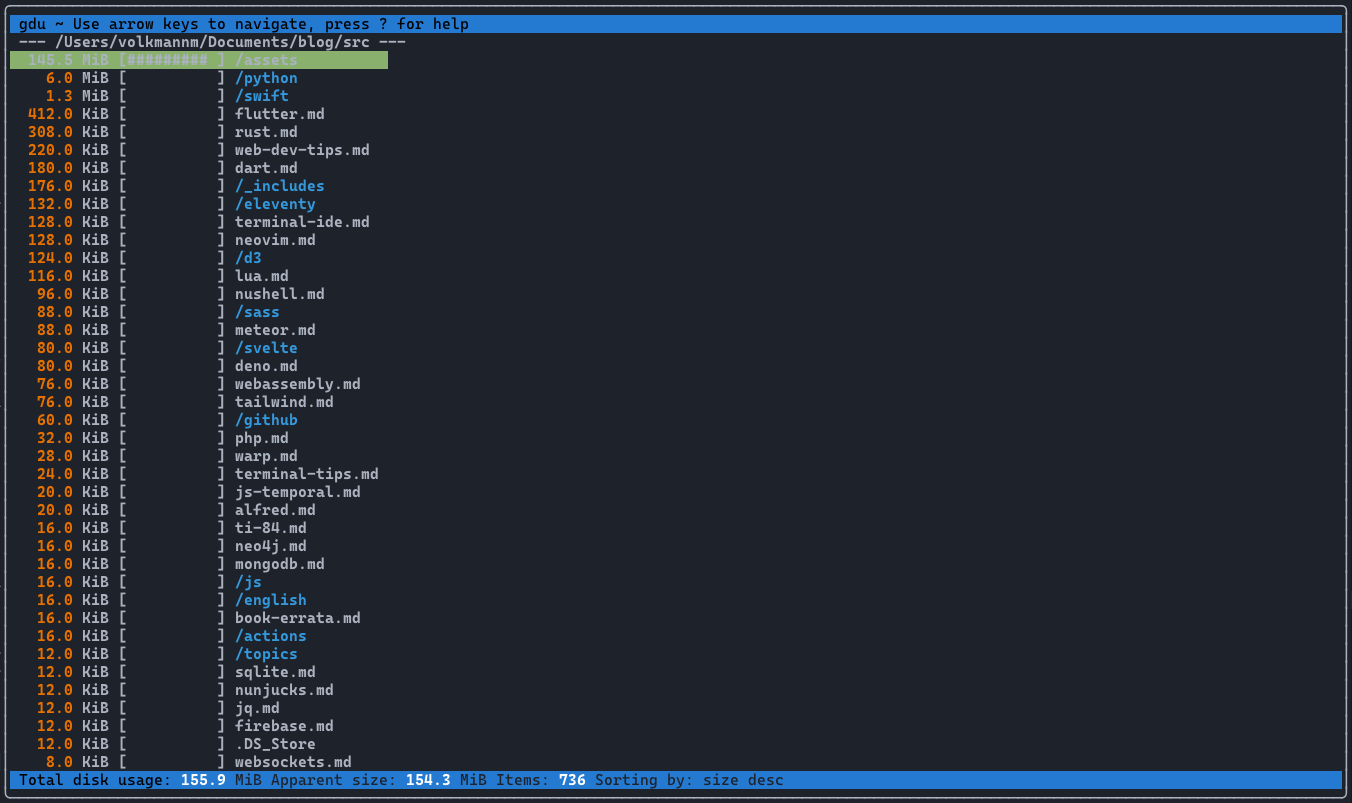
To install gdu in MacOS using Homebrew, enter the following command:
brew install -f gdubrew link --overwrite gdu
To run gdu inside Neovim, enter <leader>tu for "usage". This opens a floating terminal and runs gdu inside it.
Initially this shows the disk space occupied by all the files and directories in the directory from which nvim was launched. To see the disk space occupied by the files and directories inside one of these directories, select the directory and press the return key. To return to the parent directory, select .. and press the return key.
To quit gdu and close the terminal that is running it, press q.
Terminal
There are many ways to open a terminal window.
| Key | Action |
|---|---|
<leader>tf | opens a floating terminal (f for "float") |
F7 | same as above; on a MacBook keyboard, also hold fn key |
<leader>th | opens a terminal at the bottom (h for "horizontal") |
<leader>tv | opens a terminal on the right side (v for "vertical") |
Another way to open a floating terminal is to enter :ToggleTerm.
The working directory of the terminal session will be the directory from which nvim was started.
The terminal cannot be split into multiple panes.
To close the terminal and return to nvim, enter exit.
There are also many key mappings that open a floating terminal whose only purpose is top run a specific command.
| Key | Action in Floating Terminal |
|---|---|
<leader>tn | runs a Node REPL (n for "Node") |
<leader>tl | runs lazygit (l for "lazygit") |
<leader>tp | runs a Python REPL (p for "for Python") |
<leader>tt | runs btm (t for "top") |
<leader>tu | runs gdu (u for "usage") |
Custom Plugins
There are a large number of plugins available for Neovim. A nice summary of them can be found at Awesome Neovim Overview.
When AstroNvim starts, it executes all the .lua files in the ~/.config/nvim/lua/plugins directory followed by all the .lua files in the ~/.config/nvim/lua/user/plugins directory. Each of these files serves to configure a specific plugin. Any names can be used for these files, but it's standard practice to name them after the plugin they configure.
Storing the plugin configuration files provided by AstroNvim in a different directory from the configuration files you create makes it easier to avoid losing custom configurations when updating to a new version of AstroNvim.
To install a custom plugin, create a configuration file for it in the ~/.config/nvim/lua/user/plugins directory whose name is {plugin-name}.lua. After doing this it may be necessary to enter :Lazy sync. This downloads the latest version of each plugin being used. When this completes, press q to close the window.
The contents of the plugin configuration files should be similar to those shown in the subsections below. For details on the supported keys, see the "Plugin Spec" section in the
Lazy doc.
For help on a specific custom plugin, enter :h {name}-config.
For information on writing your own Neovim plugins, see Writing Plugins - It's Never Been Easier from DevOnDuty at NeovimConf 2022.
Comment.nvim
The Comment.nvim plugin integrates with Tree-sitter to provide language-specific smart commenting. It can recognizes different syntaxes in the same file, such as JavaScript, HTML, and CSS in a Svelte file, and apply the correct comment syntax for each.
To configure Comment.nvim, create the file ~/.config/nvim/lua/user/plugins/comment.lua containing the following:
return {
  "numToStr/Comment.nvim",
  config = function()
    require("Comment").setup {
      opleader = {
        block = "gb",
        line = "gc"
      },
      mappings = {
        basic = true,
        extra = true
      }
    }
  end
}| Key | Action |
|---|---|
gb | block comment toggle selected lines |
gc | line comment toggle selected lines |
gcb | ??? |
gcc | toggles whether the current line is commented |
gco | inserts line comment above |
gcO | inserts line comment below |
gcA | inserts line comment at end of line |
Entering gcc as the same effect as the built-in mapping <leader>/.
Emmet
Emmet is an editor plugin for quickly entering HTML, XML, and CSS. It also supports many "actions" that operate on HTML and XML elements. The most commonly used action is to expand an abbreviation or snippet.
AstroNvim does not ship with Emmett support. To add it, see emmet-vim.
git-blame.nvim
The git-blame.nvim plugin displays a git blame description after the current line in source files that are in a git repository.
To install and configure this plugin, create the file ~/.config/nvim/lua/user/plugins/git-blame.lua with the following content:
return {
  {
    "f-person/git-blame.nvim",
    event = "VeryLazy"
  }
}
To toggle display of Git blame text, enter :GitBlameToggle.
Consider adding a "gb" key mapping that runs the GitBlameToggle command.
hop.nvim
The hop.nvim plugin is a rewrite of the EasyMotion Vim plugin for Neovim. It provides an efficient way to jump to a specific place within a file that is currently visible.
To configure Hop, create the file ~/.config/nvim/lua/user/plugins/hop.lua containing the following:
return {
  "phaazon/hop.nvim",
  branch = 'v2', -- optional but strongly recommended
  config = function()
    require "hop".setup {}
    -- When in normal mode, initiate with a capital "H".
    vim.keymap.set('n', 'H', ":HopWord<cr>")
  end,
  event = "User AstroFile"
}
The event value specifies when the plugin should be triggered. This can be a single event or a table of them. The supported events are:
VeryLazy: triggered after starting NeovimBufEnter *.lua: triggered after opening a.luafileUser AstroFile: triggered after opening any fileLspAttach: triggered after starting LSP serversInsertEnter: triggered after entering insert mode
Enter :Lazy sync to install the plugin. This opens a window that show the status of the install. When this completes, press q to close the window.
To "hop" to a visible word, look at the target word and press <leader>H or enter :HopWord. This replaces the first one or two characters of every visible word with one or two unique letters. Type the letter(s) for the target word to jump to it.
To "hop" to a visible line, enter :HopLine. This replaces the first one or two characters of every visible line with one or two unique letters. Type the letters for the target line to jump to it.
The Hop plugin defines more commands, but HopWord and HopLine are the most frequently used.
neoformat
The neoformat plugin formats text in many file types. It selects a formatter to use based on file type of the current buffer. The text in the buffer is then formatted. If this is successful, the buffer contents are replaced by the formatted text. If the formatter is unable to format the text and additional formatters for the file type are available, it will try the next one.
Prettier is one of the supported formatters.
To install and configure this plugin, create the file ~/.config/nvim/lua/user/plugins/neoformat.lua with the following content:
return {
  "sbdchd/neoformat",
  event = "User AstroFile"
}
By default AstroNvim formats files on save.
nvim-surround
The nvim-surround plugin makes it easy to add, change, or delete the delimiter surrounding a word or selected text.
To install and configure this plugin, create the file ~/.config/nvim/lua/user/plugins/nvim-surround.lua with the following content:
return {
  {
    "AstroNvim/astrocommunity",
    { import = "astrocommunity.motion.nvim-surround" }
  }
}
The following keyboard shortcuts are supported by default where {d} is replaced by delimiter text:
| Key | Action |
|---|---|
ysw{d} | surrounds the word under the cursor (y for "you") |
S{d} | surrounds visual selection |
cs{oldD}{newD} | changes surrounding delimiter |
ds{d} | deletes surrounding delimiter |
cst | changes surrounding HTML tag; prompts for new tag |
dst | deletes surrounding HTML tag |
smartcolumn.nvim
The smartcolumn.nvim plugin displays a vertical line at a given column only if at least one line in the file extends past that column.
To install smartcolumn.nvim, create the file ~/.config/nvim/lua/user/plugins/smartcolumn.lua containing the following:
return {
  "m4xshen/smartcolumn.nvim",
  opts = {
    -- colorcolumn = 80 -- This is the default.
    -- Don't disable any file types.
    disabled_filetypes = {} -- default is {"help", "text", "markdown"}
  },
  event = "User AstroFile"
}
todo-comments.nvim
The todo-comments.nvim plugin highlights comments that begin with "FIX:", "HACK:", "NOTE:", "PERF:", "TODO:", or "WARNING:". Each of these are highlighted with a different background color. This plugin also defines commands for navigating to these comments.
To install todo-comments, create the file ~/.config/nvim/lua/user/plugins/todo-comments.lua containing the following:
return {
  "folke/todo-comments.nvim",
  requires = "nvim-lua/plenary.nvim",
  config = function()
    require("todo-comments").setup {}
  end,
  event = "User AstroFile"
}
The comment syntax this plugin looks for is language-specific. The following are examples of comment prefixes that this plugin recognizes in JavaScript code.
// FIX: Please fix this.
// HACK: I really should not have done this.
// NOTE: For more information, see https://some-tutorial.com.
// PERF: This may cause a performance issue.
// TODO: Please do this in the future.
// WARNING: This may break if invalid input is received.
There are multiple ways to display a list of all these kinds of comments found in all files that are in and below the starting directory.
To see them in a Telescope window, enter :TodoTelescope.
To see them in a quick fix list, enter :TodoQuickFix.
These commands are not available until at least one file has been opened. It's unclear why that is necessary.
treesj
The treesj plugin makes it easy to split and join "blocks of code like arrays, hashes, statements, objects, dictionaries, etc."
To install and configure this plugin, create the file ~/.config/nvim/lua/user/plugins/treesj.lua with the following content:
return {
  {
    "AstroNvim/astrocommunity",
    { import = "astrocommunity.editing-support.treej" }
  }
}
To toggle whether the syntax under the cursor is split across multiple lines or joined onto a single line, enter :TSJToggle. Enter this again to reverse the change.
For example, the follow shows the definition of a JavaScript object in both its split and joined forms:
const person = {
  firstName: 'Mark',
  lastName: 'Volkmann'
};

const person = {firstName: 'Mark', lastName: 'Volkmann'};
Consider adding a "sj" key mapping that runs the TSJToggle command.
trouble
The trouble.nvim plugin provides "a pretty list for showing diagnostics, references, telescope results, quickfix and location lists to help you solve all the trouble your code is causing."
To configure this plugin, create the file ~/.config/nvim/lua/user/plugins/trouble.lua containing the following:
return {
  {
    "AstroNvim/astrocommunity",
    { import = "astrocommunity.diagnostics.trouble-nvim" }
  }
}
To show diagnostics for the current document, press <leader>xx.
To show diagnostics for all documents in the workspace, press <leader>xX.
When diagnostics are displayed and focus is in that panel, press m to toggle between document and workspace mode.
vim-bbye
When there are multiple open buffers and the :bdelete or :close command is issued, closes the buffer AND the window it is inside. Typically there is only one window, so Vim exits. And typically this is NOT the desired behavior!
To fix this, install the vim-bbye plugin. This provides the commands Bdelete and Bwipeout. The Bdelete command "removes the file from the buffer list and clears its options, variables and mappings. However, it remains in the jumplist, so Ctrl-o takes you back and reopens the file." The Bwipeout command removes the file from the buffer list and the jumplist.
To configure this plugin, create the file ~/.config/nvim/lua/user/plugins/vim-bbye.lua containing the following:
return {
  "moll/vim-bbye"
}
I prefer to always use Bwipeout in places of the built-in bdelete command. To do this, enter :Bw in place of :bd.
AstroNvim Community
The AstroNvim Community Repository is a collection of AstroNvim plugins and their configurations. These are typically easier to install that configuring them manually.
To add these to your AstroNvim setup, create the file ~/.config/lua/user/plugins/community.lua and add content the like the following:
return {
  "AstroNvim/astrocommunity",
  { import = "astrocommunity.pack.typescript" },
  { import = "astrocommunity.colorscheme.catppuccin", enabled = true },
  { import = "astrocommunity.colorscheme.nightfox", enabled = true }
}
Conclusion
Neovim plus a selection of plugins delivers an IDE-like experience that is comparable to popular IDEs such as VS Code.
Configuring plugins is a time-consuming, error-prone task. Starting with a pre-built configuration simplifies this significantly.
I encourage you to give Neovim a try for at least two weeks before deciding whether it is a fit for you. It can take that long to get through the bulk of the learning curve. That should be enough time to determine whether using an editor that allows you to keep your fingers on the keyboard makes you more efficient.