Overview
Texinfo is a markup language for software documentation. It can be used to generate output in many formats including DocBook, DVI, EPUB 3, HTML, info, LaTeX, plain text, and XML.
Texinfo markup appears in text files that can describe
chapters, sections, cross-references, indices, lists, and tables.
All of this is accomplished with commands that begin with the @ character.
Texinfo files have a file extension of .texi, .texinfo, .txi, or .tex,
but using .tex is discouraged because
files for the markup languages TeX and LaTeX use that file extension.
Minimum Markup
All Texinfo files must begin and end with the following lines:
\input texinfo
...
@bye
Tooling
To install commands for working with Texinfo files in macOS using Homebrew,
enter brew install texinfo.
This installs the following commands:
| Command | Description |
|---|---|
info | This renders .info files. |
makeinfo | This translates Texinfo source documentation to other formats including DocBook, DVI, EPUB 3, HTML, info, LaTeX, plain text, and XML. By default it produces .info files that can be rendered in Emacs or by the GNU info command. |
texi2any | same as makeinfo |
texi2dvi | This converts Texinfo files to DVI or PDF formats. |
texi2pdf | same as texi2dvi |
To convert a Texinfo file to an info file from the command line, enter the following command:
makeinfo name.texi
This creates the file name.info
which can be viewed by entering info name.
To convert a Texinfo file to PDF from the command line, enter one of the following commands:
texi2pdf name.texi
texi2dvi --pdf name.texi
To convert a Texinfo file to HTML from the command line, enter one of the following commands:
makeinfo --html name.texi
texi2any --html name.texi
This creates a diretory whose name is name_html.
It will contain the file index.html that contains links
to separate .html files for each menu item.
VS Code
If using VS Code to edit Texinfo files, consider installing the extension “Texinfo Language Support” from CismonX. This adds syntax highlighting, code completion, HTML preview, block folding, breadcrumb navigation, and diagnostics.
To view an HTML preview, open a Texinfo file and click the preview button
in the upper-right (document with small magnifier glass).
All the content will appear to be on a single page,
unlike when viewed using the info command.
info Command
The info command enables viewing and navigating
the contents of a .info file.
It also provides information on itself
which can be viewed by entering info info.
The following keyboard shortcuts are supported:
| Key | Action |
|---|---|
| h | open help on GNU info |
| H | toggles display of help window |
| q | quit info, returning to command line |
| space | scroll down one page |
| backspace | scroll up one page (delete key) |
| arrows keys | move cursor in associated direction |
| b | go to beginning of curent node |
| d | go to directory node |
| e | go to end of curent node |
| g | go to a node by name |
| i | search for text in index |
| l | return to last visited node |
| n | go to next node at this level |
| p | go to previous node at this level |
| t | go to top node |
| u | go up to parent node |
| [ | go to previous node in document order |
| ] | go to next node in document order |
| return | go to menu item under cursor |
| 1-9 | select item n in current menu |
| / | search forward for given text |
| { | search for previous text occurrence |
| } | search for next text occurrence |
| ctrl-g | cancel current operation |
Basic Example
The following Texinfo file, smalltalk.texi
provides a reasonable starting point.
\input texinfo
@c This is a comment.
@setfilename smalltalk.info
@documentencoding UTF-8
@settitle Smalltalk Notes

@copying
Copyright @copyright{} 2025 R. Mark Volkmnann
@end copying

@titlepage
@title Smalltalk Notes
@page
@vskip 0pt plus 1fill
@insertcopying
@end titlepage

@node Top
@top Introduction to Smalltalk

Smalltalk is an object-oriented programming language
with a beautifully minimal syntax

@menu
  * Getting Started:: an overview
  * Images:: holder of objects
  * Syntax:: beautifully minimal
@end menu

@node Getting Started
@chapter Getting Started

Do adipisicing quis dolore anim mollit dolor cupidatat. Esse ex ...

Amet cupidatat do ullamco exercitation deserunt consequat veniam ...

@node Images
@chapter Images

Quis aute do ex labore anim ex voluptate eiusmod adipisicing sint ...

Aute culpa cillum veniam ea quis in eiusmod nisi in eu irure aute ...

@include syntax.texi

@bye
The following Texinfo file, syntax.texi
is included by the file above.
This enables breaking large documents into sections
that can be edited and versioned independently.
@node Syntax
@chapter Syntax

Aliquip consectetur labore adipisicing voluptate. Cupidatat ...

Eu sint eu cillum nisi tempor id excepteur fugiat fugiat sunt ...
Special Characters
To output a literal { character, escape it with @{.
Lists
The following Texinfo file demonstrates rendering bulleted and numbered lists.

\input texinfo
@settitle Lists Demo
@node Top
@top Lists Demo
@menu
* Itemized Lists:: Similar to an unordered list in HTML
* Enumerated Lists:: Similar to an ordered list in HTML
@end menu
@node Itemized Lists
@chapter Itemized Lists
@c The only bullet options are @bullet (default) and @minus.
@itemize @bullet{}
@item Red
@itemize @minus{}
@item apple
@item cherry
@item strawberry
@end itemize
@item Green
@itemize @minus{}
@item grape
@item kiwi
@end itemize
@item Blue
@itemize @minus{}
@item blueberry
@end itemize
@end itemize
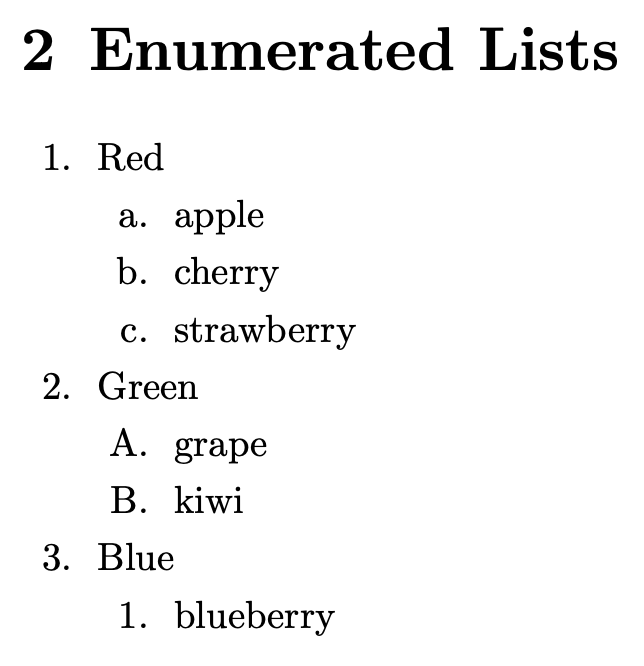
@node Enumerated Lists
@chapter Enumerated Lists
@c The only numbering options are 1 (numbers),
@c a (lowercase letters), and A (uppercase letters).
@enumerate 1
@item Red
@enumerate a
@item apple
@item cherry
@item strawberry
@end enumerate
@item Green
@enumerate A
@item grape
@item kiwi
@end enumerate
@item Blue
@enumerate 1
@item blueberry
@end enumerate
@end enumerate
@bye
Tables
The @table command produces a two-column table
that is similar to an HTML definition list
that is created with dl, dt, and dd elements.
The @multitable command produces a multi-column table
that is similar to an HTML table
that is created with table, tr, and td elements.
Unlike HTML tables, Texinfo tables do not support cell borders.
In addition, cell padding cannot be specified
and the default spacing tends to be insufficient.
The following Texinfo file demonstrates rendering tables.
\input texinfo
@settitle Tables Demo

@node Top
@top Tables Demo

@menu
* 2-Column Tables:: similar to HTML definition lists
* Multi-column Tables:: similar to HTML table
@end menu

@node 2-Column Tables
@chapter 2-Column Tables

@c @table must be followed by @asis, @code, @samp, @var, @option, or @kbd.
@table @asis
@item Apples
A crisp and delicious fruit.
@item Bananas
A yellow, curved fruit rich in potassium.
@item Cherries
Small, red, and juicy fruits.
@end table

@node Multi-column Tables
@chapter Multi-column Tables

@c The sum of the column fractions should be 1.
@multitable @columnfractions .3 .3 .4
@c The @tab command separates row items.
@headitem @strong{Header 1} @tab @strong{Header 2} @tab @strong{Header 3}
@item Row 1, Column 1 @tab Row 1, Column 2 @tab Row 1, Column 3
@item Row 2, Column 1 @tab Row 2, Column 2 @tab Row 2, Column 3
@item Row 3, Column 1 @tab Row 3, Column 2 @tab Row 3, Column 3
@end multitable

@bye