Overview
Warp is "the terminal for the 21st century".

Currently Warp only runs in macOS, but there are plans to support web (through WASM), Linux, and Windows in the future.
Warp functions more like a standard text editor than most terminal programs. The cursor can be positioned by using the arrow keys or clicking anywhere in a command. Any text can be selected, copied, and pasted.
Warp currently only supports the shells Zsh, Bash, and Fish, and it does so without any configuration. If your default shell is not one of these, Warp will default to Zsh. The Warp team has stated that they would like to support Nushell in the future.
Warp is implemented in Rust which makes it very fast. From the Warp FAQ, "The UI is built on our own rendering layer that leverages lower-level graphics APIs like Metal."
Warp uses GPU-acceleration. From the Warp FAQ, "Picking GPU acceleration has allowed us to be a way over 60fps on a 4K screen."
Vim keybindings are not currently supported, but the Warp team has stated that they want to add support. See issue 159.
Installing
To install Warp using Homebrew, enter brew install warp. This creates Warp.app in your Applications directory.
Running
Double-click Warp.app in your Applications directory to launch it. The first launch will prompt you to sign up.
When an update is available an "Update Available" button will appear on the right side of the title bar. Clicking displays a popup with an "Install update" option that lists the new version number. Click it download the new version.
When quitting Warp if there are any processes running inside it, a dialog will appear allowing you to verify that you really want to quit which will kill the processes. Click the "Show running processes" button to see a list of the processes.
Help
To get help on using Warp, open the "Warp Essentials" panel by clicking the button on the right side of the title bar. This contains four sections titled "What's New?", "Getting Started", "Maximize Warp", and "Advanced Setup".
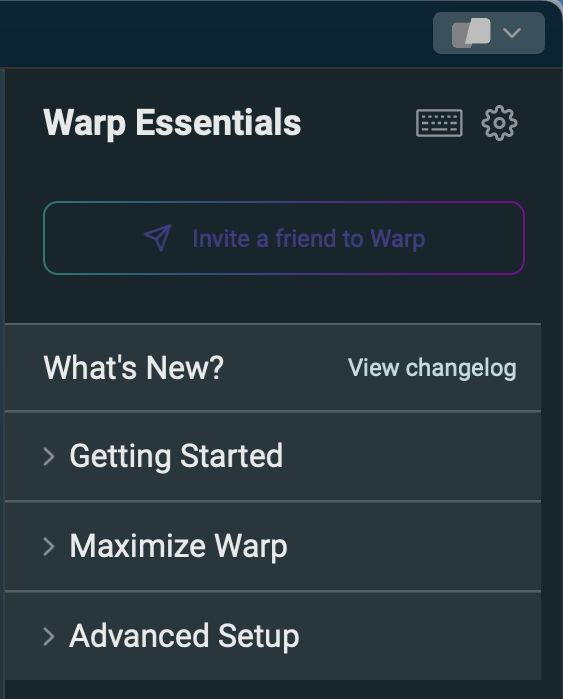
To view "Keyboard Shortcuts", click the keyboard icon.
To open the Settings dialog, click the gear icon.
For online help, click "Docs" at the bottom of the "Warp Essentials" panel or browse Warp Documentation.
Hierarchy
Warp uses the terms window, tab, pane, and block. These have the following relationships:
- A windows holds tabs.
- A tab holds panes.
- A pane holds blocks.
- A block holds a shell command and its output.
Windows
Each window can contain any number of tabs.
To open a new window, select File ... New Window or press cmd-n.
To move a window to a different monitor, select one of the "Move to" options on the Window menu.
To switch to full-screen mode, select "Enter Full Screen" from the Window menu or press fn-f. To exit full-screen mode, hover over the top of the window and click the green circle or press fn-f again.
Tabs
Each tab can contain any number of panes.
To open a new tab, click the "+" to the right of the last open tab or press cmd-t. The new tab will appear to the right of the currently active tab, not after the last open tab.
To rename a tab, right-click it, select "Rename", enter the new name, and press the return key.
To change the color of the bottom border and background gradient of a tab, right-click it, and select one of the six theme colors at the bottom of the popup.
To navigate to the tab to the right, press cmd-}.
To navigate to the tab to the left, press cmd-{.
To reorder tabs, drag them left or right.
Dragging a directory from the Finder onto the Warp app dock icon opens a new tab in that directory where the title is the directory path.
Panes
Each pane can hold any number of blocks.
To create a new pane, right-click and select one of the "Split pane" options to open a new pane on the right, left, down (bottom), or up (top).
I defined the following keyboard shortcuts of the form opt-shift-{arrow-key} to simplify creating new panes:
- right arrow - Split pane right
- left arrow - Split pane left
- down arrow - Split pane down
- up arrow - Split pane up
To close the currently focused pane, enter "exit" or press cmd-w. To close any pane, right-click in it and select "Close pane". Closing the last pane in a tab closes the tab. Closing the last tab in a window closes the window.
To navigate to the next pane, press cmd-].
To navigate to the previous pane, press cmd-[.
To navigate to a pane in a specific direction, press cmd-option-{arrow-key}.
To resize panes, drag a divider line or press cmd-ctrl-{arrow-key}.
To temporarily change the current pane to occupy the entire window, open the command palette and select "Toggle Maximize Active Pane" or press cmd-shift-return. To undo this, execute the same command again.
To see a list of all current panes across all tabs, press cmd-shift-p. This opens a dialog that lists the panes. Alternatively, press cmd-p to open the command palette and type "@". Each pane is described by providing its current working directory and the last command executed in it. To navigate to one of the panes, click its description.
Currently there is no way to swap the positions of two panes within their tab.
Blocks
Entering a shell command creates a new "block".
Blocks are divided by thin horizontal lines. By default there is some vertical space on both sizes of the lines. To remove this space, open Settings, select Appearance, and toggle the "Compact mode" option to be on.
There are two ways to select a previous block:
- Scroll up until it is visible and click it.
- Click any block and use the up and down arrow keys to navigate to it.
There are many Warp commands that operate on a block. To execute such a command, open the block command menu by doing one of the following:
- click the vertical ellipsis in the upper-right corner of the block
- right-click anywhere in the block
- select the block and press ctrl-m
Block commands include:
- Copy Command
- Copy Output
- Copy Both (the shell command and its output)
- Create Permalink... (see the "Permalink" section below)
- Copy Prompt
- Copy Working Directory
- Copy Git Branch
- Find Within Block - searches only within the block instead of the entire pane
- Toggle Bookmark
- Split pane right - cmd-d; I changed to cmd-shift-right-arrow
- Split pane left - I added cmd-shift-left-arrow
- Split pane down - cmd-shift-d; I changed to cmd-shift-down-arrow
- Split pane up - I added cmd-shift-up-arrow
- Toggle maximize pane
- Close pane
To scroll to the top of the output in a block, click its command at the top of the block.
To clear all the blocks in the current pane, open the command palette and select "Clear Blocks", enter the Warp command "clear block", or press cmd-k.
Commands
When entering a shell command or Warp command:
- Recognized commands are displayed in green (ex.
git). - Recognized subcommands are displayed in light blue (ex.
branchingit branch). - Recognized flags are displayed in yellow (ex.
-allingit branch --all). - Environment variable references are displayed in magenta (ex.
$PATH). - Unrecognized commands are underlined with a red, dashed line.
For recognized commands, a suggested completion may appear in dimmed text. To accept the suggestion, press the right arrow key.
To execute the entered command, press the return key.
Dragging a file or directory from the Finder to the command entry area inserts its full path.
To enter multiple commands on separate lines, press ctrl-j (runs the "Insert Newline" command) after each command except the last. Pressing the return key executes all of the commands and displays the output of each command.
To see a brief description of a command, subcommand, or flag in a popup provided by the "Command Inspector", hover over it.
To recall a command previously entered in the current pane, repeatedly press the up arrow key until the desired command is highlighted. Press the return key to execute it.
To search command history, workflows, and AI commands, press ctrl-r. To limit the search to one of these three categories, click the "history", "workflows", or "AI command search" button. Then enter text to perform a fuzzy search. For example, entering "start" will find any command containing those letters in that order, but not necessarily together. This would match "fastlane screenshots".
A block cannot be re-executed. However, you can:
- right-click a block
- select "Copy Command"
- press cmd-v to paste it into the input area at the bottom of the pane
- press the return key to execute it
Command Editing
There are many keyboard shortcuts that trigger text editing commands. The following table summarizes the most useful shortcuts.
| Command | Keyboard Shortcut |
|---|---|
| Clear Command Editor | ctrl-c |
| Clear Screen | ctrl-l |
| Insert Newline | ctrl-j |
| Move Backward One Word | option-left-arrow |
| Move Forward One Word | option-right-arrow |
| Move to Start of Line | cmd-left-arrow |
| Move to End of Line | cmd-right-arrow |
| Select All | cmd-a |
| Delete All Left | cmd-delete |
| Delete All Right | cmd-fn-delete |
| Delete Word Left | option-delete |
| Delete Word Right | option-fn-delete |
For more keyboard shortcuts, see the Keyboard Shortcuts.
AI Commands
To generate a shell command using an AI search, enter a # character of press ctrl-`.

Enter English text describing the desired command and press the return key. For example, entering "delete local git branch" suggests "git branch -d branch_name". To accept this suggestion, click the "Input Command" button or press cmd-return. Replace any placeholders (such as branch_name above) and press the return key to execute the command.
Sometimes the suggested commands are correct for Linux and not macOS. To get macOS equivalents, add "on mac" to the English description.
AI search can also be used to ask questions not related to shell commands. For example, asking "What is a Whippet?" gives the suggestion "A whippet is a small breed of dog with a distinctively tightly curled tail." Unfortunately this is a bad description.
Workflows
Workflows are named sets of shell commands (typically just one) that are parameterized. They are similar to snippets in code editors.
Each workflow is defined by a .yaml file.
To search for a workflow, press ctrl-shift-r.
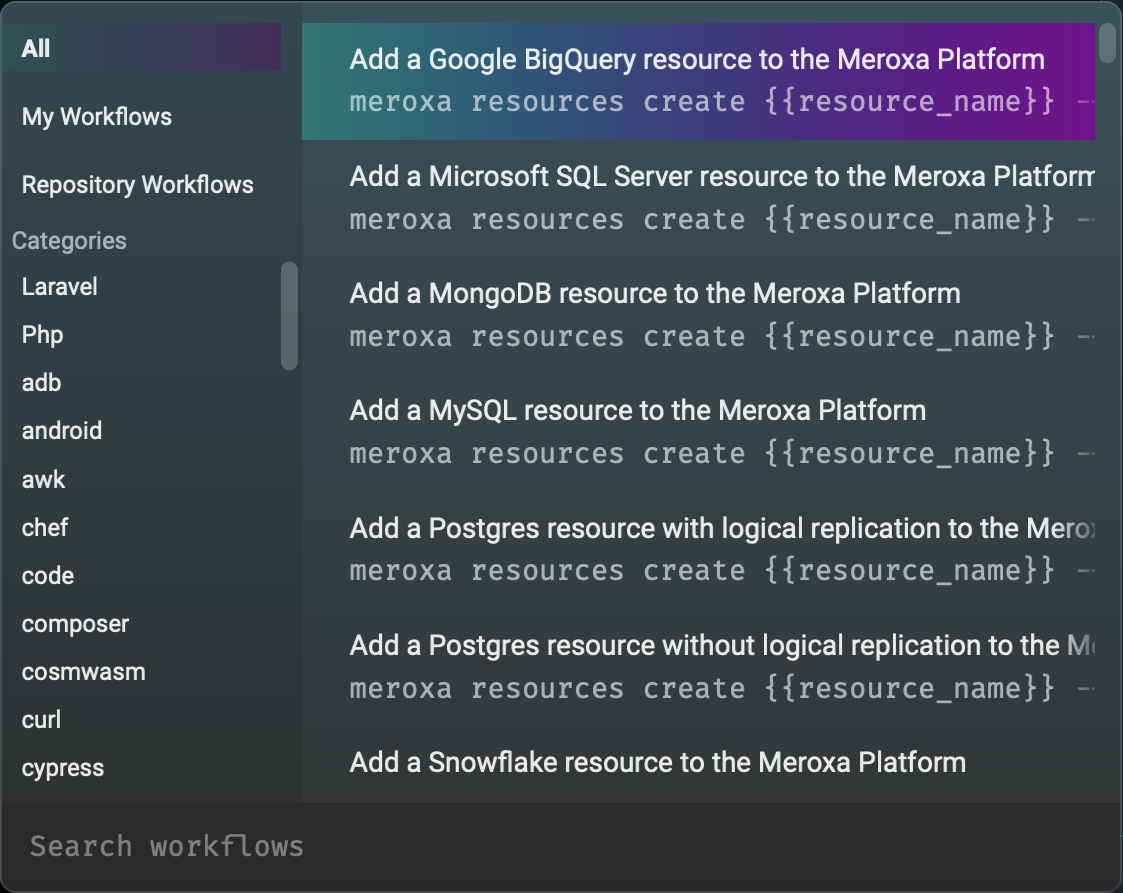
In the popup that appears, select a category in the left nav such as "git". Then click one of the workflows to copy it to the current block. Replace any placeholders and press the return key to execute the workflow.
Warp ships with over 100 predefined workflows.
To install additional workflows, see the GitHub repository warpdotdev/workflows.
To create custom workflows, see Creating Custom Workflows.
Selecting Text
To select text, perhaps to copy it, drag over it as you would in most editors. Additionally "Smart-Select" allows you to to select a file path, URL, email address, IP address, or floating point number by double-clicking it. To enable or disable this feature, see Settings ... Features ... Terminal ... Double-click smart selection.
Finding Text
The "Find" and "Find Within Block" commands open a dialog in the upper-right corner of the pane from which they were issued. Search text can be entered here.

All matches are highlighted in yellow except for the currently selected match is highlighted in orange.
The total number of matches found and the number of the currently highlighted match are displayed. For example, "2/5" indicates that there a five matches and the second match is the one highlighted in orange.
In addition, the following buttons are provided:
- navigate to the previous match, cycling to the end after the first is reached
- navigate to the next match, cycling to the beginning after the last is reached
- toggle the use of regular expressions
- toggle whether the search is confined to the block or can search all blocks in the pane
- toggle whether the search is case-sensitive
- close the dialog
Block Bookmarks
Blocks can be bookmarked to make it easy to find them in the future.
To toggle whether a block is bookmarked, click its bookmark icon in the upper-right. Alternatively if the block is selected, press cmd-b.

The pane scrollbar on the right will contain horizontal lines that indicate the location of each bookmarked block in the pane.
The color of the bookmark icon and the horizontal lines is based on the selected theme.
Hovering over one of the horizontal lines displays a popup that contains the working directory of the block, the command that was run, the first two lines of its output, and the number of lines that were omitted.
To navigate to a bookmarked block, click one of these lines.
To navigate to the previous bookmarked block, press option-up-arrow.
To navigate to the new bookmarked block, press option-down-arrow.
Block bookmarks are not saved across sessions. This may be a bug.
Command Palette
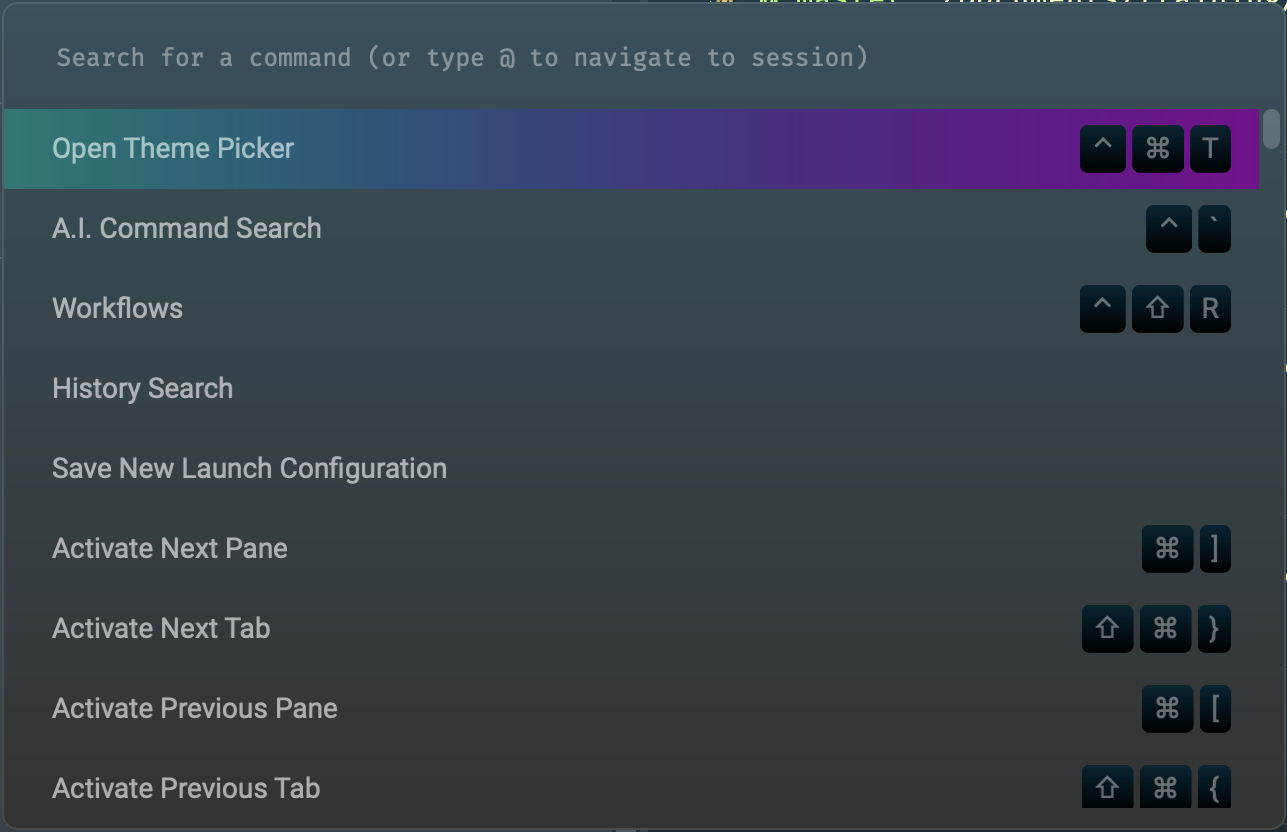
To quickly find and execute a Warp command (not a shell command), open the command palette by pressing cmd-p, filter the list of commands by typing part of its name, and click a command.
Themes
Warp supports themes that change the look of the user interface. Each theme can define colors, gradients, and a background image and is defined by a .yaml file.
To choose a theme, open the command palette and select "Open Theme Picker" or press cmd-ctrl-t. This opens a panel on the left that lists all the available themes.

The list of themes can be filtered by entering part of a theme name.
The themes listed appear to be in a somewhat random order. Currently there is no option to sort them by name or separate them into groups of light and dark themes.
Selecting a theme changes the display to preview the theme.
To change the theme being used to the selected one, click the checkmark at the bottom. To close the theme picker without changing the theme being used, click the X at the bottom.
Custom Themes
The files that define custom themes must be placed in the ~/.warp/themes directory. Create this directory if it doesn't exist.
To download additional open source themes, see the Git repository warpdotdev/themes. This contains several subdirectories such as base16, holiday, standard, and warp_bundled (themes that ship with Warp). Each subdirectory contains a README.md file that displays previews of each theme defined in the directory.
To use a theme, download its .yaml file and corresponding background .jpg file, if it has one. For example, to use the "thanksgiving" theme defined in the holiday directory, create a holiday directory in the ~/.warp/themes directory and download the files thanksgiving.yaml and thanksgiving_bg.jpg into it. Then open the Theme Picker and select the "Thanksgiving" theme.
To create a custom theme, create a .yaml file similar to the one shown below. Including a background image is optional. Each theme defines accent, background, and foreground colors. The details property indicates whether it is lighter or darker theme.
A theme defines two sets of ANSI escape "terminal" colors, one for "bright" and one for "normal". Each set defines the colors to be used in place of black, blue, cyan, green, magenta, red, white, and yellow. The selected colors can differ from these color names. For example, a theme might choose to use a shade of orange for yellow.
ANSI colors use numbers 0 to 15. Normal colors are 0 to 7 and bright colors are 8 to 15.
background_image:
  path: holiday/thanksgiving_bg.jpg
  opacity: 47 # 0 to 100
accent: '#b3deef'
background: '#282828'
details: darker # for dark theme?
foreground: '#eeeeee'
terminal_colors:
  normal:
    black: '#282828' # 0
    red: '#f43753' # 1
    green: '#c9d05c' # 2
    yellow: '#ffc24b' # 3
    blue: '#b3deef' # 4
    magenta: '#d3b987' # 5
    cyan: '#73cef4' # 6
    white: '#eeeeee' # 7
  bright:
    black: '#1d1d1d' # 8
    red: '#dc9656' # 9
    green: '#383838' # 10
    yellow: '#484848' # 11
    blue: '#b8b8b8' # 12
    magenta: '#e8e8e8' # 13
    cyan: '#a16946' # 14
    white: '#ffffff' # 15
For more detail see Custom Themes.
Permalinks / Shared Blocks
Creating a permalink for a block provides a URL that can be shared with others to view the shell command and output associated with the block.
There are multiple ways to initiate create a permalink:
- Open the command palette and select the "Share Selected Block" command.
- Right-click anywhere in the block or click the vertical ellipsis and select "Create Permalink...".
Either way a dialog will appear.
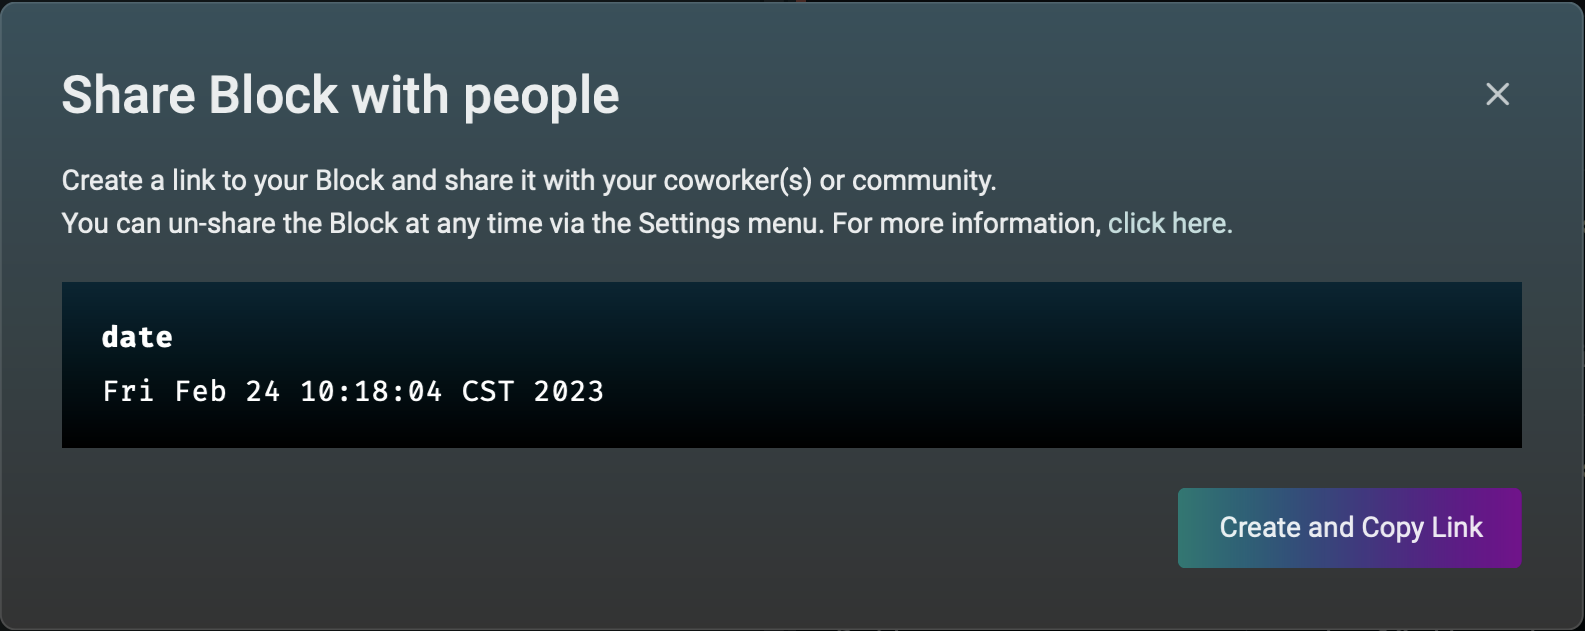
Click the "Create and Copy Link" button to create the permalink. This displays the permalink URL and copies it to the clipboard.
Permalinks remain active until they are deleted. To see all the permalinks that have been created, open the Settings dialog by pressing cmd-,. Then select "Shared blocks" in the left nav. To delete a permalink, click its vertical ellipsis and select "Unshare". Confirm this by clicking the "Unshare" button in the dialog that appears.
Settings
There are several ways to view and modify settings:
- Select Warp ... Settings ... Settings.
- Open the "Warp Essentials" panel by clicking the button on the right side of the title bar and click the gear icon.
- Press cmd-,
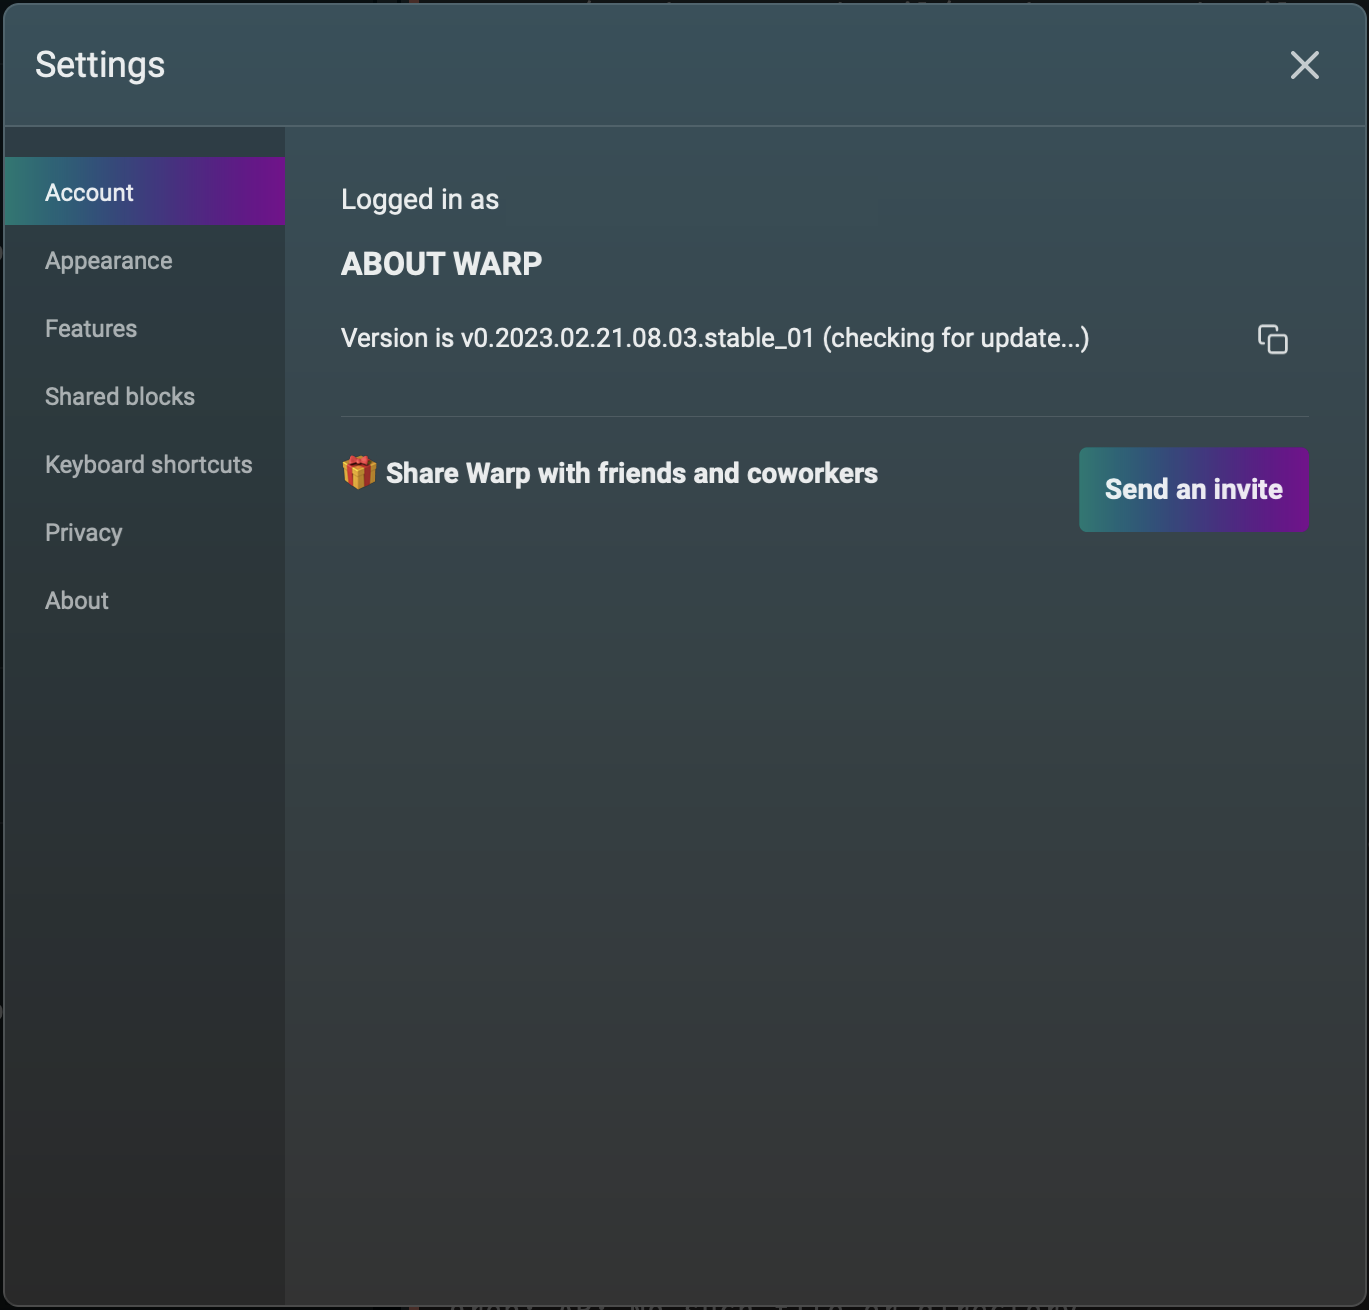
The left nav of the Settings dialog contains the following sections:
Account
This displays the logged in username and current version of Warp.
Appearance
When the "Sync with OS" option is on, Warp switches between light and dark mode based on the current OS setting. This option is off by default.
The "Window Opacity" can be adjusted to enable seeing content behind Warp windows. It is 100% by default, so nothing behind Warp windows is visible.
The "Window Blur Radius" controls how much the content visible behind the Warp window is blurred. This only has an effect if "Window Opacity" is less than 100. To make it as readable as possible, set this to the minimum value of 1. To make the background less distracting, set this to a higher value.
When the Panes "Dim inactive panes" option is on, all panes except the current one are dimmed to make it clear which pane is active. This option is off by default.
When the Blocks "Compact mode" option is on, the vertical space around the horizontal lines that separate blocks is removed. This option is off by default.
In the Text section, the "Terminal font", "Font size", and "Line height" can be set. I am using the font "Cascadia Code" which supports ligatures.
In the Cursor section, the "Blinking cursor" option can be toggled. This option is on by default.
Features
This section contains a large number of settings. The highlights are described below.
General section
"Restore windows, tabs, and panes on startup" (on by default)
When this option is on, new Warp sessions begin with all the windows, tabs, panes, and blocks of the previous session. However, the bookmark status of blocks is not retained. This may be a bug. Also, processes that were running will not be automatically restarted.
It is also possible to save multiple "launch configurations" so a specific one can be used in the future. To save the current configuration, open the command palette and select the "Save New Launch Configuration" command. This opens a dialog containing a "Save Configuration" button. For more detail, see Launch Configurations.
"Show sticky command header" (on by default)
This option causes the shell command associated with a block to stick to the top of the pane when scrolling the output vertically so it is always clear which shell command generated the output.
"Show tooltip on click on links" (on by default)
Hovering over a URL changes it to be blue and underlined. Command-clicking it opens the URL in the default web browser. When this option is on and a URL is clicked, a tooltip appears containing "Open Link" that can be clicked to open the URL.
"Choose an editor to open file links" ("Default App" by default) can be changed to open all file links in VSCode.
One way to get file links is to run the
lsshell command. Hovering over any file name that is output changes it to be blue and underlined. Command-clicking it opens the file in the default editor app. For directory paths the Finder opens. Clicking it displays a tooltip containing a button labelled "Open File" or "Open Directory" that can be clicked to open the file or open the directory in a Finder window."Show warning before quitting" (on by default)
When this option is on and an attempt is made to quit Warp while there are processes running, a dialog will appear allowing you to verify that you really want to quit which will kill the processes. Click the "Show running processes" button to see a list of the processes.
Session section
"Honor user's custom prompt (PS1)" (off by default)
When this option is off, executed blocks show the number of seconds it took to run their command. The provided prompt displays the working directory. If the directory is associated with a git repository, it also shows the current branch and the number of uncommitted files that are untracked or modified.
When this option is on, custom prompts created in shell configuration files or by utilities like Starship are used. Multi-line prompts are not currently supported.
Keys section
"Hotkey Window" (off by default)
When this option is on and a keyboard shortcut is assigned, pressing the keyboard shortcut when in any application brings Warp to the front and makes it the active application. This can configure the monitor on which is should appear, the size of the screen to which it should be pinned, the size of the Warp window. I use cmd-shift-w for the keyboard shortcut.
None of the remaining options here are particularly interesting and the default settings seem fine.
Editor section
"Open completions menu as you type" (off by default)
When this option is on, a completions menu is display while typing commands. For example, typing "git" followed by a space displays all the possible git subcommands followed by brief descriptions. This can be both helpful and annoying.
None of the remaining options here are particularly interesting and the default settings seem fine.
Terminal section
"Double-click smart selection" (on by default)
When this option is on, double-clicking any of the following kinds of values selects the entire value: file path, URL, email address, IP address, or floating point number.
None of the remaining options here are particularly interesting and the default settings seem fine.
Shared blocks
This lists all the permalinks that have been created. See the description of permalinks in the "Blocks" section.
Keyboard shortcuts
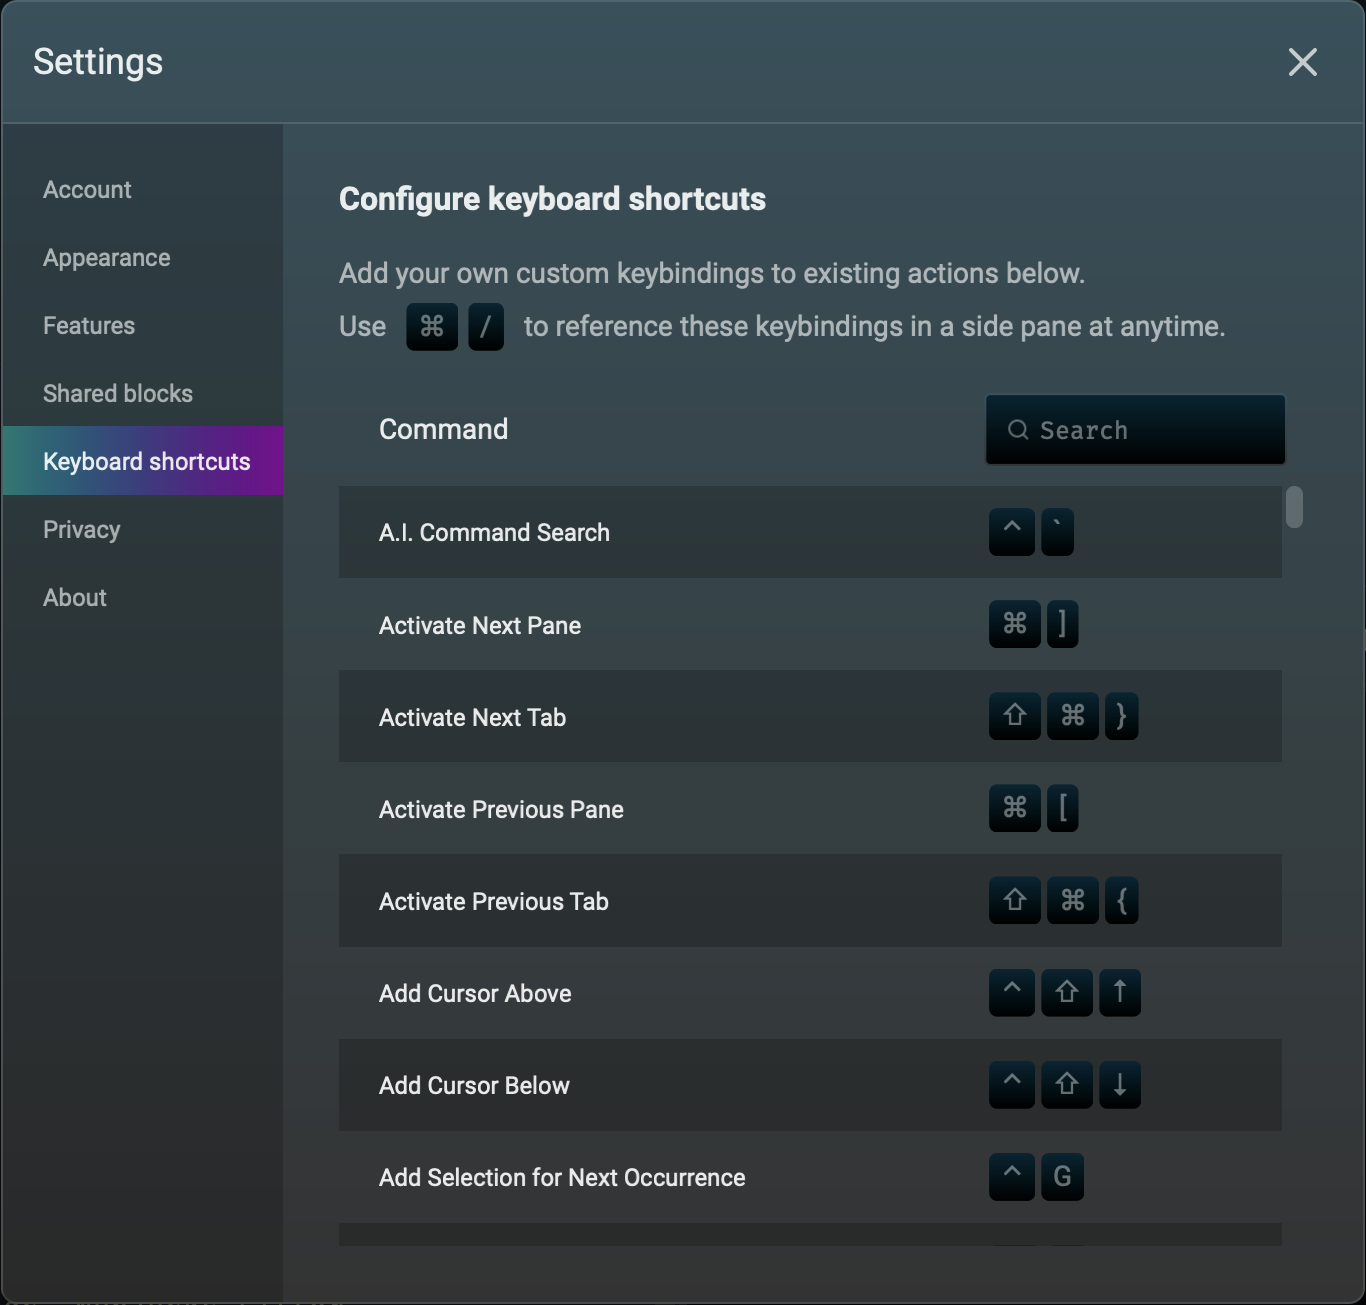
The keyboard shortcuts for all Warp commands can be customized here. Some Warp commands do not have a default keyboard shortcut. One example is "Rename the Current Tab".
To see all the current keyboard shortcuts in a panel on the right, press cmd-/. The display of this panel can be toggled by clicking the button in the upper-right corner.
Privacy
This contains options to send app analytics and crash reports to the Warp team to help them improve the product. Both options are on by default.
The captured telemetry data only contains metadata such as the Warp commands used. It does not contain keystrokes, shell commands entered, or shell command output.
Click "Close settings and view network logging" to add a shell command in the current pane that displays all the communications being sent to the Warp team. After viewing it, press ctrl-c to return to the pane.
About
This displays the current version of Warp.
Keyboard Shortcuts
To view all the keyboard shortcuts, open the "Warp Essentials" panel by clicking the button on the right side of the title bar and click the keyboard icon.
To modify keyboard shortcuts, see "Keyboard shortcuts section" described in "Settings" above.
Issues
I have filed the following issues: