Overview
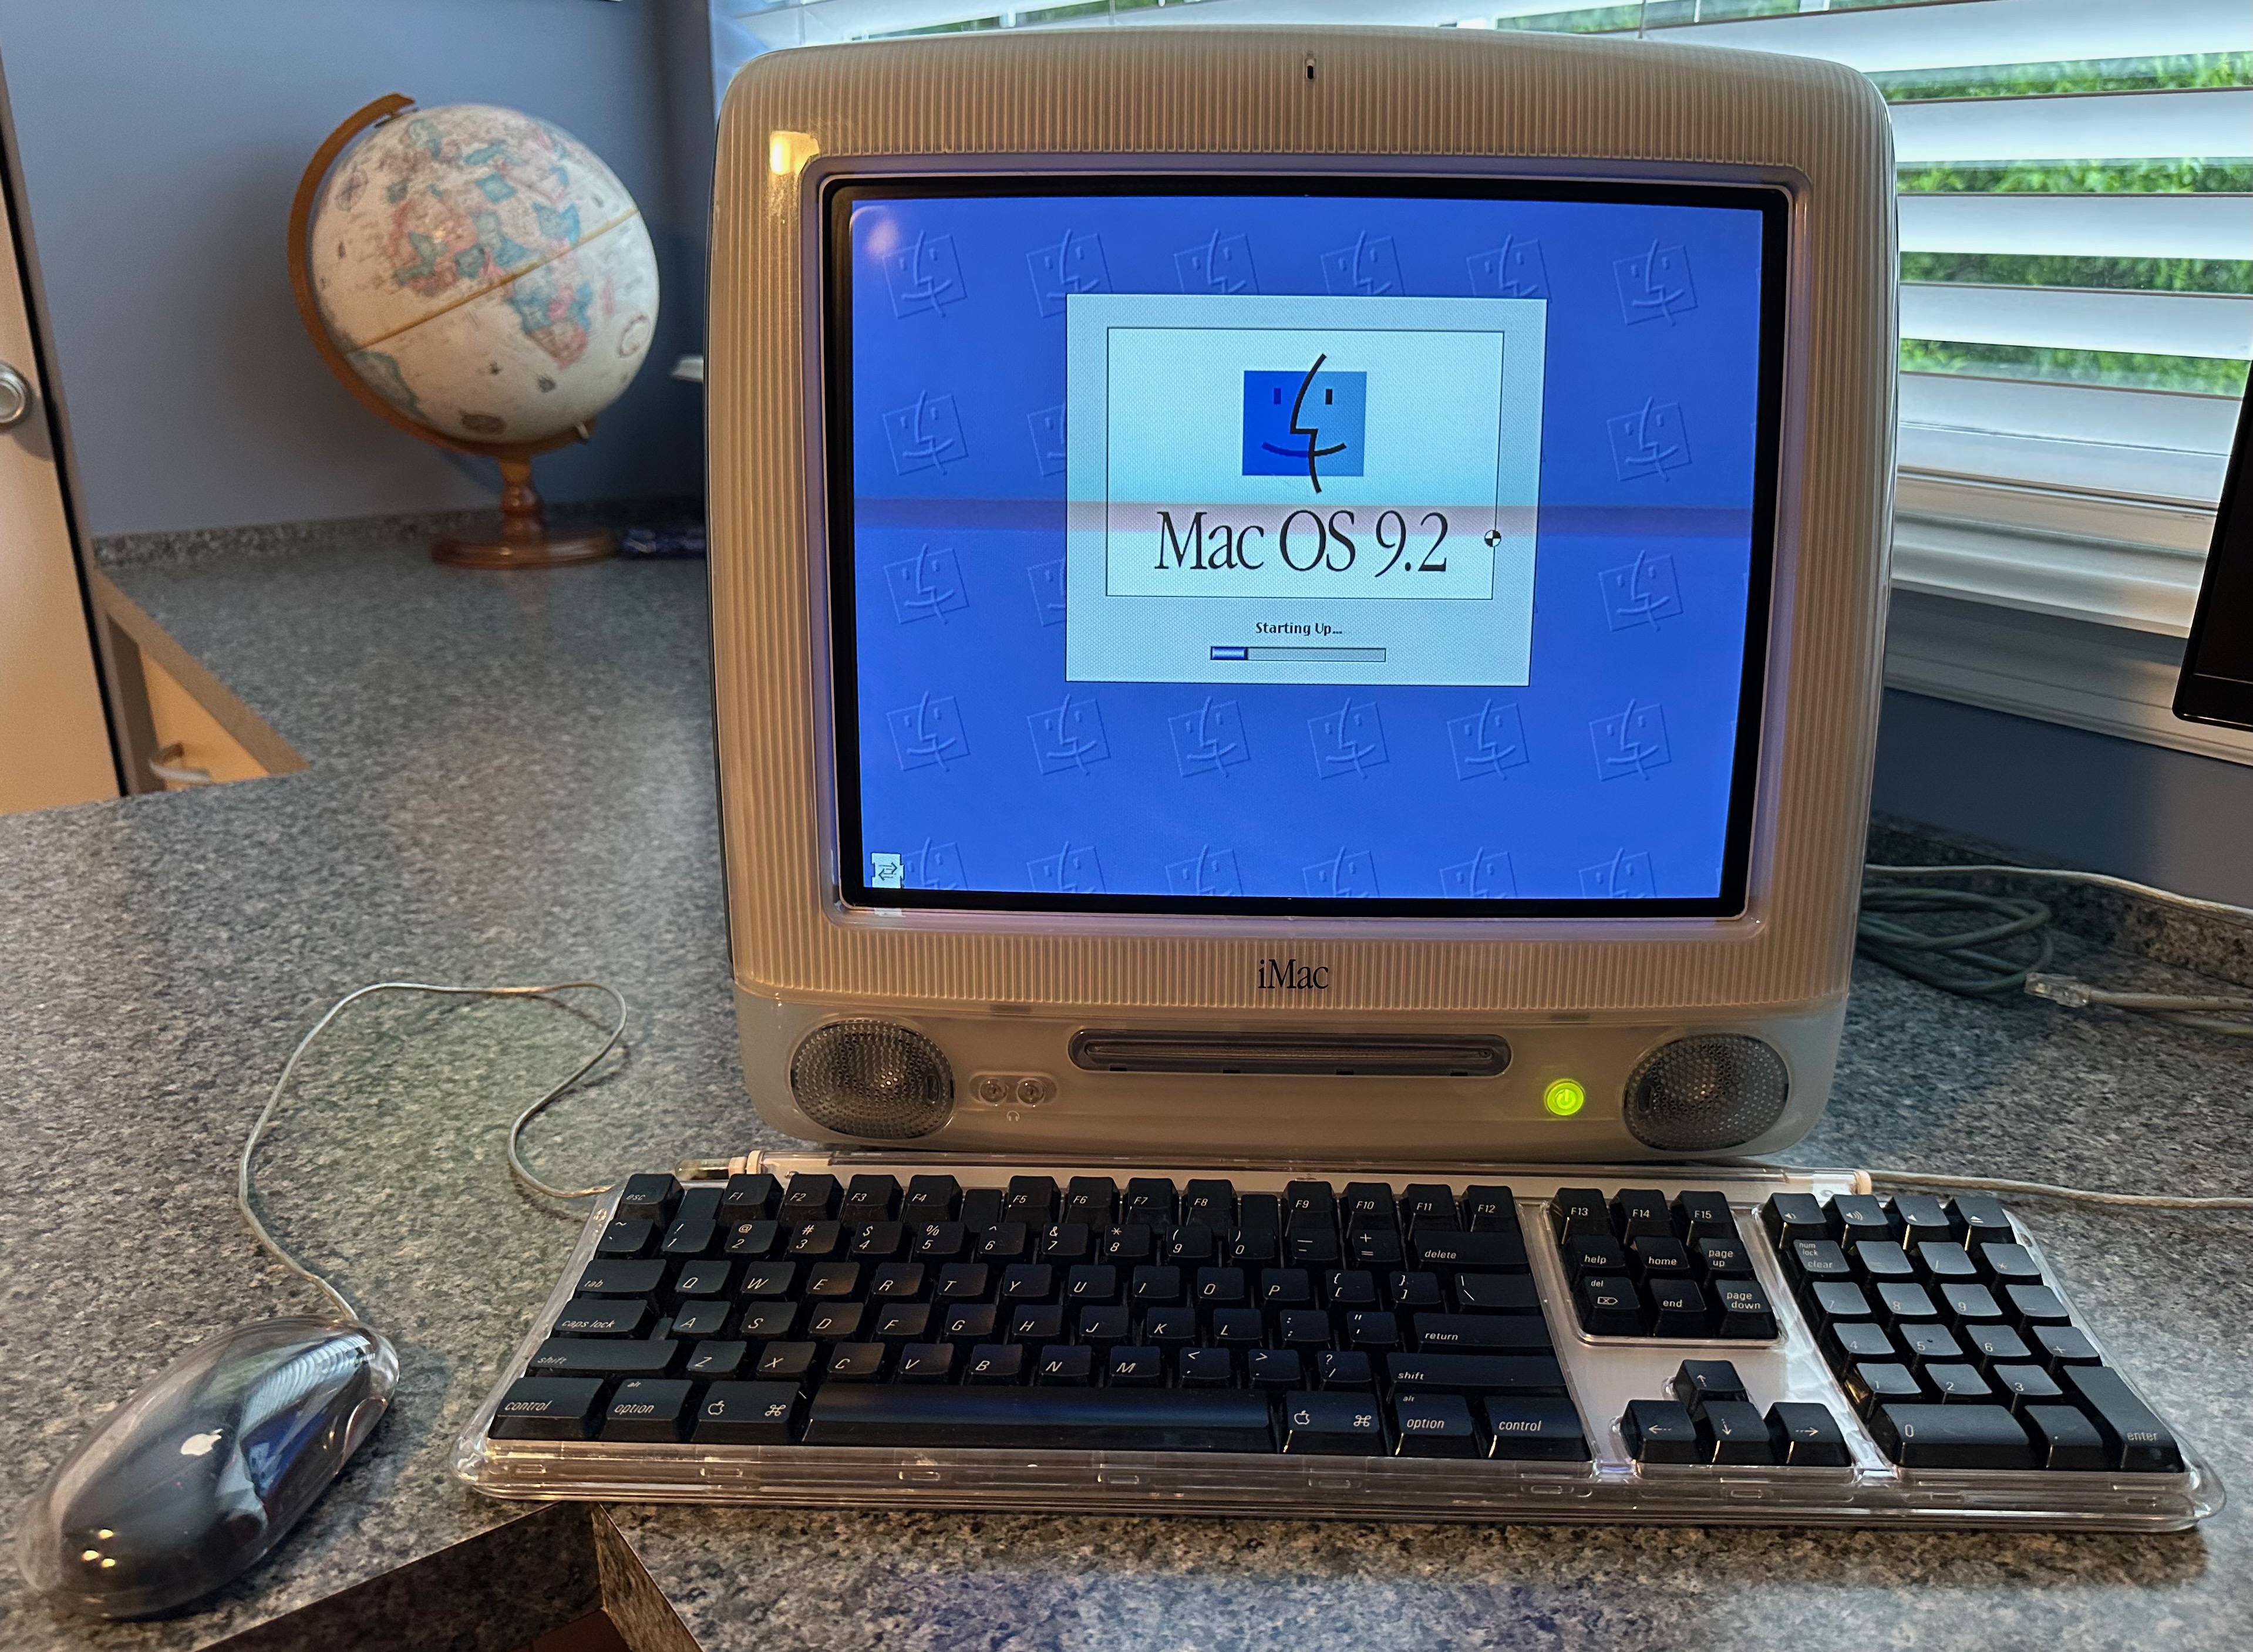
I purchased a used iMac G3 on April 30, 2025 for $200. It chose this model because it is one of the newest Macintosh computers that can run the HyperCard application. I’m learning about HyperCard so I can attempt to recreate it as web application.
The specs for this computer can be found at everymac.com. The highlights are:
- Apple iMac G3/500 DV SE (Summer 2000)
- Graphite color
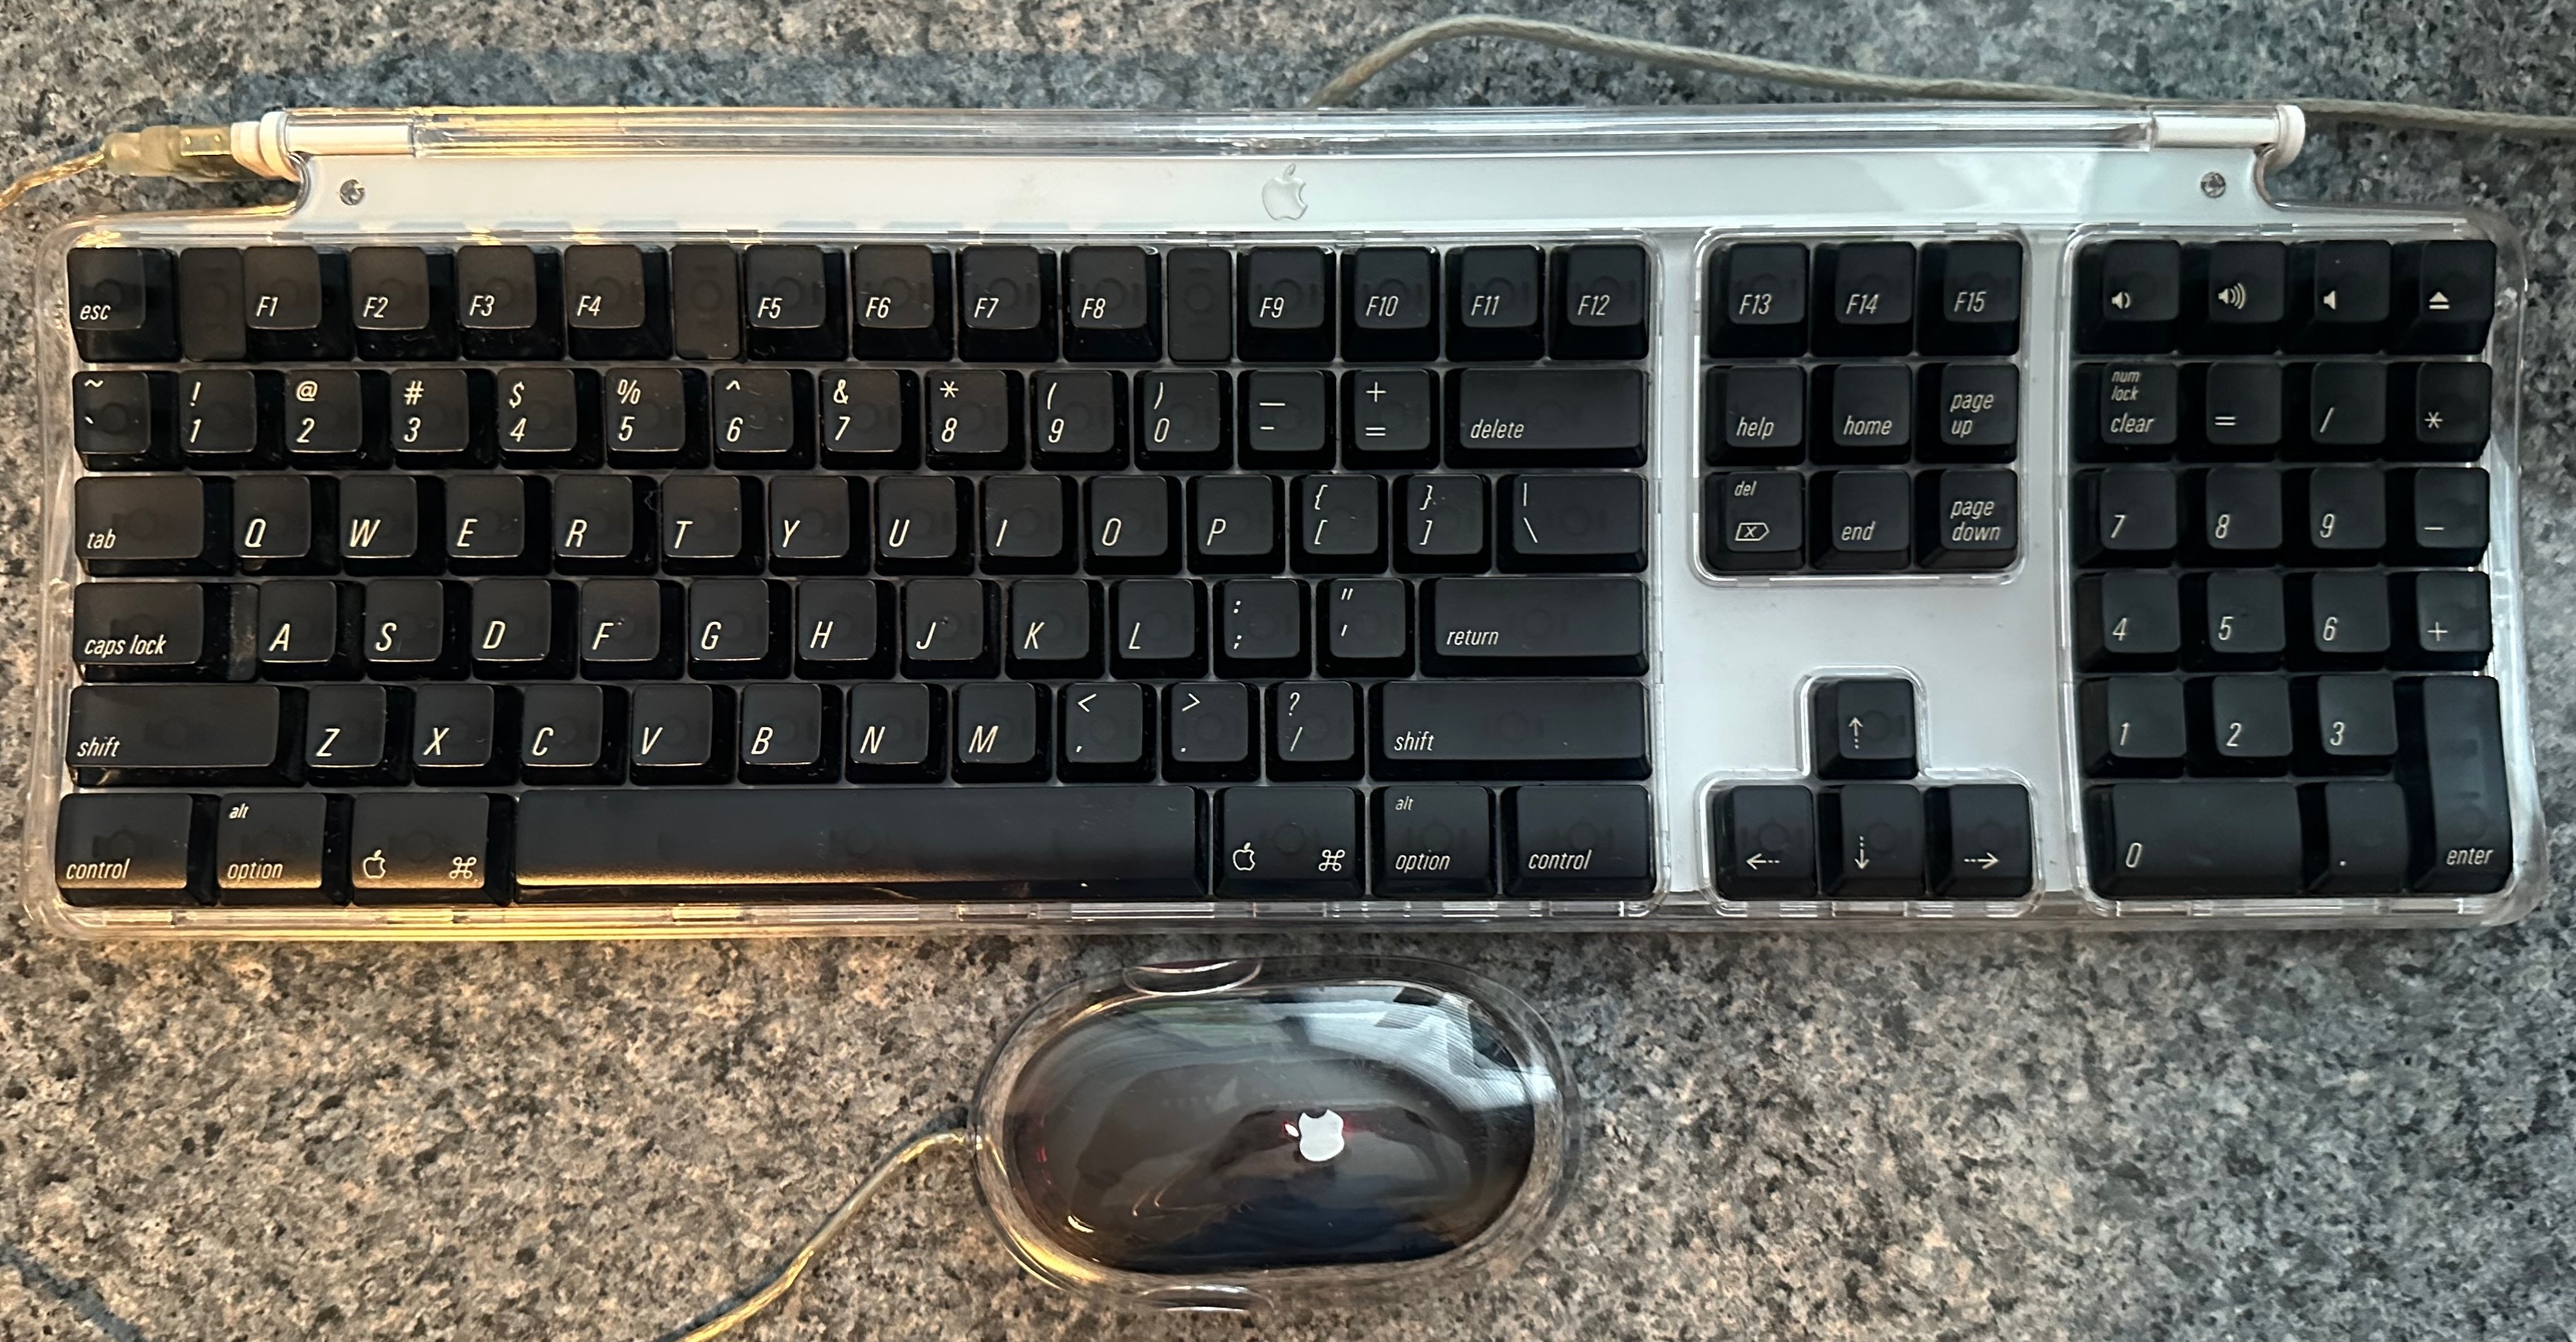
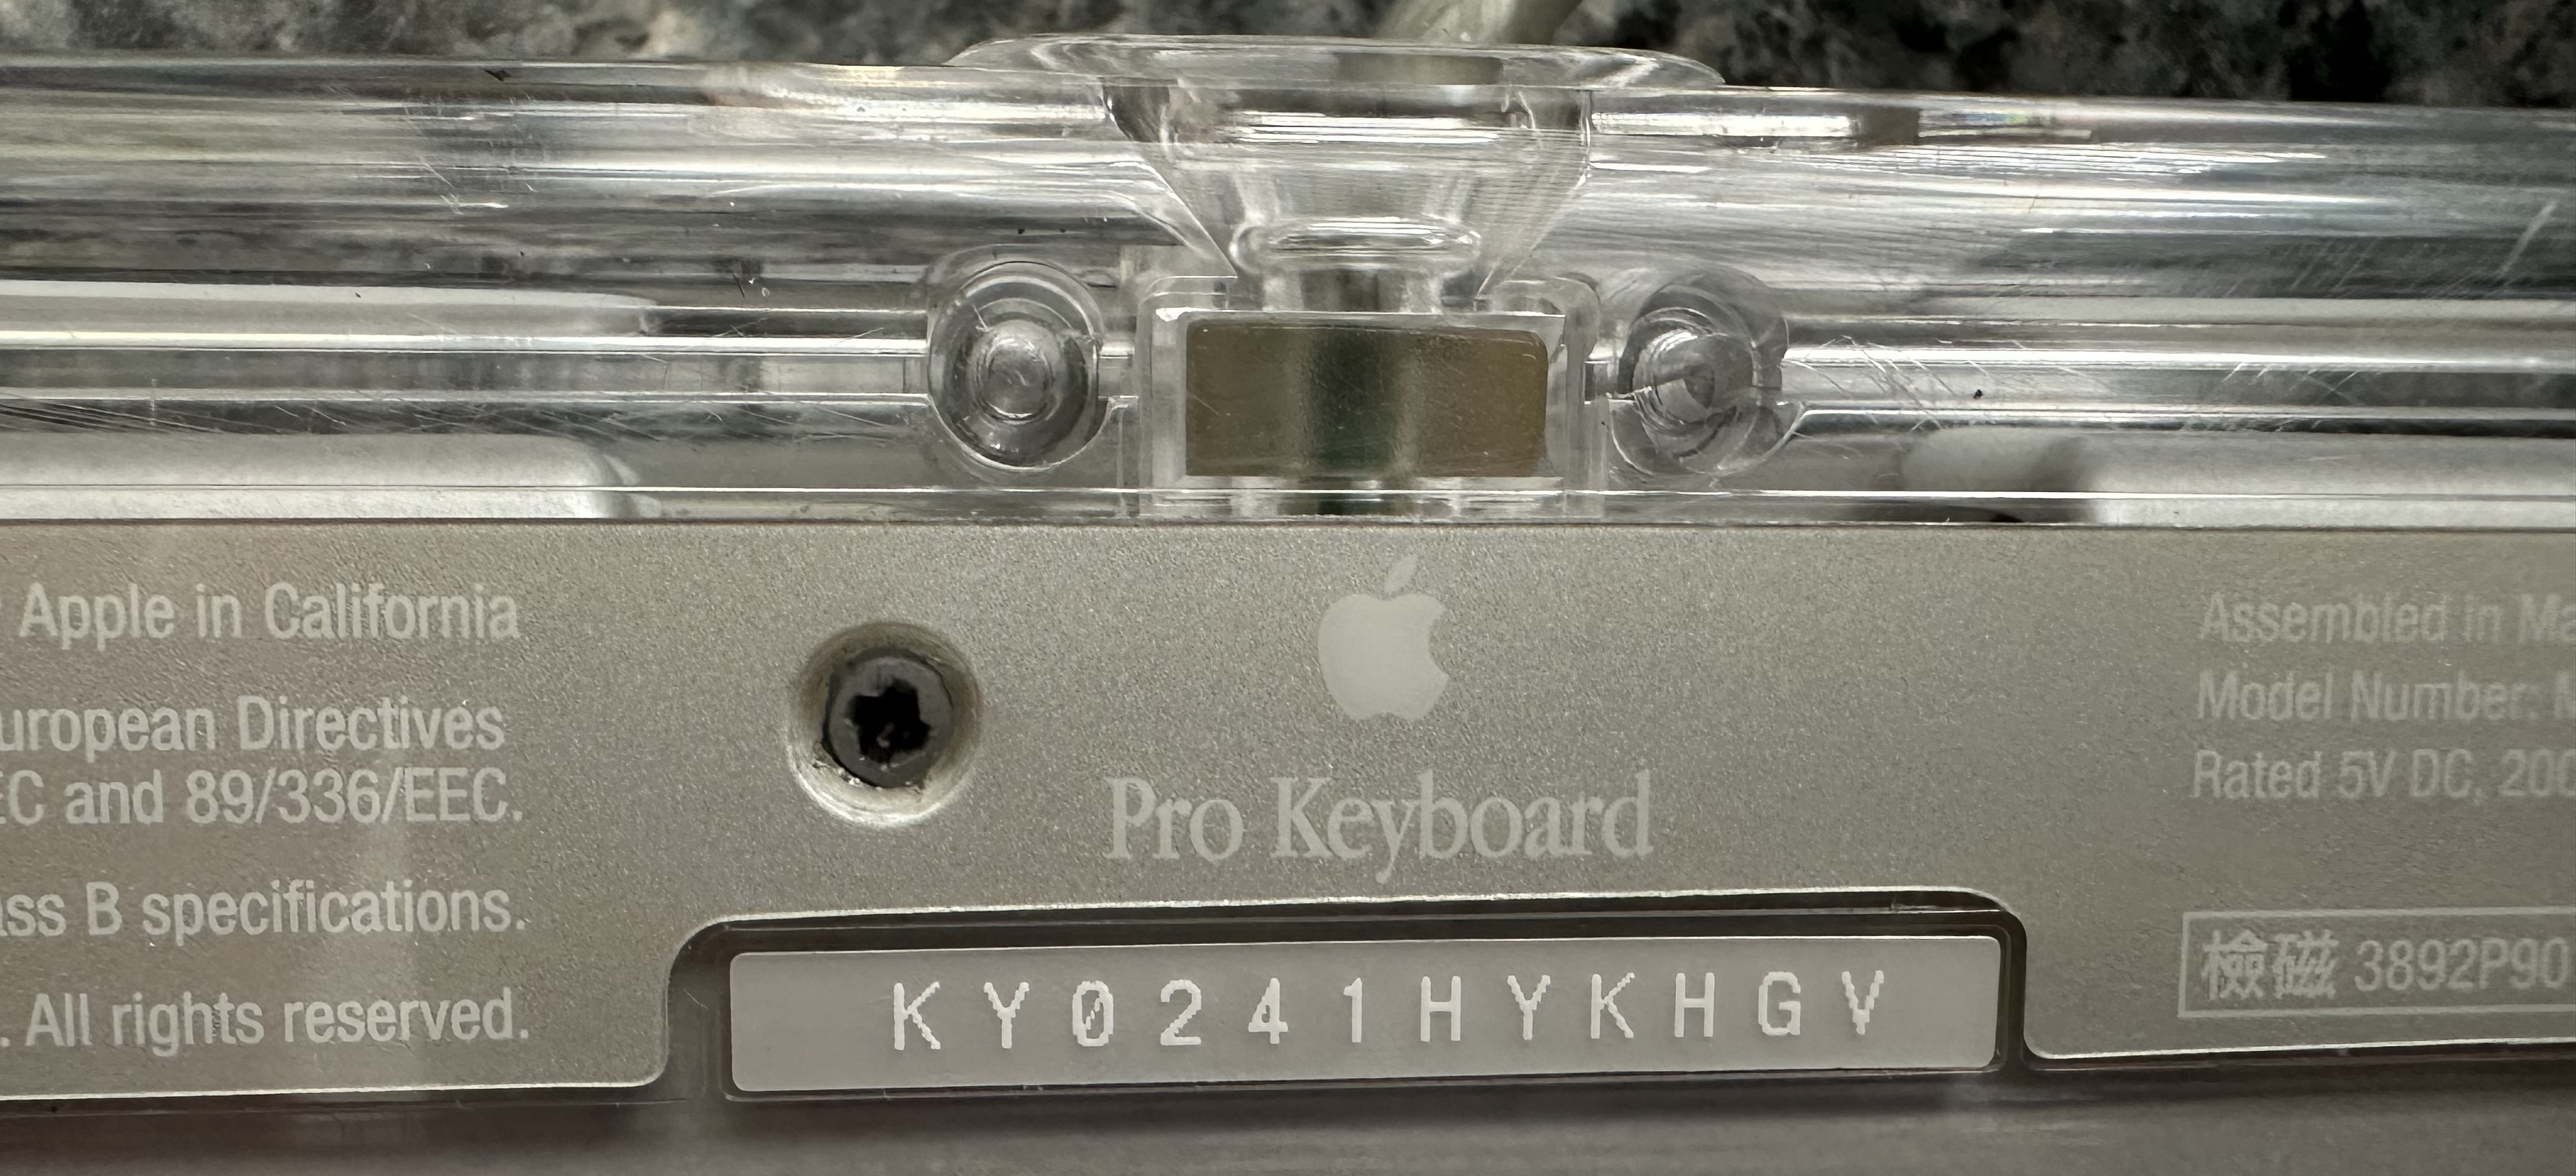
- Pro Keyboard
- Pro Mouse
- 15” CRT display
- native resolution 800x600
- 30 GB hard drive
- PC100 SDRAM 128 MB
- processor type PowerPC 750
- processor speed 500 MHz
- 4X DVD ROM slot loading
- Ethernet port
- 2 USB-A ports
- 2 Firewire 400 ports
- AirPort card for wireless internet using WEP
- VGA port for display mirroring (couldn’t get this to work)
- original price $1499
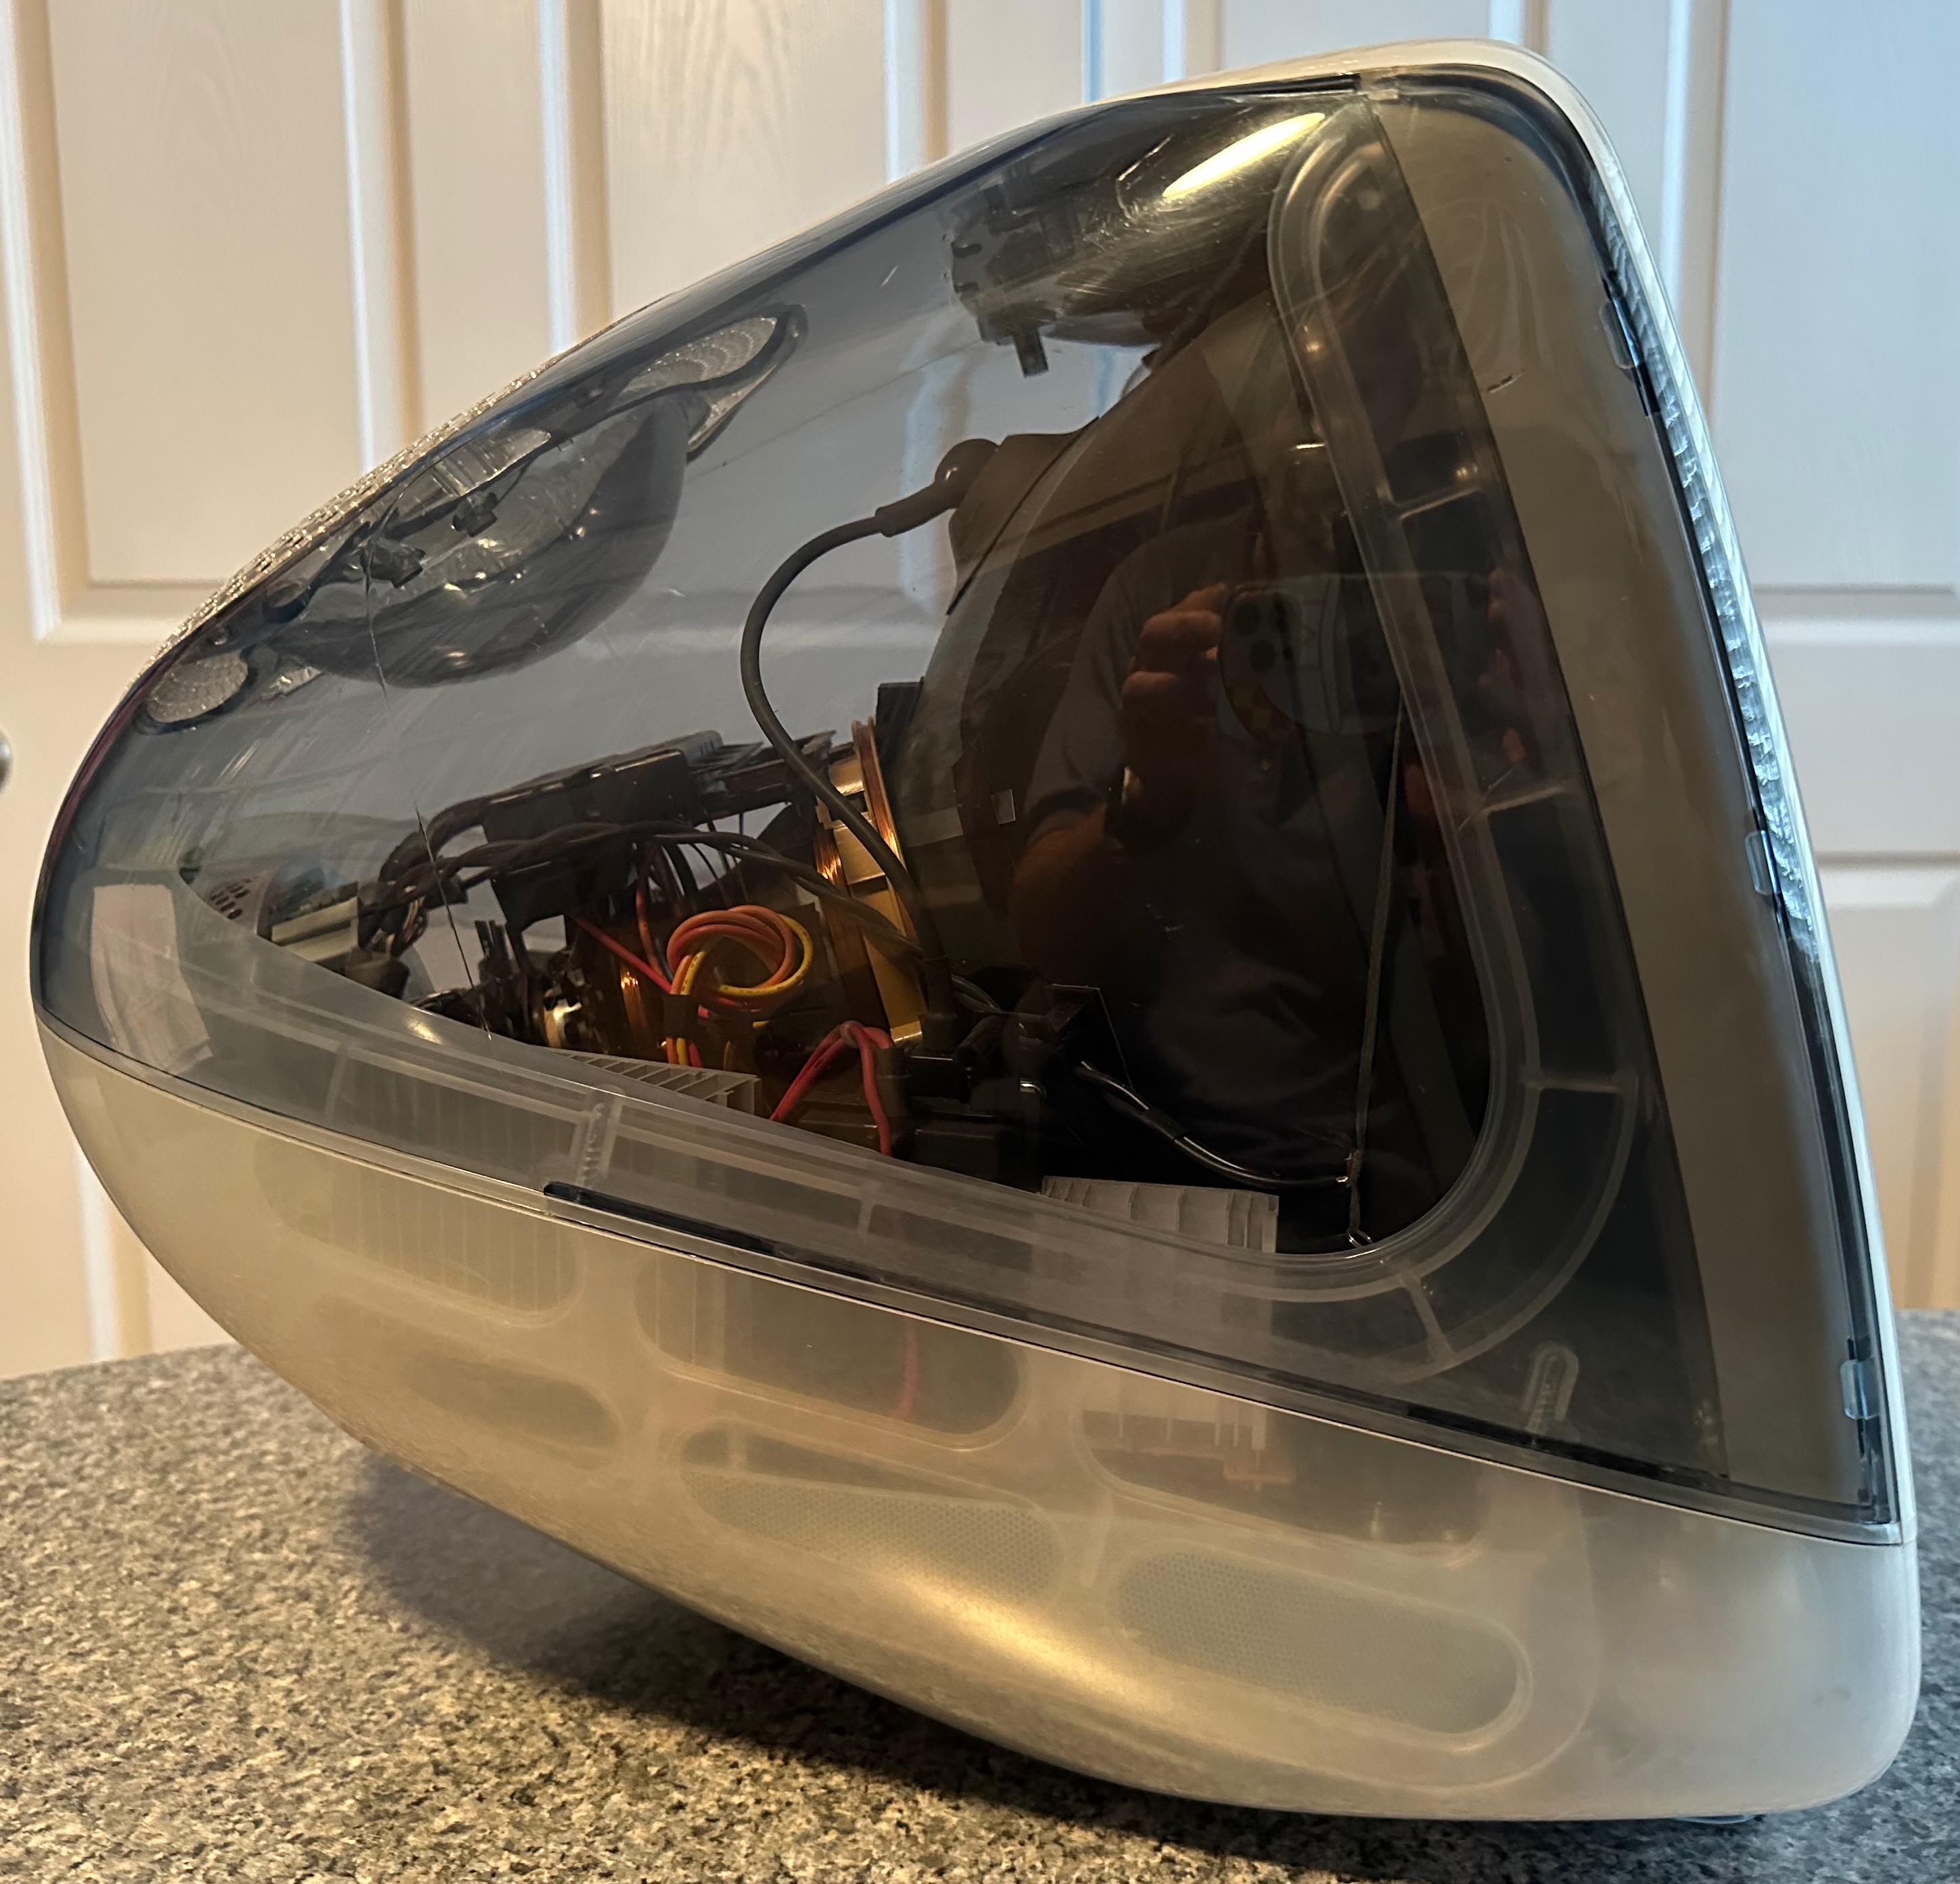
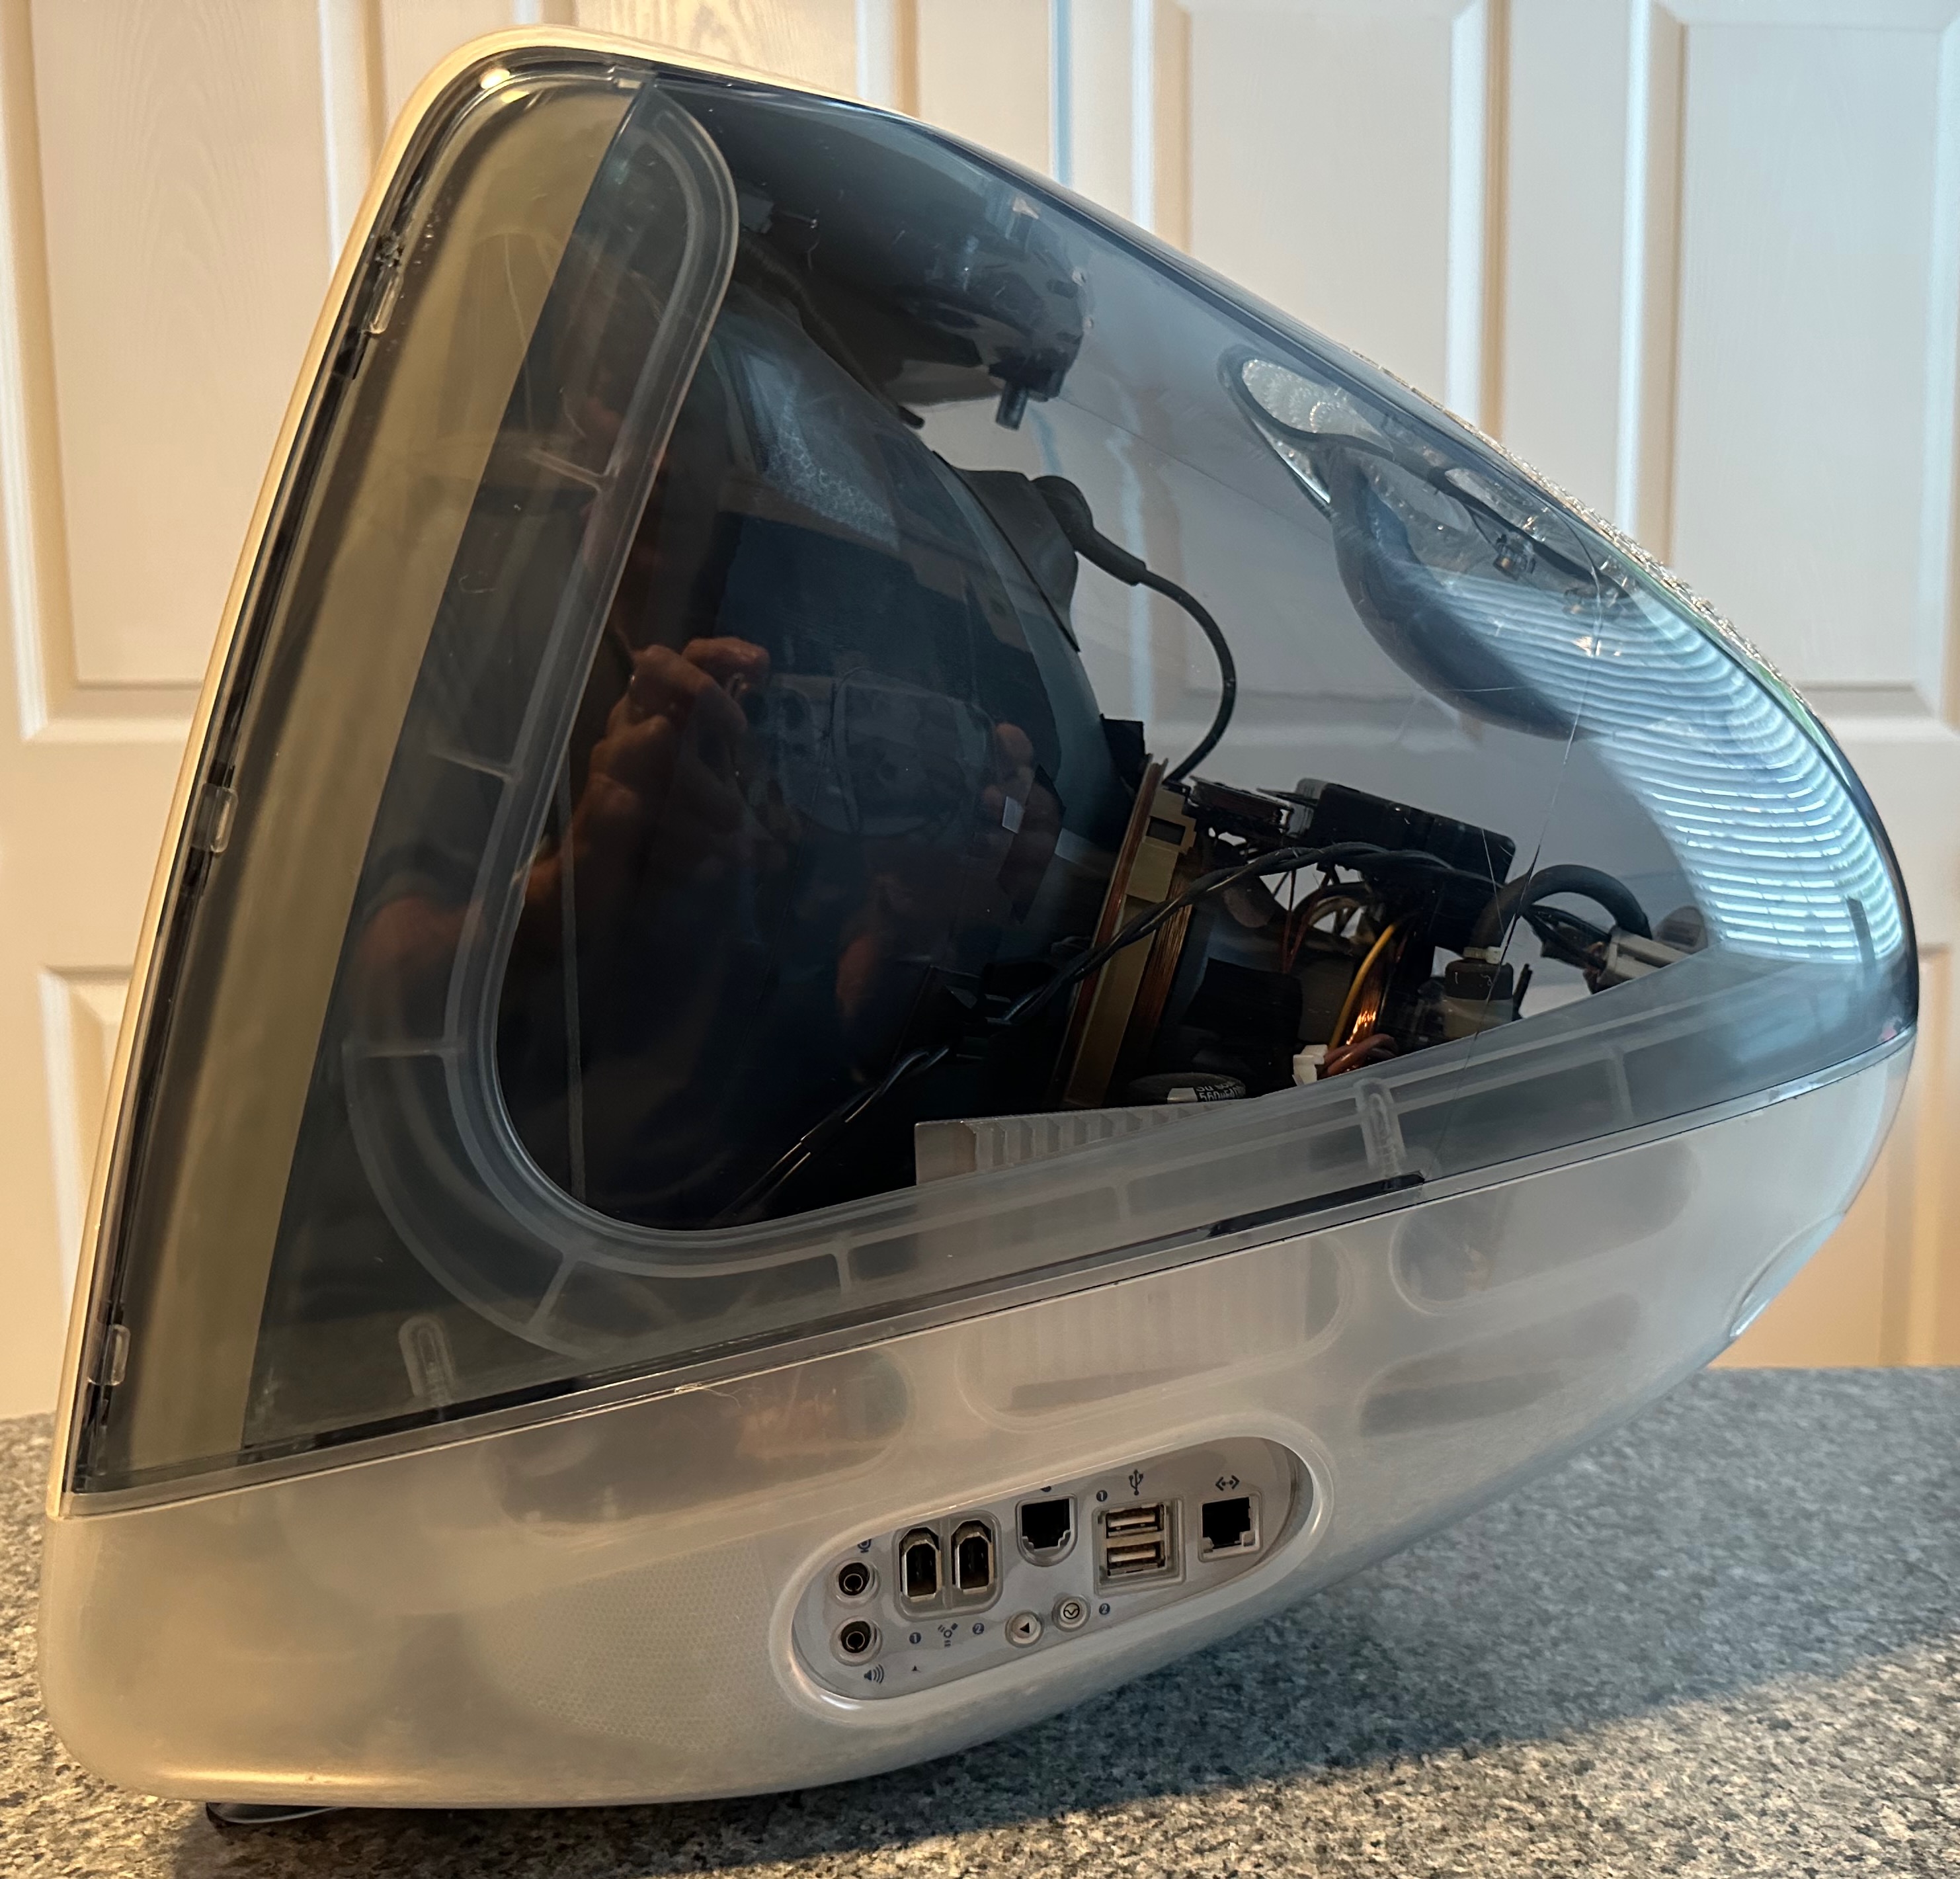
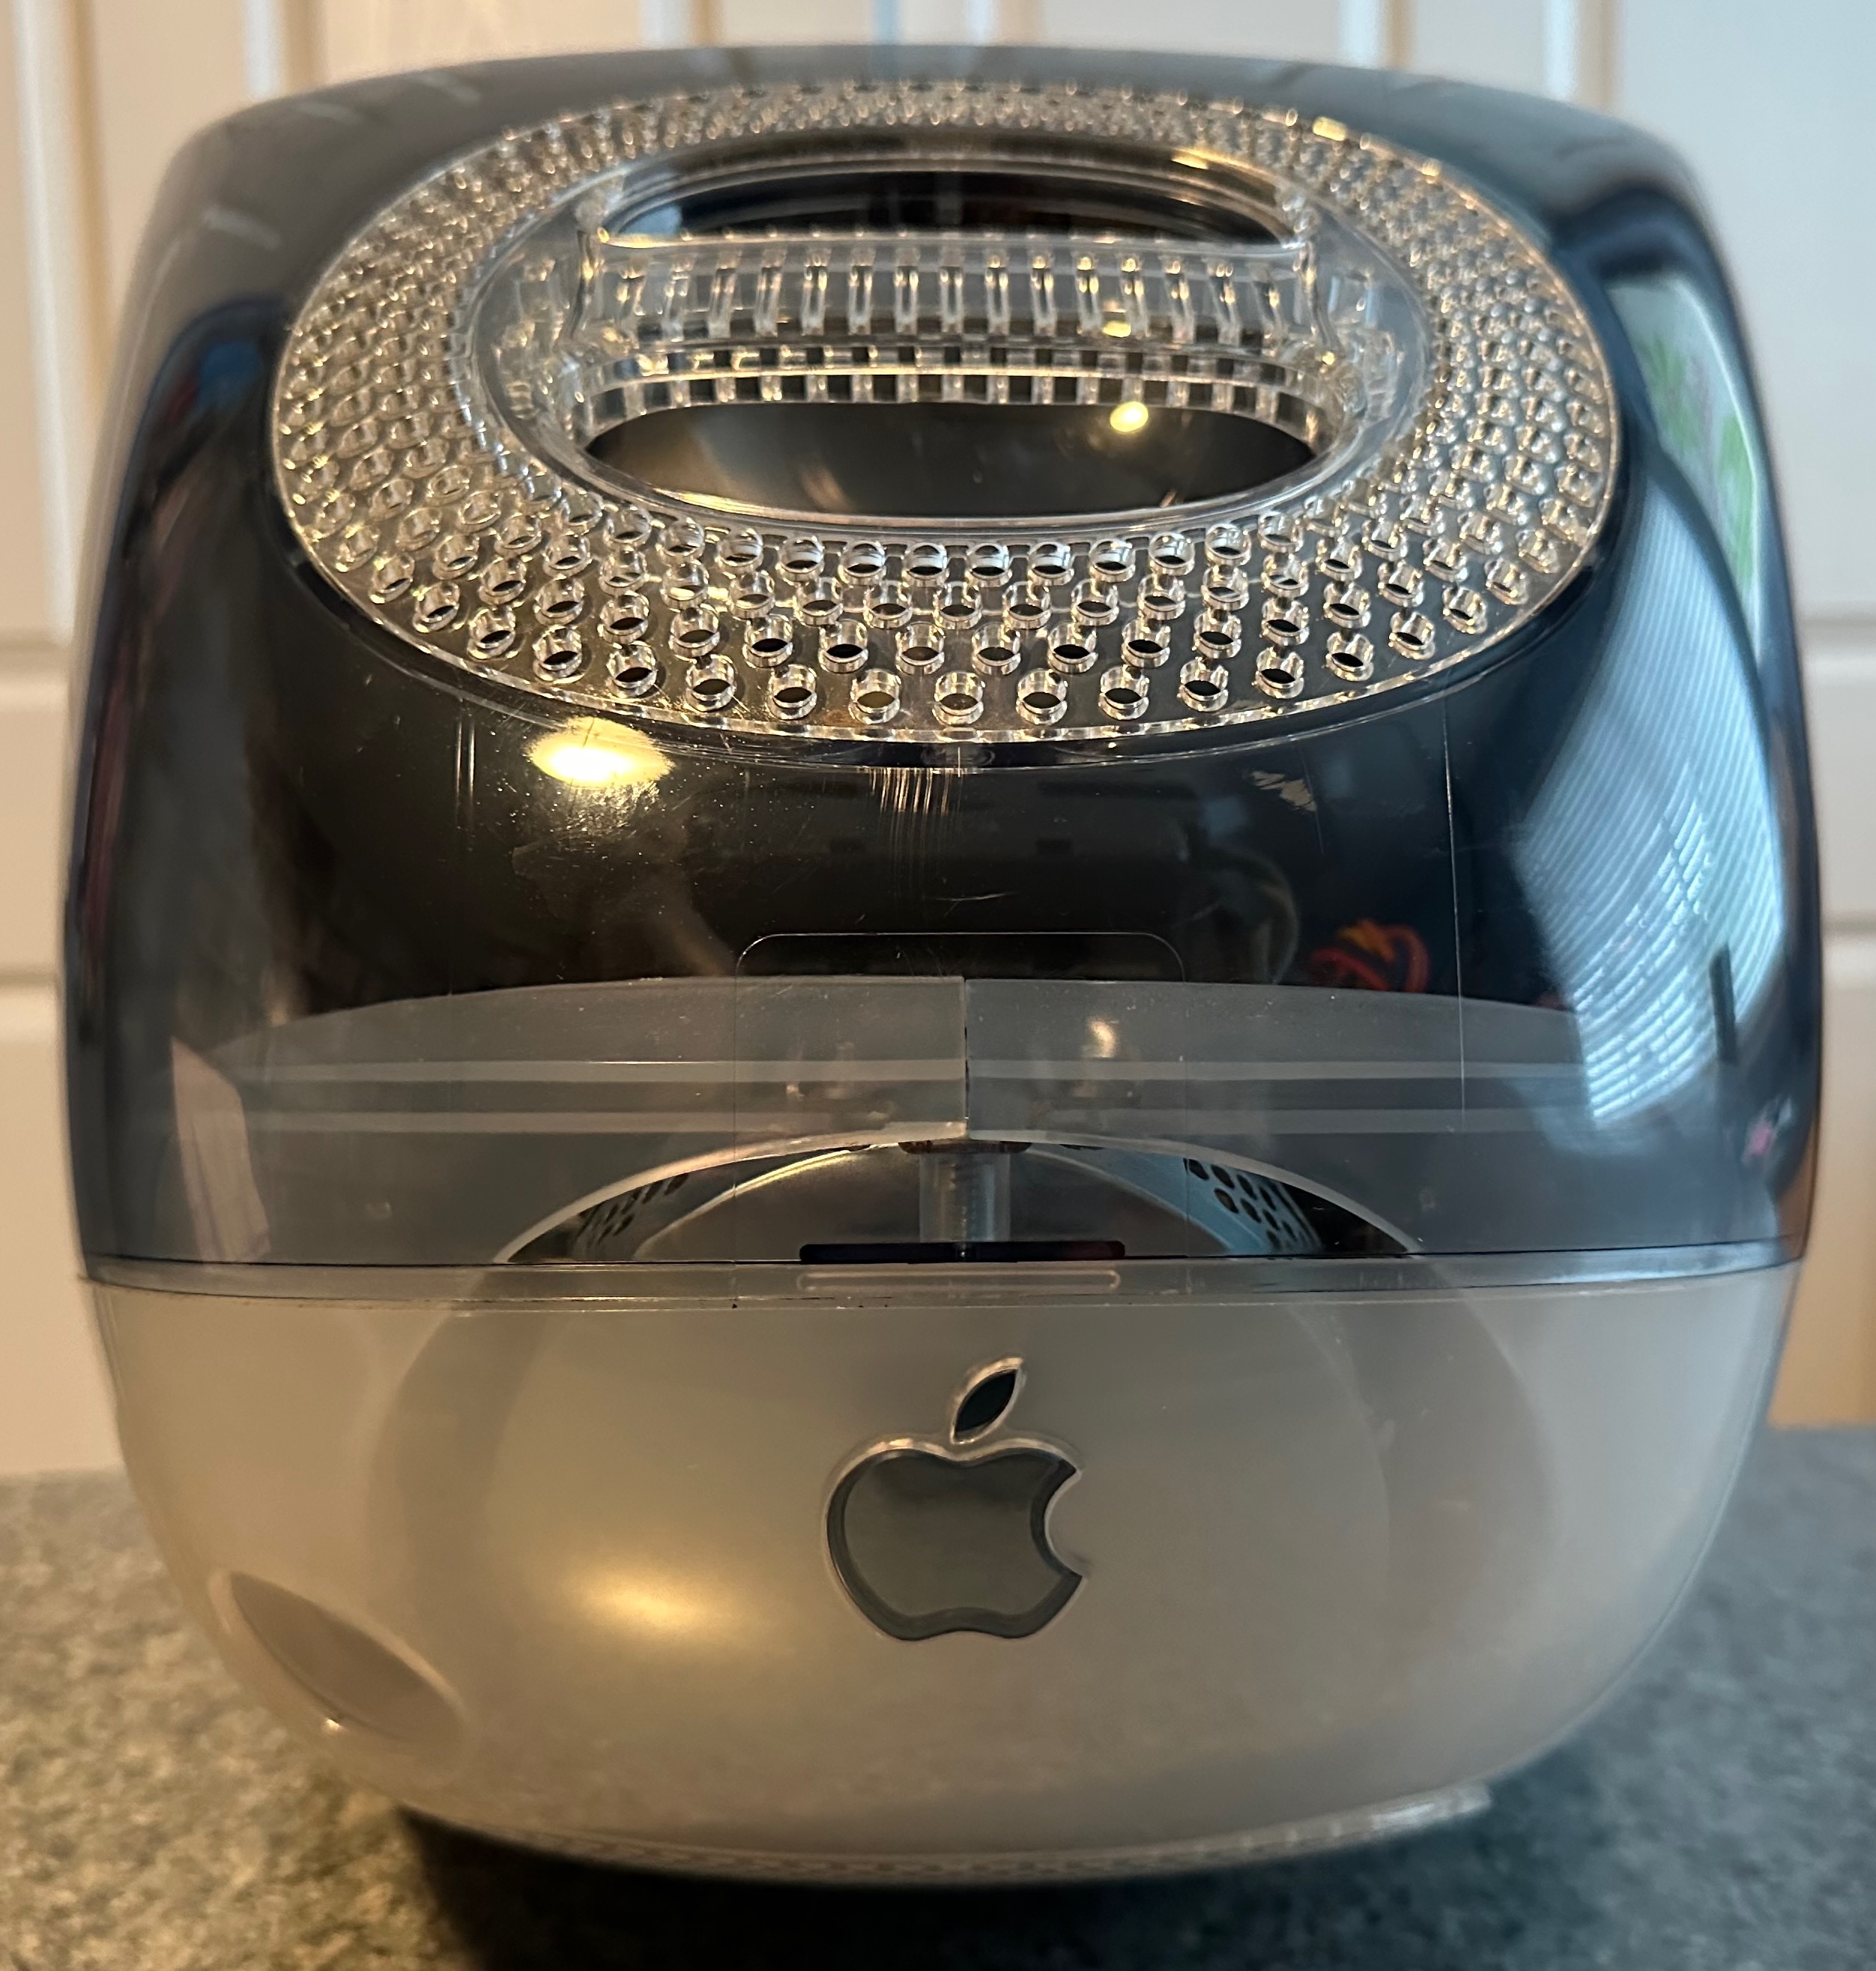
This is one of the cleanest iMac G3 computers I was able to find, as evidenced by the photos below.

Setup
Below are the steps I took to setup this computer.
- Reinstall the operating system to run Mac OS 9.0.1 instead of macOS X using the provided CD “iMac Software Restore”. While macOS X can run on this computer, it is slow compared to Mac OS 9.
- Insert a 32GB USB stick into the iMac G3.
- Erase the USB stick and format it as “Macintosh ? Extended”.
- Use the USB stick to copy software from a modern Mac to the iMac G3.
- Install “Aladdin Stuffit Expander” from a self-extracting archive.
- Install the “Mac OS 9.1 Updater”.
- Install the “Mac OS 9.2.1 Updater”.
- Install HyperCard 4.2.1.
- Install “The Haunted House 1.0.2” HyperCard stack.
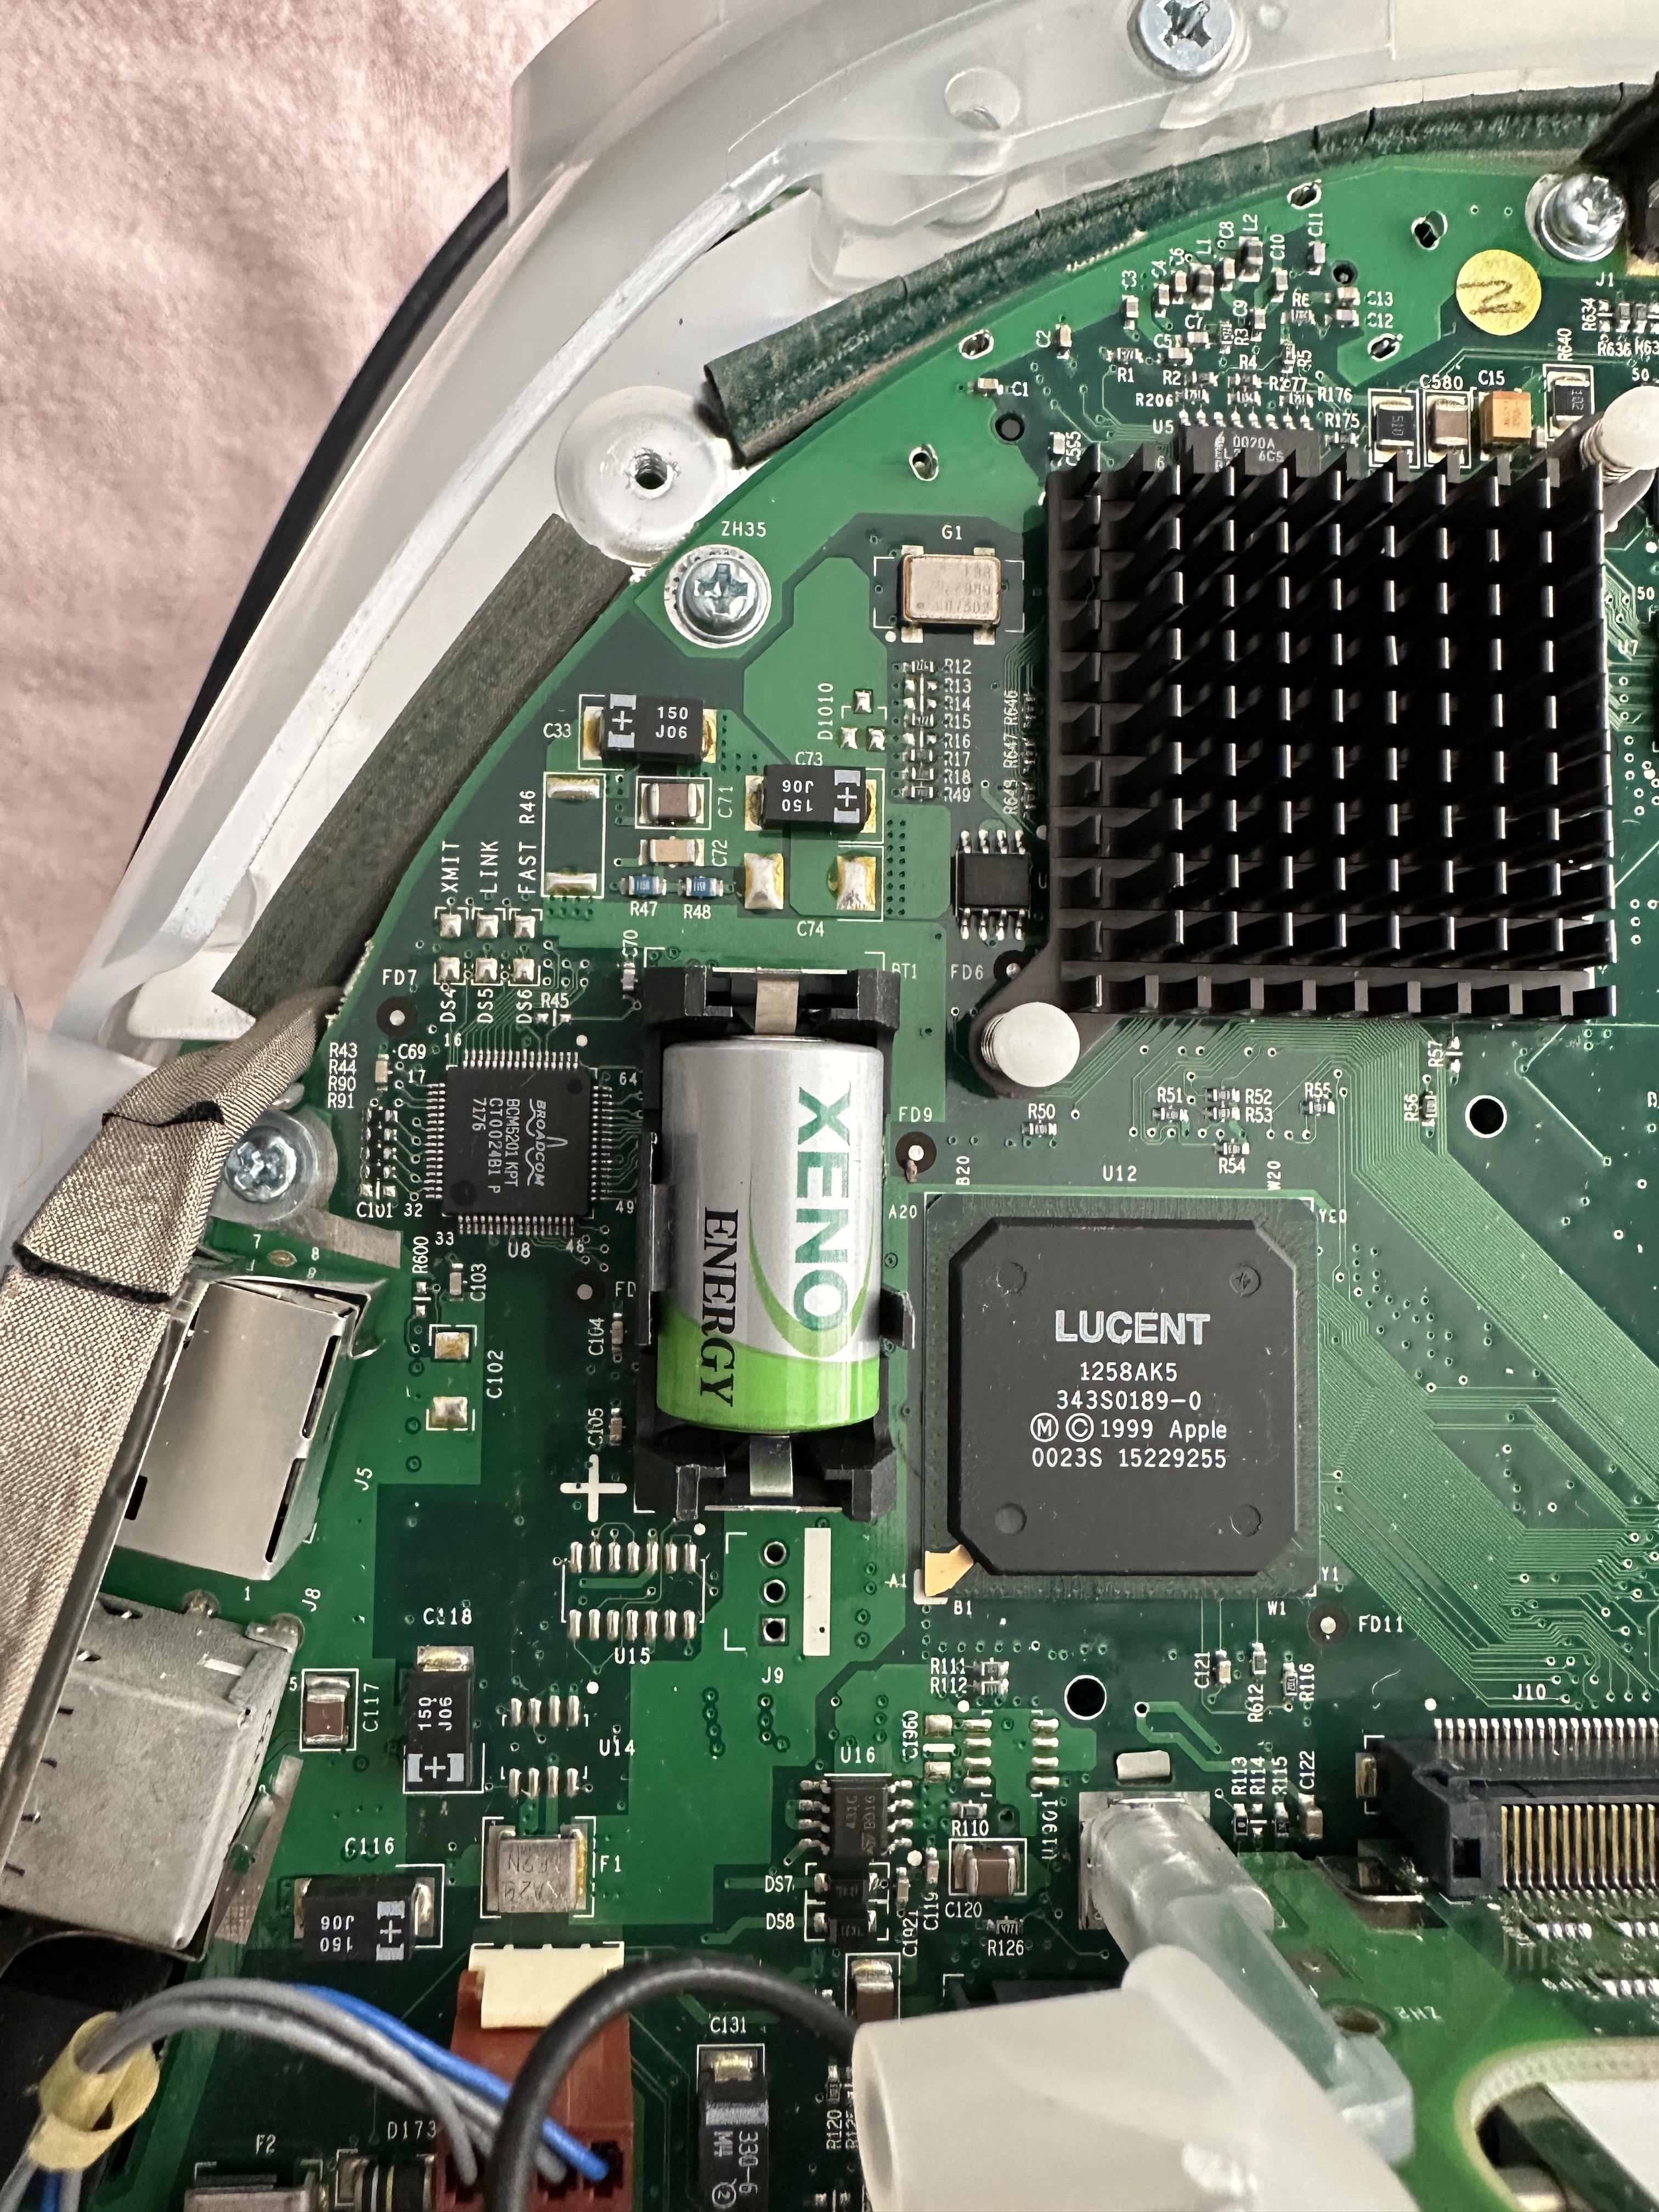
PRAM Battery
The PRAM battery in a computer is responsible for maintaining:
- date and time
- startup disk preference
- display settings like resolution and color depth
- sound volume
- other system parameters
Old computers likely have a PRAM battery with very little charge remaining. These batteries can also begin to leak acid which can damage the computer. It’s highly recommended to replace the PRAM battery with a new one as soon as possible.
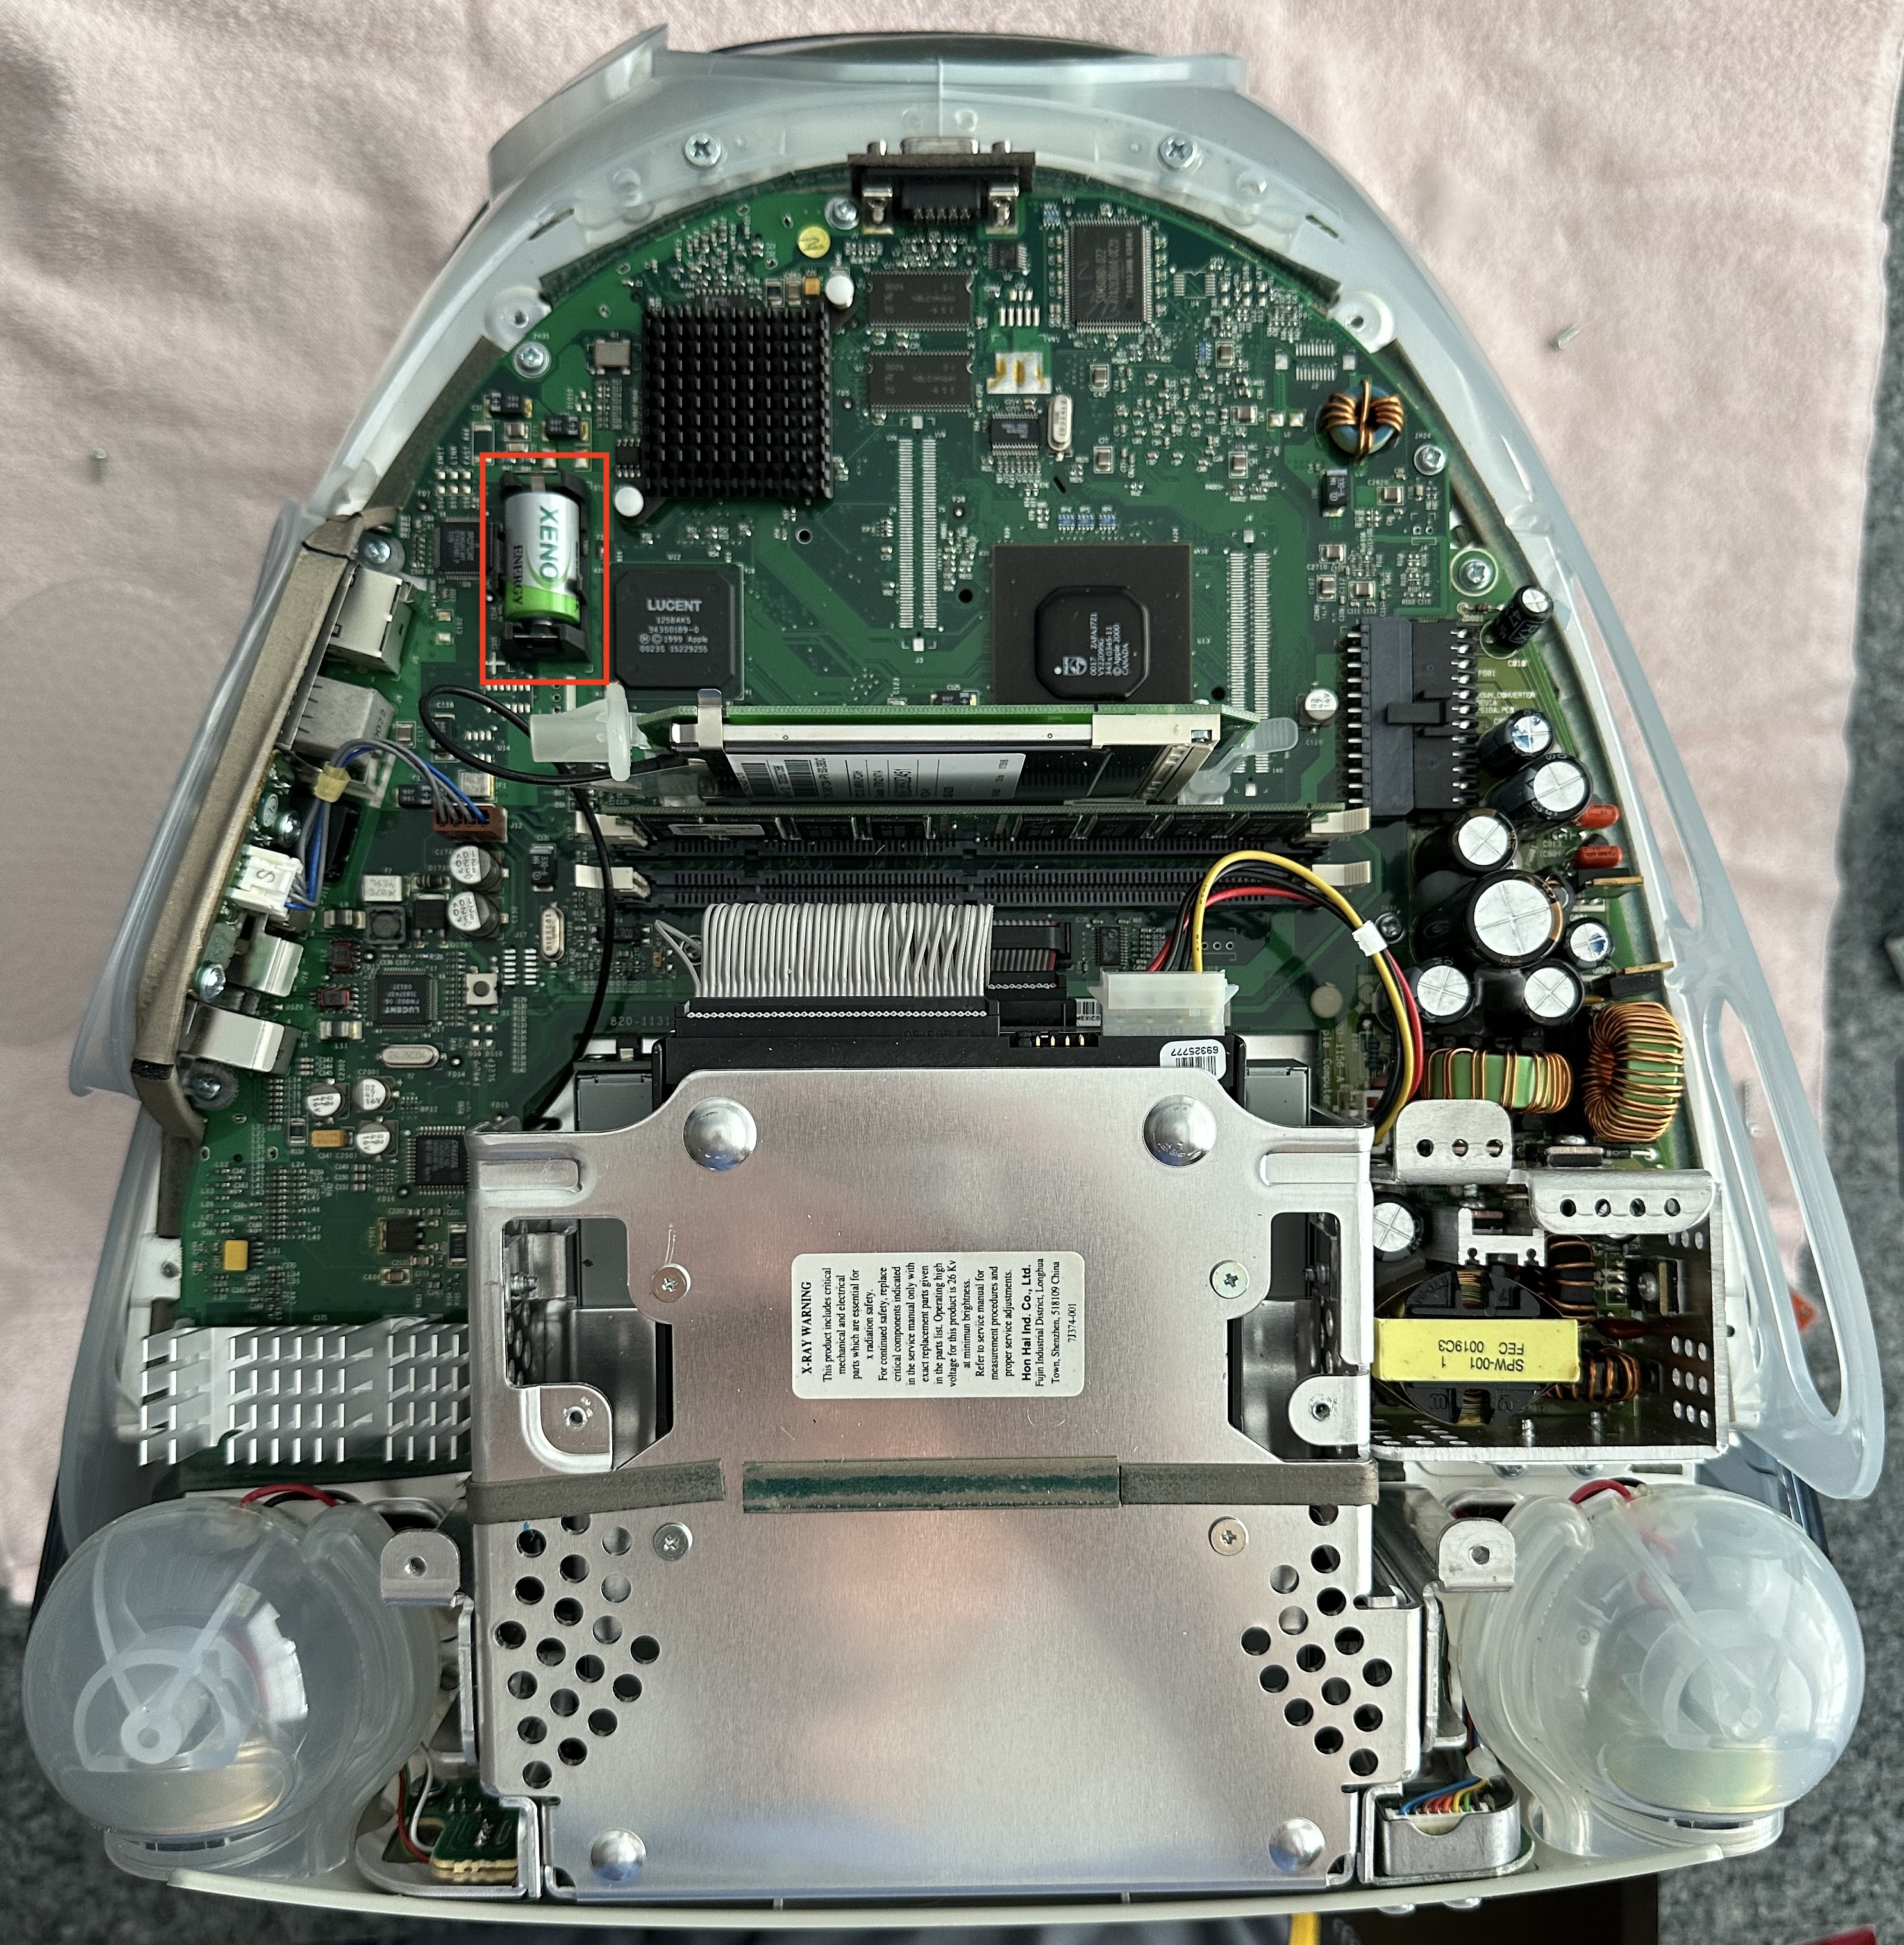
In an iMac G3 computer, the PRAM battery is a 1/2 AA 3.6 volt lithium battery. I ordered a Xeno Energy XL-050F battery from Amazon.
The steps to install a new PRAM battery are shown below.
-
Verify that the new PRAM battery has close to 3.5 volts.
-
Shut down the computer.
-
Unplug everything including the power cord, keyboard, mouse, and Ethernet cable.
-
Spread a blanket or towel on the table/desk where you will work to provide a soft surface for the computer.
-
Lay the computer upside down on the soft surface.
-
Unscrew the four screws that hold the bottom of the plastic case in place. The photos below show the location of the four screws.
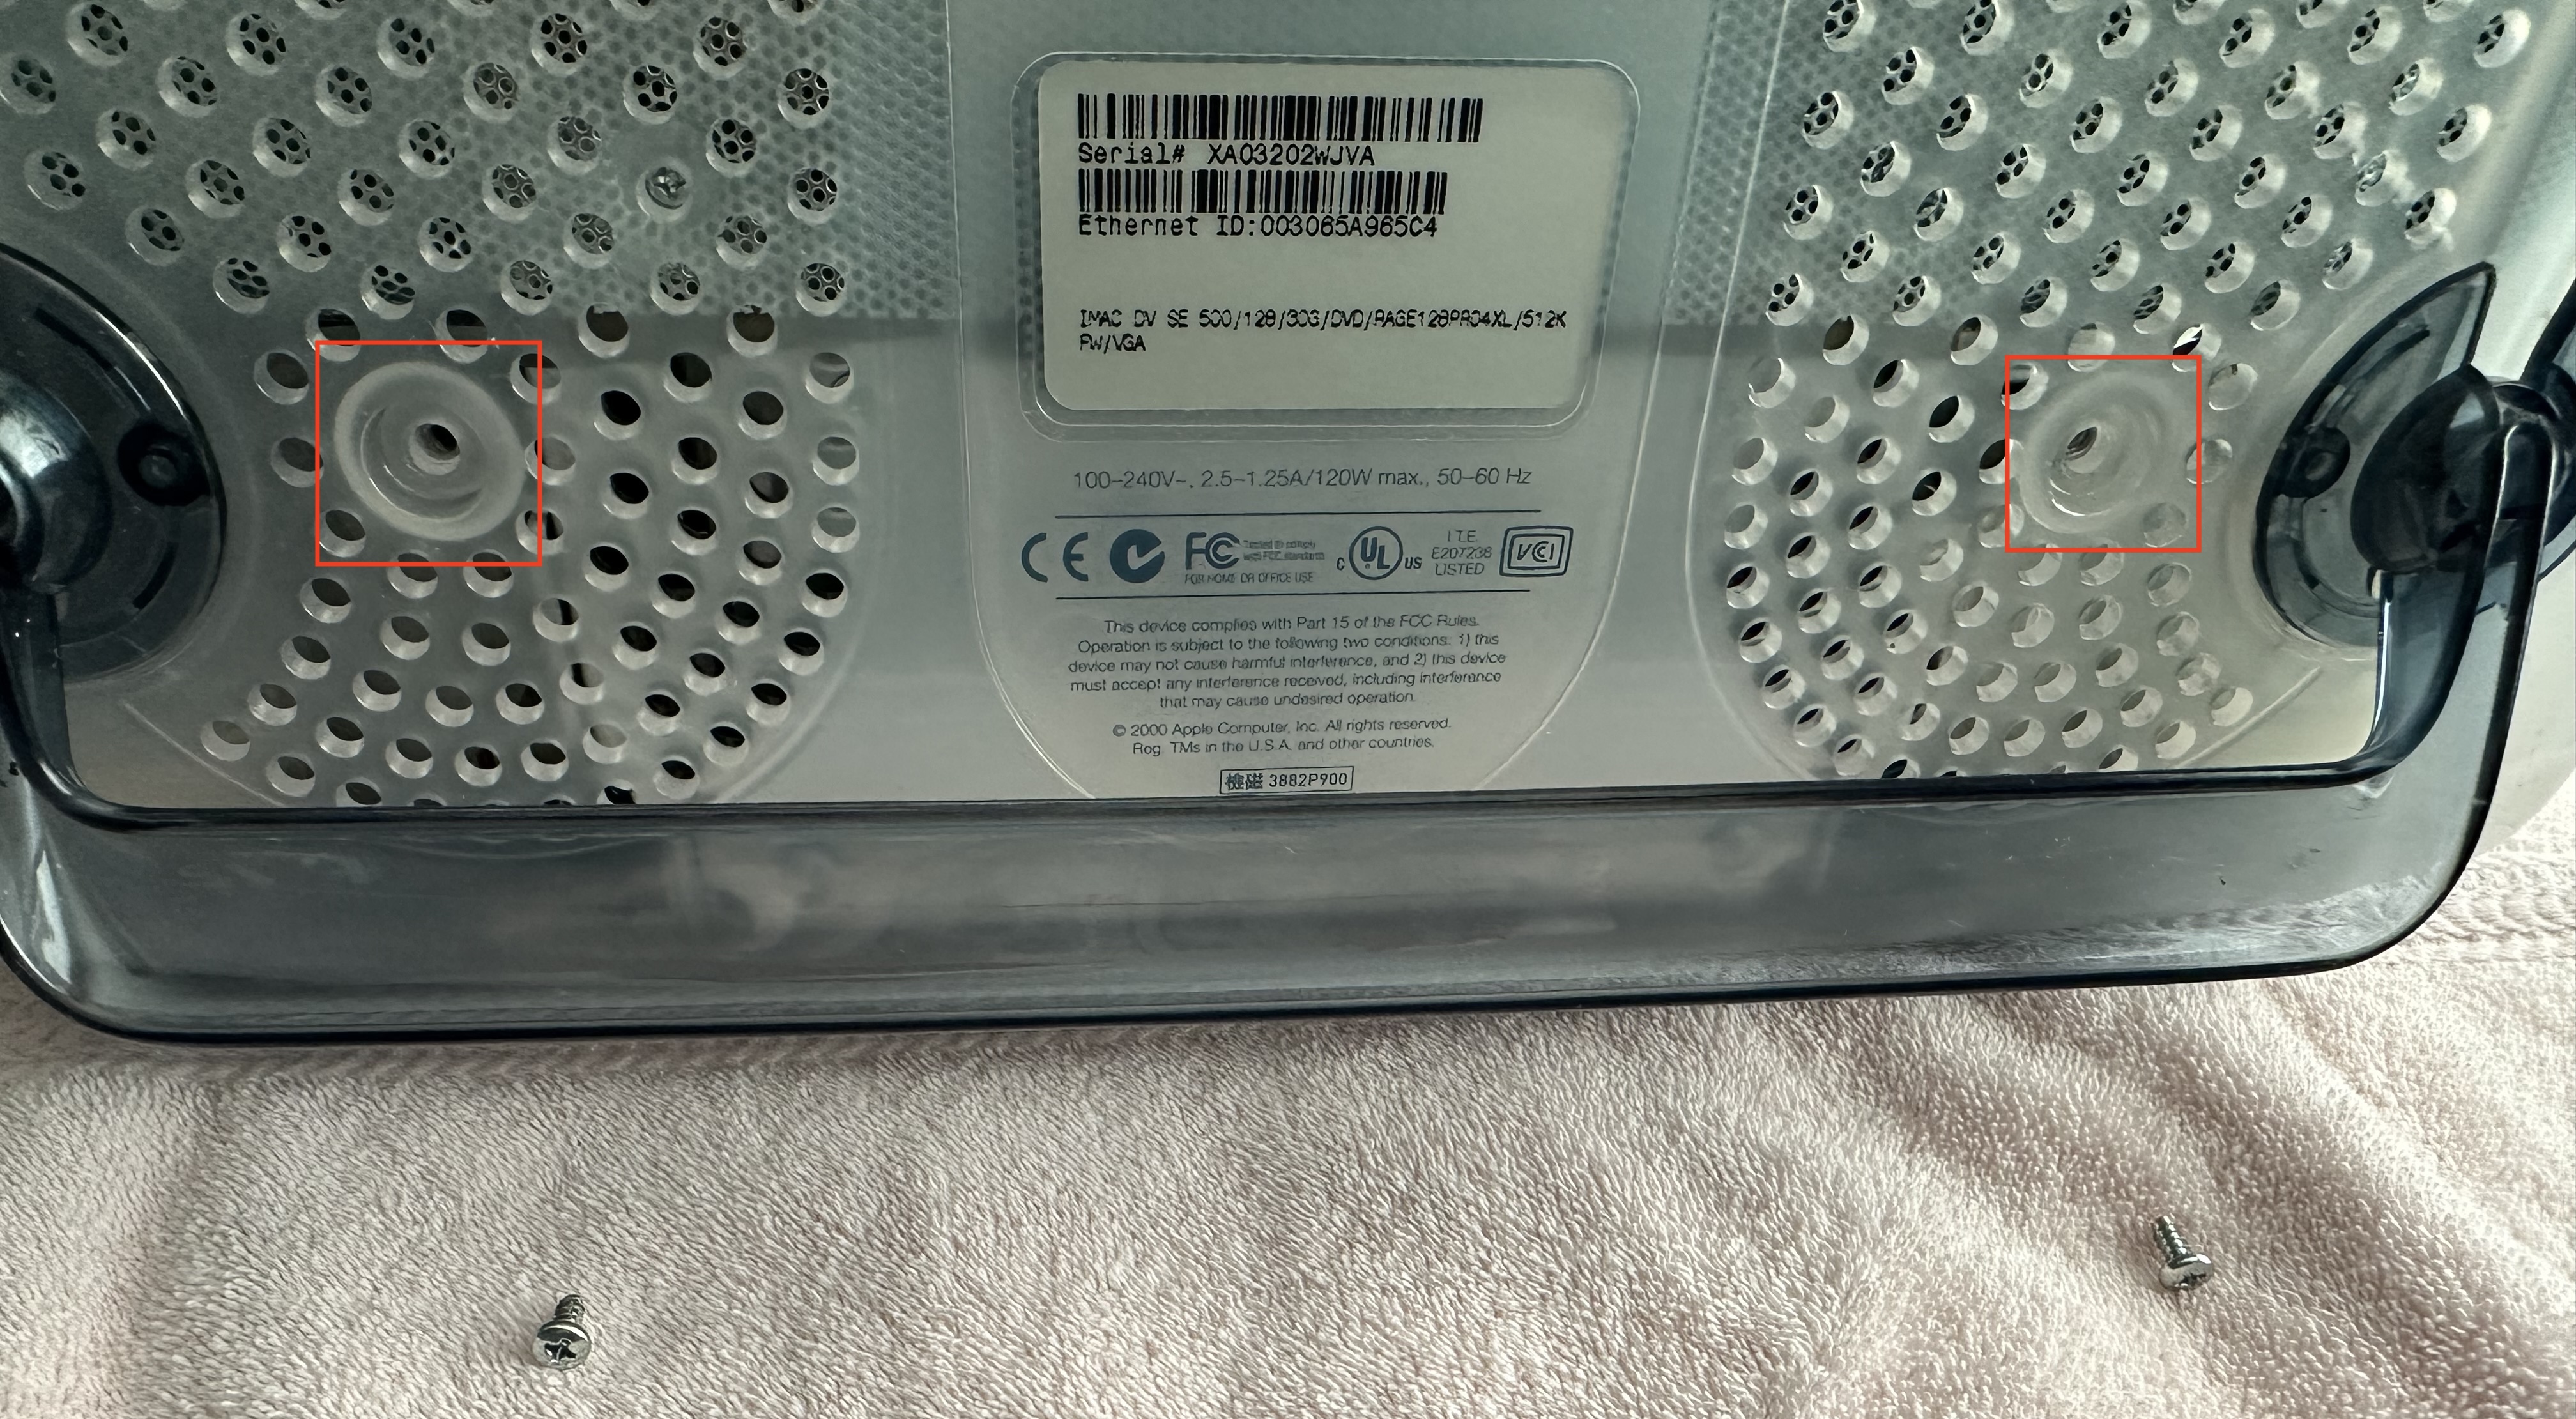
-
Gently remove the bottom plastic case. It will be somewhat difficult to free the edge that is near the CD slot. You will likely hear some cracking sounds, but supposedly that is okay. I heard cracking, but nothing seems to have broken.
-
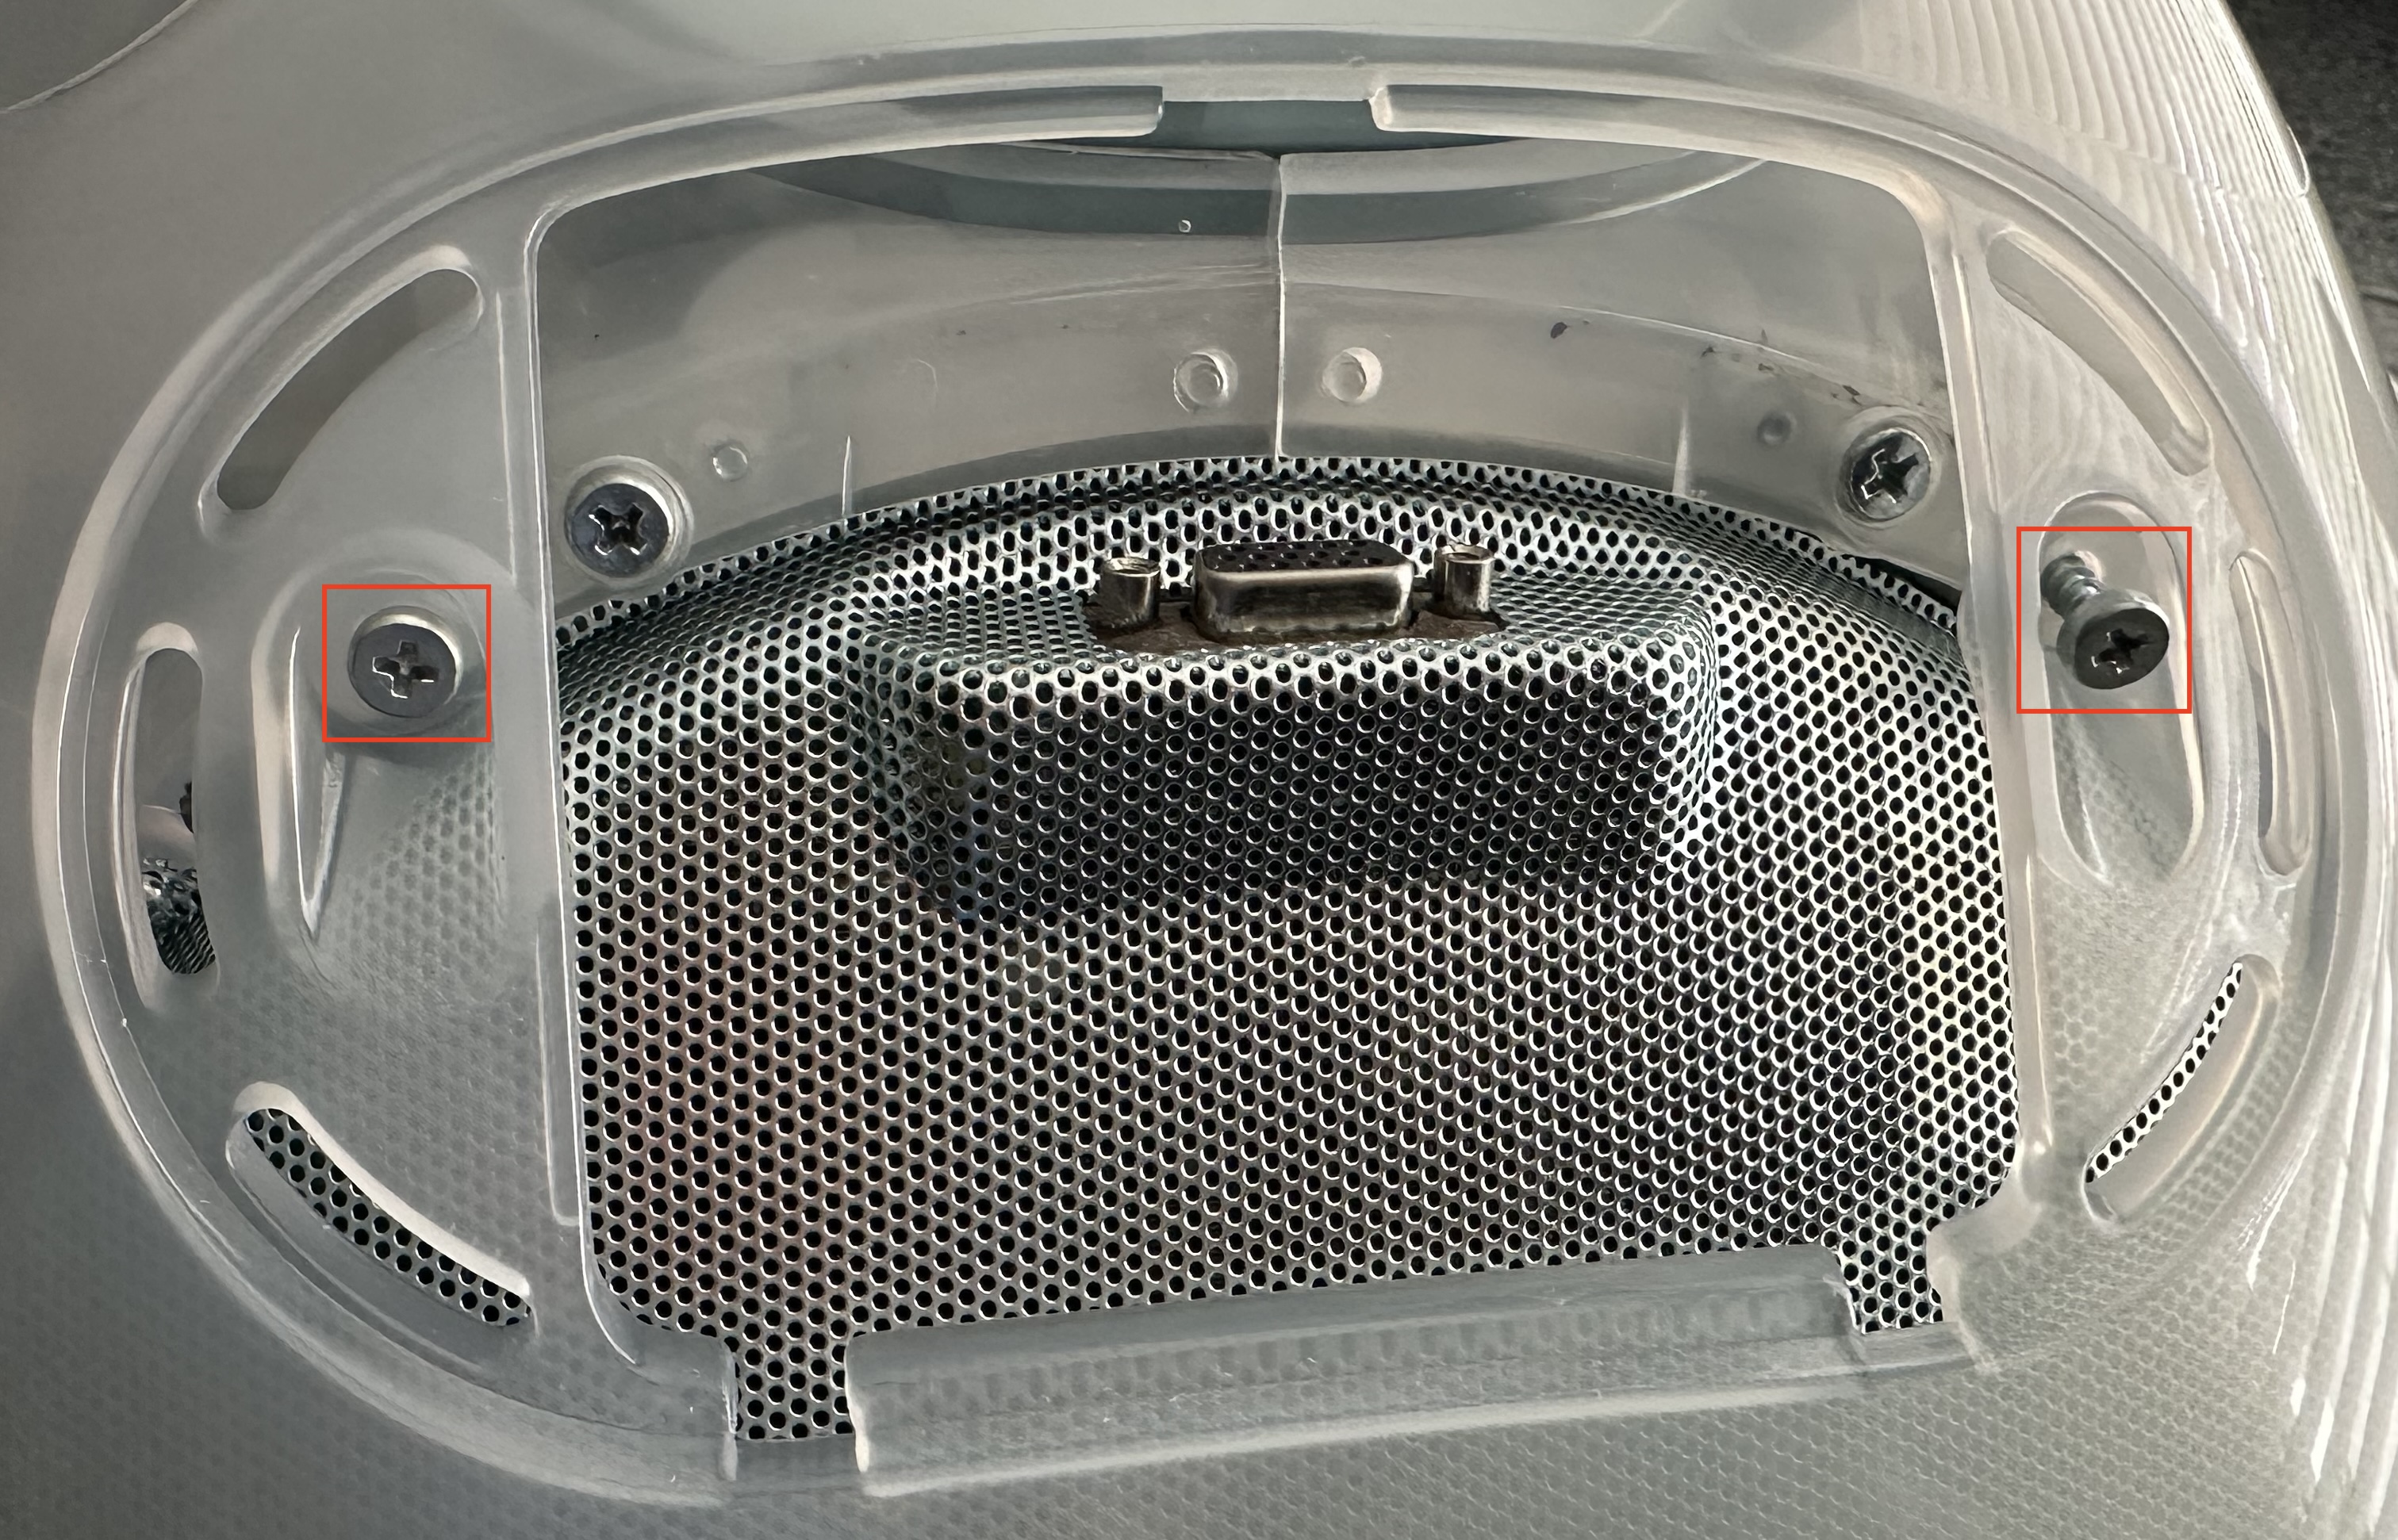
Unscrew the six screws that hold the electromagnetic interference (EMI) shield (a molded, thin, silver metal with lots of pin holes) in place. Be careful not to allow the removed screws to fall inside the computer! The photo below shows the location of the six screws.
-
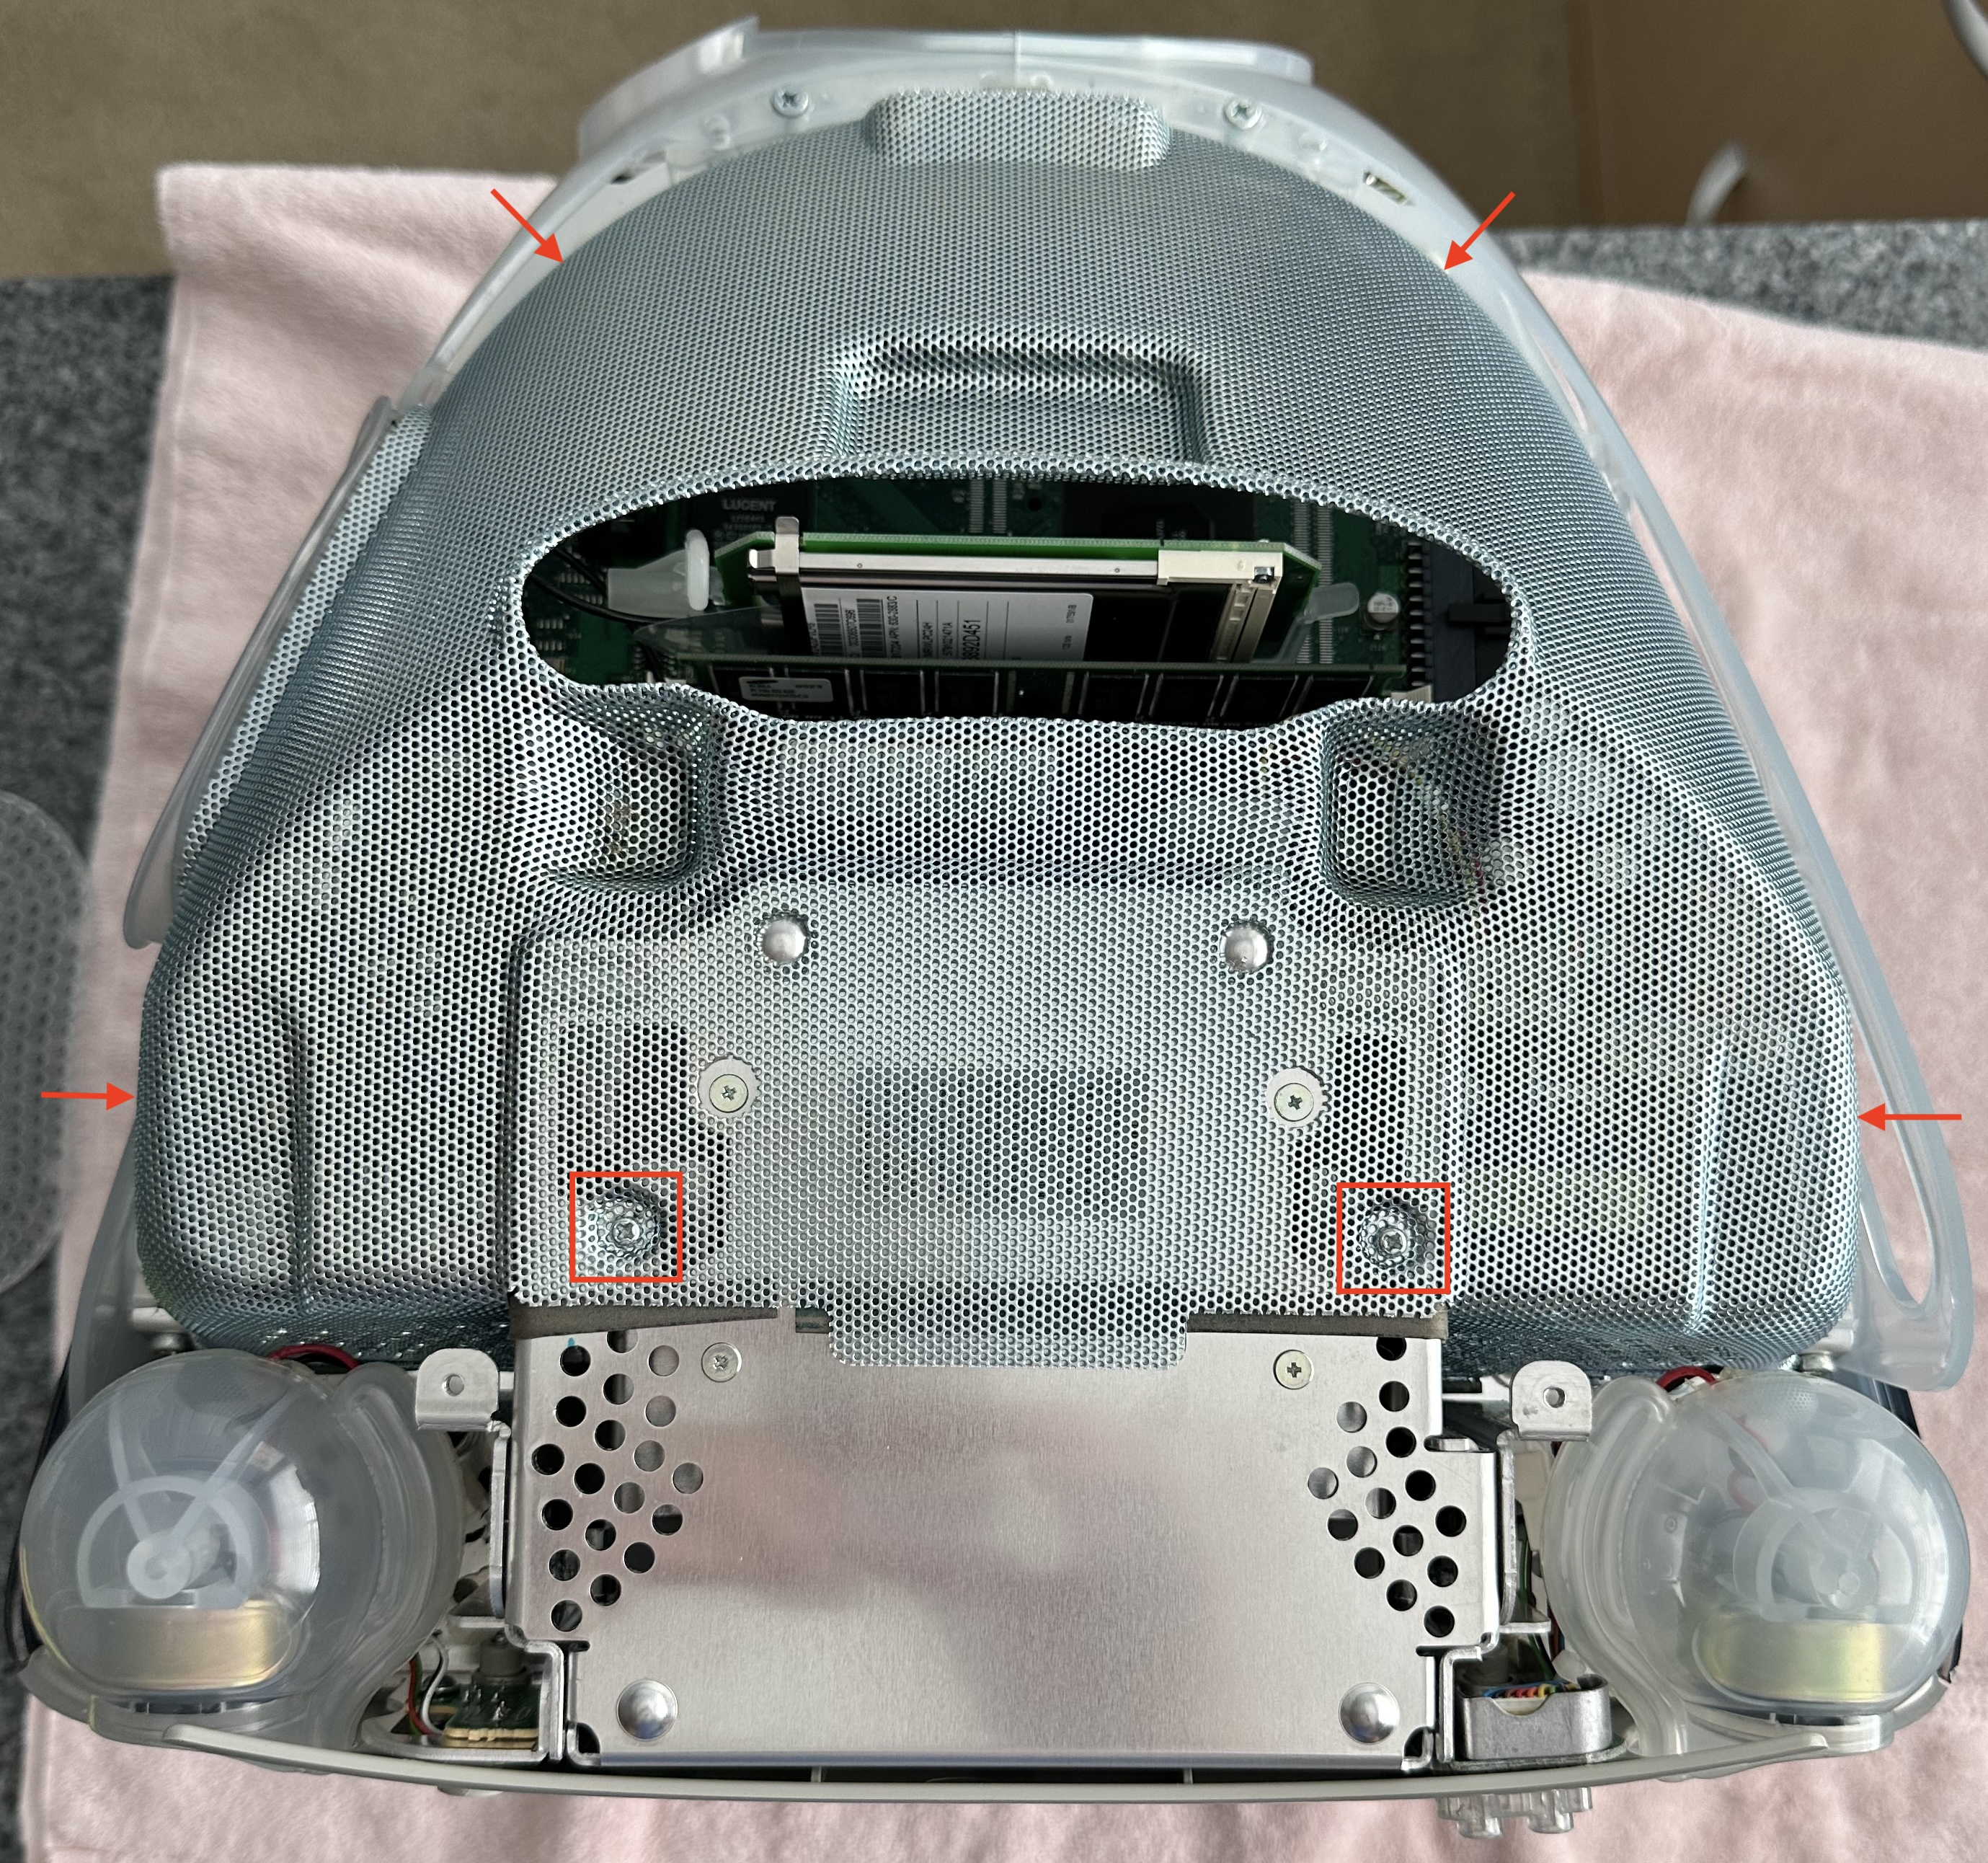
Remove the EMI shield.
-
Remove the old PRAM battery.
The image above shows the location of the PRAM battery.
-
Insert the new PRAM battery.
-
Replace the EMI shield. Be careful not to allow the screws to fall inside the computer!
-
Optionally clean the bottom of the plastic case. See “Cleaning” below.
-
Replace the bottom of the plastic case.
-
Return the computer to its upright position.
-
Plug in the power cord, Ethernet cable, keyboard, and mouse.
-
Boot the computer.
-
Open the “Date & Time” control panel.
-
Set the date and time.
Cleaning
Plastic Case
To clean the top and bottom parts of the plastic case of an iMac G3 computer:
- Remove the bottom of the plastic case as described above.
- Remove the top of the plastic case.
- Wash the plastic case parts using Dawn liquid dish washing soap or similar and a microfiber cloth. Do not use paper towels because the wood fibers in them can scratch the plastic. Do not use Windex, isopropyl alcohol, or a Magic Eraser sponge because they can make the plastic cloudy.
- Dry the plastic case parts with another microfiber cloth.
- Use a blow dryer on low heat to thoroughly dry the plastic case parts.
- Optionally use Meguiar’s PlasticX to remove scuffs and scratches in the plastic case parts.
- Reattach the top of the plastic case.
- Reattach the bottom of the plastic case.
Pro Keyboard
To disassemble, clean, and reassemble the Pro Keyboard, see this YouTube video.
To clean the key caps and the area beneath all the keys, gently pop them off with something like a butter knife.
There are three phillips screws on the top side of the keyboard that need to be removed. They are under the caps lock key, the semicolon key, and the 6 key on the numeric keypad.
There are four screws on the bottom of the keyboard that need to be removed with a 1.3mm allen wrench. You likely don’t have one that small!
From 7:36 to 8:28 in the video he struggles to remove a hidden screw. It is not necessary to use heat and pull back the sticker. It is located 15mm to the left of the Apple logo on the sticker and can be seen from the top edge of the keyboard. Poke the point of a razor knife directly over the top of the screw and gently turn it to create a small hole in the sticker through which it can be unscrewed.
At this point the back of the keyboard case can be removed, but not easily. From the top side of the keyboard, pry the top edge that runs between the two USB ports free. Then work your way down the sides with a thin piece of metal until you reach the front edge of the keyboard. Continue using the thin piece of metal to pop the top plastic piece free from the tabs that snap it into place, being careful not to crack the case.
Speakers
The speakers in an iMac G3 are surrounded by a black foam ring that deteriorates over time. When that happens, the speakers will begin making an annoying, vibrating sound. This is caused by the metal speakers rattling against their plastic enclosure.
To fix this, order new form rings and install them. They can be ordered from AliExpress. The item description is “SOTAMIA 2Pcs 1 Inch Speaker Foam Folding Ring Speakers Repair Accessories DIY Harman Laptop JBL Speaker Edge Repair”. See the YouTube video iMac G3 speaker replacement (2023) which walks through the steps to remove and repair the speakers.
Make sure you remove the large screw from each plastic speaker enclosure before attempting to pry it open with a flathead screw driver!
Hard Drive
The internal hard drive in an iMac G3 is typically quite small and loud. It’s a good idea to replace it with an SSD drive. I purchased a kit from Other World Computing (OWC) called 250GB OWC Mercury Pro Legacy. The iMac G3 can only address up to 128GB, so about half the available drive space will not be used, but it still works fine.
See the YouTube video installing an SSD in an iMac G3 which walks through the steps to remove the old hard drive and install the SSD kit.
The steps I followed were:
- Copy everything from the current, spinning hard drive to an external drive, not the SSD kit.
- Remove the AirPort card if present.
- Remove the spinning hard drive.
- Install the SSD kit.
- Replace the AirPort card if present.
- Boot from an install CD.
- Format the SSD.
- Copy all the files from the external drive to the SSD.
- Reboot, this time from the SSD.
- Eject the install CD.
Installing Software
The websites Macintosh Garden and Macintosh Repository provide lots of software that can be downloaded and installed on older Macintoshes.
Web browsers that run in Mac OS 9 do not support HTTPS. That prevents them from accessing modern websites. One way to obtain software for a computer running Mac OS 9 is to:
- Insert a USB stick into the computer running Mac OS 9 (referred to as “old” below).
- If you see the message “This disk is unreadable by this Computer”, select the format “Mac OS Extended 1.8 GB” and click the Initialize button.
- Eject the USB stick.
- Insert the USB stick into a modern Macintosh computer (referred to as “new” below).
- Download the software onto the new Mac.
- Copy the software to the USB stick.
- Insert the USB stick into the old Mac.
- Copy the software from the USB stick to the hard drive of the old Mac.
The software comes in many file formats:
.bin: binary executable file.dmg: standard disk image format for macOS (OS X and later); mount with “Disk Copy” utility.dsk: disk image.gz: compressed with gzip.hqx: ASCII text in BinHex format; use StuffIt Expander or BinHex 4.0 to decode.img: generic disk image format; mount with “Disk Copy” utility.sea: self-extracting archive; double-click to decompress.sit: compressed with Stuffit; requires Stuffit Expander or Stuffit Deluxe to decompress.smi: Self-Mounting Image; double-click to create a virtual disk on the desktop.toast: proprietary disk image format associated with Toast Titanium (a CD/DVD burning software for macOS); mount with “Roxio Toast”.zip: compression format; decompress with MacZip or StuffIt Expander.tar.gzor.tgz: gzipped Tape Archive; a Unix utility for bundling multiple files into a single archive that is then compressed with gzip
The utility “Toast 5 Titanium” can be obtained from Macintosh Garden.
The first “www” link downloads the file Toast_501_523_Install.sit.
Copy the file to the old Mac and double-click it to expand.
Install version ? and then each of the updates in order.
Double-click the file ? to run it and
enter the license key “SP-HG15N-HP693-S72OR”
which is provided after the list of links on the download page.
To mount a disk image using Toast:
- Launch “Toast Titanium”.
- Select Utilities … Mount Disc Image…
- Select a disk image file.
- Click the “Open” button.
- This may run the app in the disk image or it may open a Finder window that displays the contents.
- If it opens a Finder window, it may contain an installer app or the needed files.
- If it contains an installer app, double-click it to run it.
- If it contains the raw files, copy them to the hard drive.
Some applications like the game Myst require having a CD installed to use it. Mounting the disk image satisfies this requirement.
Printing
One solution to printing is to use Adobe Acrobat PDFWriter and configure that as a printer. It will create a PDF file rather than actually printing. The PDF can be copied to another computer, perhaps via a USB stick, that has access to a real printer.
Adobe Acrobat PDFWriter 4.0 can be downloaded from Macintosh Garden.
The steps to configure this are:
- Install Adobe Acrobat PDFWriter.
- Move the file “Acrobat PDFWriter 4.0” to Macintosh HD … System Folder … Extensions.
- Select “Chooser” from the Apple menu.
- Select “Acrobat PDFWriter 4.0”.
- Close the Chooser window.
A file named “PDFWriter” will appear on the desktop. Clicking this will open a window that displays the print queue.
When an application prints something, a PDF named “untitled [n]” will be created on the desktop. Double click one to open it in Acrobat Reader.
Internet
If WiFi is available and the iMac G3 has an AirPort card, it can be used to connect to the internet wirelessly. However, this requires the wireless router to support WEP protocol which is insecure. It is likely that the router is not configure to support WEP.
To connect to the internet using an Ethernet cable:
- Connect an active Ethernet cable to the Ethernet port on the right side of the iMac G3.
- Open the “TCP/IP” control panel.
- In the “Connect via” dropdown, select “Ethernet built-in”.
- In the “Configure” dropdown, select “Using DHCP Server”.
- Close the control panel.
- Open the “AppleTalk” control panel.
- In the “Connect via” dropdown, select “Ethernet built-in”.
- Close the control panel.
- Open a web browser such as “Internet Explorer” found in Applications (Mac OS 9) … Internet Explorer 5
Internet Explorer 5 does not support HTTPS. That means it cannot browser the majority of modern websites that require HTTPS. Notable web sites that do not require HTTPS include:
- www.google.com
- freshsilverbrightplan.neverssl.com/online
- macintoshgarden.org
- macintoshrepository.org
Attempting to access a site that requires HTTPS will display an error dialog with the message “Security failure. A secure connection could not be established.”
File Sharing
Using AFP (does not work)
Once connection to the internet is working, the following steps enable sharing files between a Macintosh running Mac OS 9 and a Macintosh running macOS X that are on the same network:
On the Macintosh running Mac OS 9:
- Open the “File Sharing” control panel.
- Click the “Start/Stop” tab.
- Under “File Sharing Off”, check the “Enable File Sharing clients to connect over TCP/IP” checkbox and click the “Start” button.
- Make a note of the URL that is displayed which begins with “afp://”.
- Click the “Users & Groups” tab.
- Click the “New User” button.
- If a user is not already present, click the “New User” button and create one.
- Close the control panel.
- Create a directory to hold shared files on the desktop.
- Select the directory.
- Press cmd-i to view its Info dialog.
- In the “Show” dropdown, select “Sharing”.
- Check the “Share this item and its contents” checkbox.
- In the “Owner” dropdown, select the user from “Users & Groups” earlier.
- In the “Privilege” dropdown in the “Owner” row, select “Read & Write”.
- Close the control panel.
On the Macintosh running macOS X:
- Open the Finder.
- Select Go … Connect to Server…
- Enter “afp://” followed by the IP address of the Macintosh running Mac OS 9.
- Click the “Connect” button.
This gives the error “There was a problem connecting to the server”. The reason is that macOS X does not support AFP. It does support SMB, but Mac OS 9 does not support that.
Using FTP
On the computer running Mac OS 9:
- Open the “File Sharing” control panel.
- Click the “Start/Stop” tab.
- Under “File Sharing Off”, check the “Enable File Sharing clients to connect over TCP/IP” checkbox and click the “Start” button.
- Make a note of the IP address that is displayed after “afp://”.
- Download and install Netpresenz 4.1 on the computer running Mac OS 9.
- Double-click “NetPresenz Setup”.
- Dismiss the “About” dialog.
- Click “FTP Setup”.
- Under “Owner”, change “File Access” to Full and check “Enabled”.
- Under “Users” and “Guest”, change “File Access” to None and uncheck “Enabled”.
- Uncheck “Allow Simple Internet Version Control (SIVC) periodic queries” because there will never be an updates.
- Click the “Save” button.
- Press cmd-q to quit the setup app.
- Double-click “NetPresenz” to start the FTP server.
Once this has been done the first time, only the last step is required to start the FTP server.
On computers running macOS X:
- Open the Finder.
- Select Go … Connect to Server…
- Enter or select “ftp://{ip-address}” where ip-address is that of the Mac OS 9 computer.
- Click the ”+” button in the lower-left to remember this server.
- Change “Name” to a username on the Mac OS 9 computer.
- Enter the password for for that username.
- Check the “Remember this password in my keychain” checkbox.
- Click the “Connect” button to open a new Finder window.
- Read the shared files.
Writing to the Mac OS 9 computer requires using an FTP client on the macOS X computer like Transmit or CyberDuck.
To use CyberDuck:
-
On the Mac OS 9 computer:
- Open the “Multiple Users” control panel.
- After “Multiple User Accounts”, select the “On” radio button.
- Optionally change the user name and password.
-
On the macOS computer:
- Launch the CyberDuck app.
- Click “Open Connection”.
- After “Server”, enter the IP address of the Mac OS 9 computer which can be found in the “File Sharing” control panel.
- Enter the username and password for the Mac OS 9 computer.
- Click the “Connect” button.
- Drag files from the CyberDuck window to the Finder.
- Drag files from the Finder to the CyberDuck window.
Screenshots
To capture a screenshot to a PICT file named “Picture {n}” at the top of the hard drive:
- Press cmd-shift-3 to capture the full screen.
- Press cmd-shift-4 to drag out a selected area of the screen.
- Press caps lock, then cmd-shift-4 to capture a selected window.
- Hold down the control when with any of the above to copy the screenshot to the clipboard.
When viewed in macOS using the Preview app, PICT files will likely appear as an all white rectangle. This happens because Mac OS 9 stores the image data in the Resource Fork instead of the Data Fork.
One way to convert a PICT file to a PNG file in macOS is to use the free app XnConvert which can be downloaded from the App Store.
- Add the file extension “.pict” to PICT files.
- Launch the XnConvert app.
- Click the “Add files…” button.
- Select any number of “.pict” files.
- Click the “Convert” button.
- Select the destination directory (defaults to directory of PICT file).
- Click the “Open” button to generate “.png” files in the destination directory. The file names will be the same name as the “.pict” files, but with “_result” appended.
- Click the “Close” button.
As an alternative to steps 2, 3, and 4, right-click a “.pict” file and select Open With … XnConvert.
For a more powerful screenshot solution that supports many graphics formats including GIF, JPEG, and PNG, see Snapz Pro 2. License keys are provided in a text file. This adds the “Snapz Pro” control panel. Click the “Settings…” button to configure. The default key to take a screenshot is cmd-shift-3. In the dialog that appears, specify:
- Capture: Select Screen, Window, Menu, or Selection.
- Send to: Select a location such as Desktop. It defaults to Macintosh HD:SystemFolder:Screen Snapz.
- “Cursor visible” checkbox: Uncheck this to avoid including the mouse cursor in the screenshot.
- File Type: Select one such as .gif, .jpg, or .png.
- “Choose file name” checkbox: When prompted for a file name, include a file extension because it will not be added automatically based on the selected file type.
When capturing a selection, adjust the rectangle to capture and press the return key.
Sounds
To record a new alert sound:
- Open the “Sound” control panel.
- Click the “Input” tab.
- Select “Built-in Mic”.
- Check the “Check signal level” checkbox.
- Say something to verify that the microphone is working.
- If the “Level” meter doesn’t move, adjust the “Gain” slider.
- Click the “Alert” tab.
- Click the “New Sound” button.
- Click the “Record” button.
- Make the desired sound.
- Click the “Stop” button.
- Click the “Play” button to verify that the sound was captured.
- Click the “Save” button.
All the alert sounds are stored in “snd” resources
inside the System file which is in the System Folder directory.
These can be copied to HyperCard stacks using ResEdit.
Some Mac OS 9 sound resources can be found in the System file.
Others are in the Platinum Sounds file
located in System Folder:Appearance:Sound Sets.
To extract a sound resource from a file:
-
Download the “SoundApp” application from Macintosh Garden
-
Install the SoundApp application on a Mac running OS 9.
-
Launch the SoundApp.
-
Select File … Convert…
-
Select a file whose “snd” resources will be converted to individual “System Sound” files. For example, the
Platinum Soundsfile mentioned above. -
Click the “Convert” button.
-
Select a destination directory.
-
Click the “Save” button.
The destination directory will contain a directory named `SoundApp Converted f” which contains a directory with the same name as the converted file. Inside that directory will be a “System Sound” file for each converted snd resource.
-
To convert a “System Sound” file to a WAV file:
- In the Controls dialog, click the document icon button.
- In the Format drop-down, select the target format such as “Windows WAVE”.
- Click the “Convert” button.
- Select the target directory.
- Click the “Save” button.
-
Quit the SoundApp application.
The directory of converted sounds can be copied to a modern Mac and played there.
Applications
AppleWorks
AppleWorks is an office suite from Apple that supersedes ClarisWorks. The final version was 6.2.9. It can be downloaded from Macintosh Repository.
To install AppleWorks:
- Launch the “Toast Titanium” app.
- Selecting Utilities … Mount Disc Image…
- Select the downloaded
.toastfile and click the “Open” button. - Double-click the disc image “AppleWorks Mac 6.2.9”.
- Double-click “US and Canadian Installer” or “International English Installer” and perform the installation.
- Restart the computer.
To create a PNG file for an icon:
- Launch ResEdit.
- Open the file that contains the icon resource.
When copying resources from the
Systemfile, avoid damaging that file by making a copy of it in the Finder and opening the copy in ResEdit. - Double-click the icon resource.
- Press cmd-a to select all the pixels.
- Press cmd-c to copy the icon.
- Launch AppleWorks.
- Click the “Painting” button.
- Press cmd-v to paste the icon.
- Drag the icon to the upper-left corner.
- Press cmd-s to save the icon.
- Optionally change the file destination which defaults to “Desktop”.
- Enter a name with the file extension
.png. - Change the “File Format” to “PNG [QT]”.
- Click the “Save” button.
- Press cmd-q to quit AppleWorks.
- Click the “Don’t Save” button.
- Return to ResEdit.
- Press cmd-q to quit ResEdit.
BBEdit
The highest version of BBEdit that runs in Mac OS 9 is 6.1.2.
This can create pure text files that can be copied to and read on a newer computer like one running macOS.
TODO: What is the difference between BBEdit and BBEdit Lite?
SimpleEdit
This is a simple text editor that is installed by default. The text files it produces cannot be read by macOS apps like TextEdit. To create plain text files, consider using BBEdit instead.
SimpleEdit documents can contain graphics. TODO: What other kinds of media can be pasted in these documents?
Finder Tips
To adjust the layout of icons in the Finder:
- Open a Finder window.
- Select View … as Icons.
- Select View … View Options…
- Select “None” to enable dragging icons to any pixel location.
- Select “Always snap to grid” to constrain the placement of icons.
- Select “Keep arranged: by Name (or another option) to automatically order icons by their names.
- Optionally change “Icon Size” to small or large icons.
To sort the contents of a directory by file/folder names, select View … Arrange …by Name.
To resize a Finder window to the minimum size required to display all of its contents, click the first button in the upper-right corner of its title bar.
To delete a file or folder in the Finder, click it to select it and press cmd-delete. The trash can icon will change to a bulging trash can to indicate that something is inside it.
To empty the trash can, do one of the following:
- Select Special … Empty Trash…
- control-click the trash can and select “Empty Trash…”
- Press cmd-shift-delete.
To eject a disc or USB stick, drag it to the trash can.
The name of the currently running application is displayed on the right end of the menu bar. To see a list of the applications that are currently running in a menu, click that. To make a different application active, click its name in the menu.
To close all Finder windows, hold down the option key and click the close box of any one of them.
Mac OS 9 Tips
To add a desktop picture:
- Select Apple menu … Control Panels … Appearance … Desktop.
- If a picture was previously selected, click the “Remove Picture” button.
- Click the “Place Picture…” button.
- Click the “Place Picture…” button.
- Select a file with the format JPEG, GIF, PICT, or Photoshop.
- Click the “Open” button.
To simulate a right mouse button click in order to get context-sensitive menus, hold down the control key while clicking. For example, doing this on the trash can icon, opens a menu containing “Empty Trash…”.
The “Control Strip” provides quick access to many settings. It is not displayed by default. To display it, select Apple menu … Control Panels … Control Strip and click the “Show Control Strip” radio button. To collapse the Control Strip so only its right end is visible, click on its left or right end. To expand the Control Strip, click on its right end which is the only visible part.
To adjust the number of minutes the computer must be inactive before it goes to sleep, select Apple menu … Control Panels … Energy Saver and drag the slider to the desired number of minutes.
To wake the computer from sleep, press any key. Moving the mouse will not wake it.
To boot from a CD, insert the CD, reboot the computer, and hold down the “C” key until the Apple logo appears.
To adjust the monitor settings:
- Click the Apple logo on the left end of the menu bar.
- Select “Control Panels”.
- Select “Monitors”
- Select “Monitor”.
- Adjust the slider for Contrast.
- Adjust the slider for Brightness.
- Select “Geometry”.
- Select “Height/Width”.
- Adjust the width and height.
- Select “Position”.
- Adjust the horizontal and vertical position.
- Select “Height/Width”.
- Select “Monitor”.
- Close the control panel window.
Mac OS 9 did not ship with a music app like iTunes, which was introduced in macOS X.
To play an audio CD:
- Insert a CD in the slot and wait about 10 seconds for it to load.
- An icon representing the CD titled “Audio CD {n}” will appear on the desktop.
- The first track will start playing automatically.
- To control the playback, open the “AppleCD Audio Player” app found in Macintosh HD:AppleCD Audio Player f.
The “AppleCD Audio Player” app:
- contains buttons to play, pause, skip to the next and previous tracks, shuffle the tracks, repeat after the last track plays, and eject the disc.
- contains a dropdown to skip to a specific track.
- contains a slider to control the volume relative to the system volume.
- displays the total duration and the duration of each track.
- contains inputs to the enter the CD title and the name of each track. These are remembered after the disc is ejected and displayed when the disc is reinserted.
- cannot import the tracks and save them on the hard drive
To watch a DVD:
- Insert a DVD in the slot.
- Wait for the “Apple DVD Player” app to launch.
- Click the Play button (right-pointing triangle).
- Optionally select Video … Fill Screen or press cmd-3.
- For me this played for about 30 seconds and then locked up, requiring a reboot. Force quit did not work.
To eject a disc when booting, hold down the mouse button.
All audio, including that from CDs and DVDs, can be played on external speakers by plugging them into one of the headphone jacks on the front of the iMac G3. There are two headphone jacks to allow two people to listen on headphones at the same time. Later versions of the iMac only have one headphone jack.